**We recommend you to apply the therm al tape to provide better heat conduction between your CPU and heatsink. (The CPU cooling fan m ight stick to the CPU due to the hardening of the thermal paste . During this condition if you try to remove the cooling fan, you might pull the processor out of the CPU socket alone with the cooling fan, and might dam age the processor. To avoid this from happening, we suggest you to either use thermal tape instead of therm al paste, orremove the cooling fan with extreme caution .)
Figure 3.
Application of thermal grease to the processor.
Step 1
Figure 4 & 5.
Alignm ent of heatsink assembly with standoffs.
Step
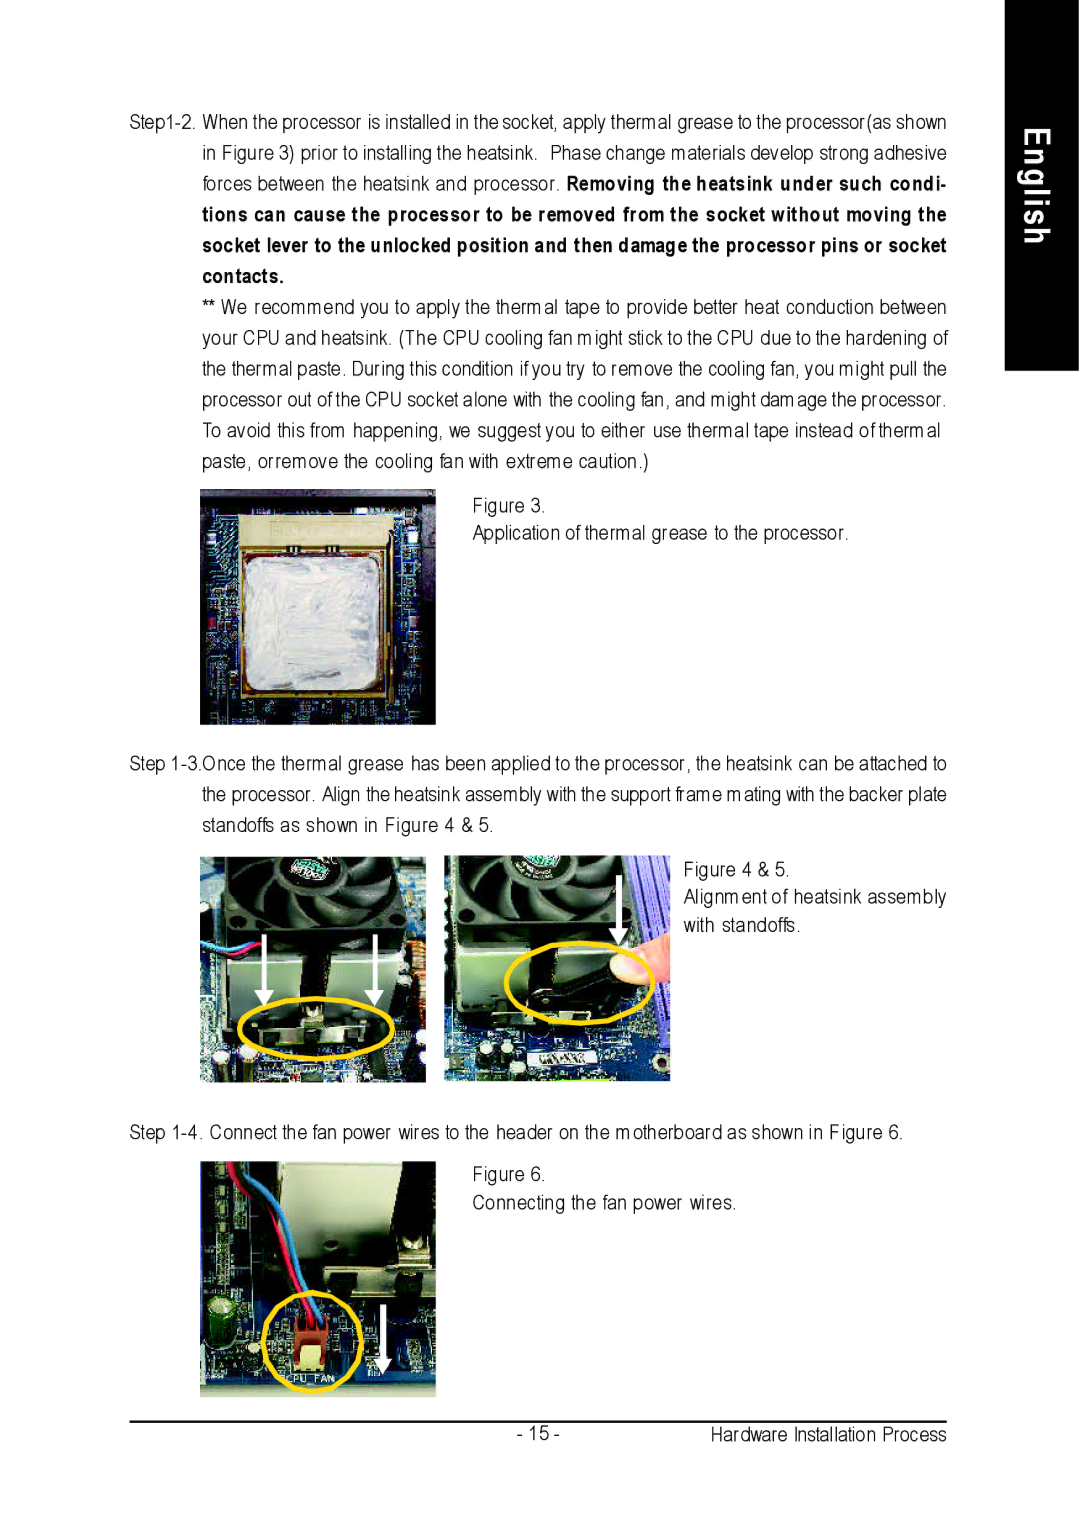
Figure 6.
Connecting the fan power wires.
English
- 15 - | Hardware Installation Process |