1-3-2 Installing the CPU Cooler
Follow the steps below to correctly install the CPU cooler on the CPU. (The following procedure uses the GIGABYTE cooler as the example.)
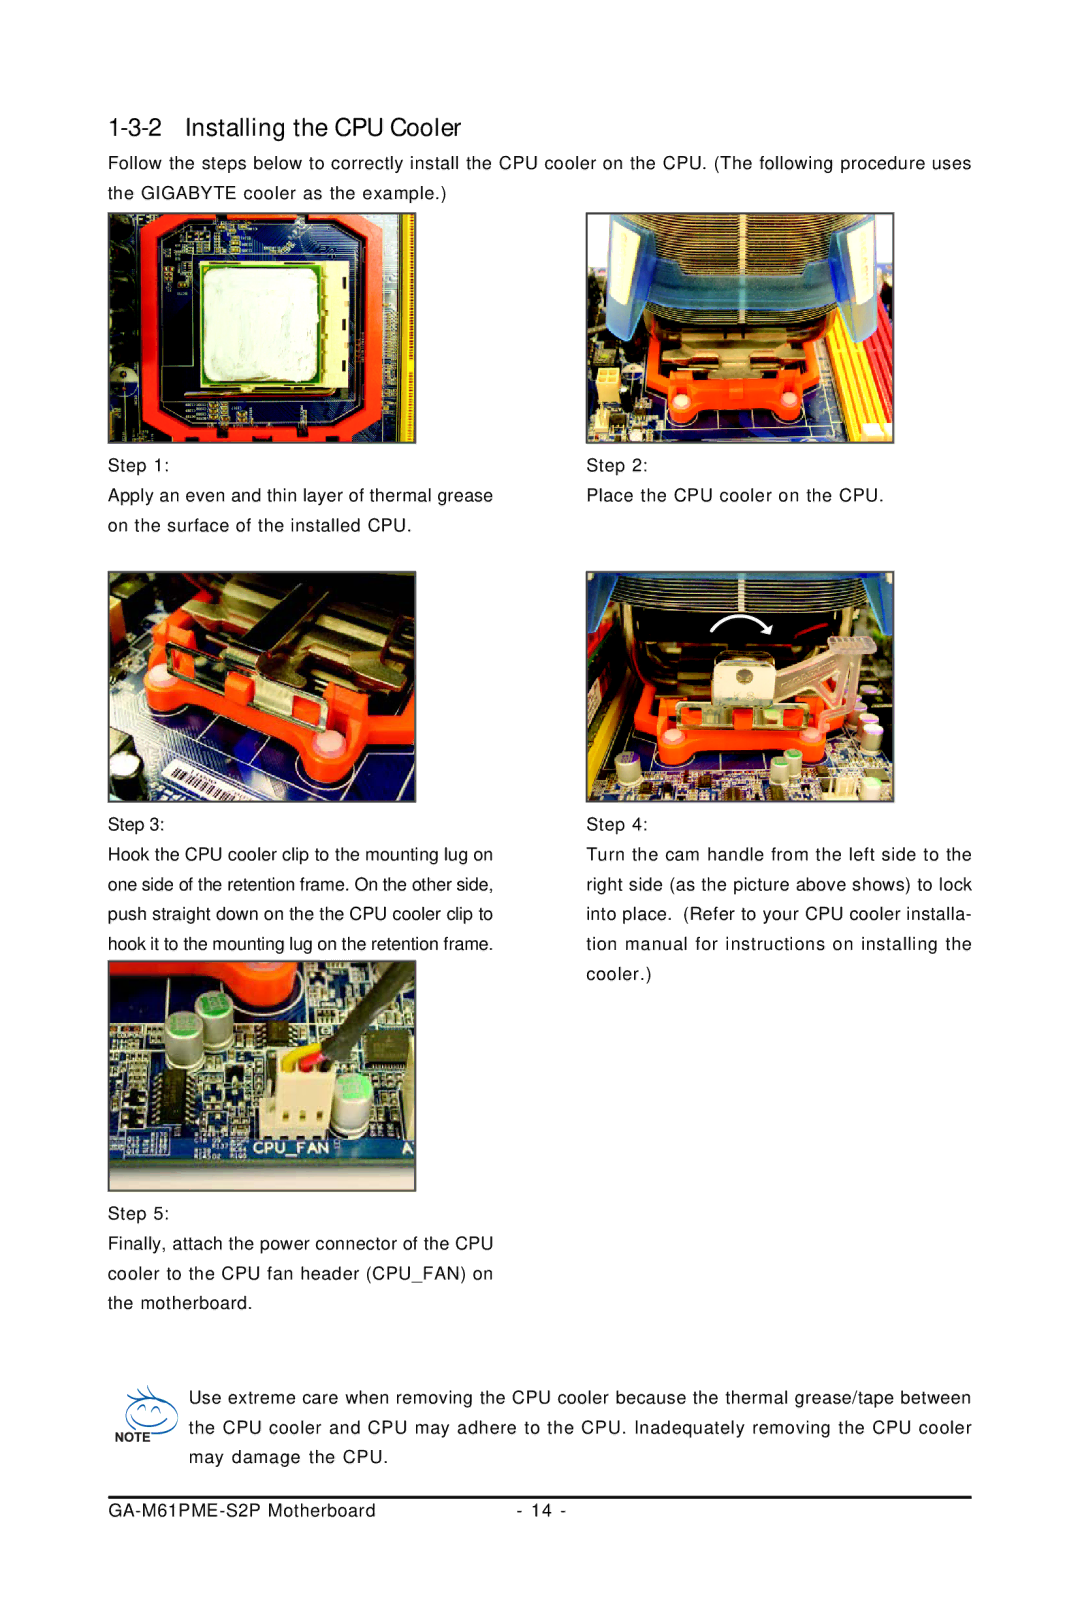
Step 1:
Apply an even and thin layer of thermal grease on the surface of the installed CPU.
Step 3:
Hook the CPU cooler clip to the mounting lug on one side of the retention frame. On the other side, push straight down on the the CPU cooler clip to hook it to the mounting lug on the retention frame.
Step 5:
Finally, attach the power connector of the CPU cooler to the CPU fan header (CPU_FAN) on the motherboard.
Step 2:
Place the CPU cooler on the CPU.
Step 4:
Turn the cam handle from the left side to the right side (as the picture above shows) to lock into place. (Refer to your CPU cooler installa- tion manual for instructions on installing the cooler.)
Use extreme care when removing the CPU cooler because the thermal grease/tape between the CPU cooler and CPU may adhere to the CPU. Inadequately removing the CPU cooler may damage the CPU.
- 14 - |