5-2 Configuring Audio Input and Output
5-2-1 Configuring 2/4/5.1/7.1-Channel Audio
The motherboard provides three audio jacks on the back panel which can support
A. Installing the 5.1/7.1 Surround Cable:
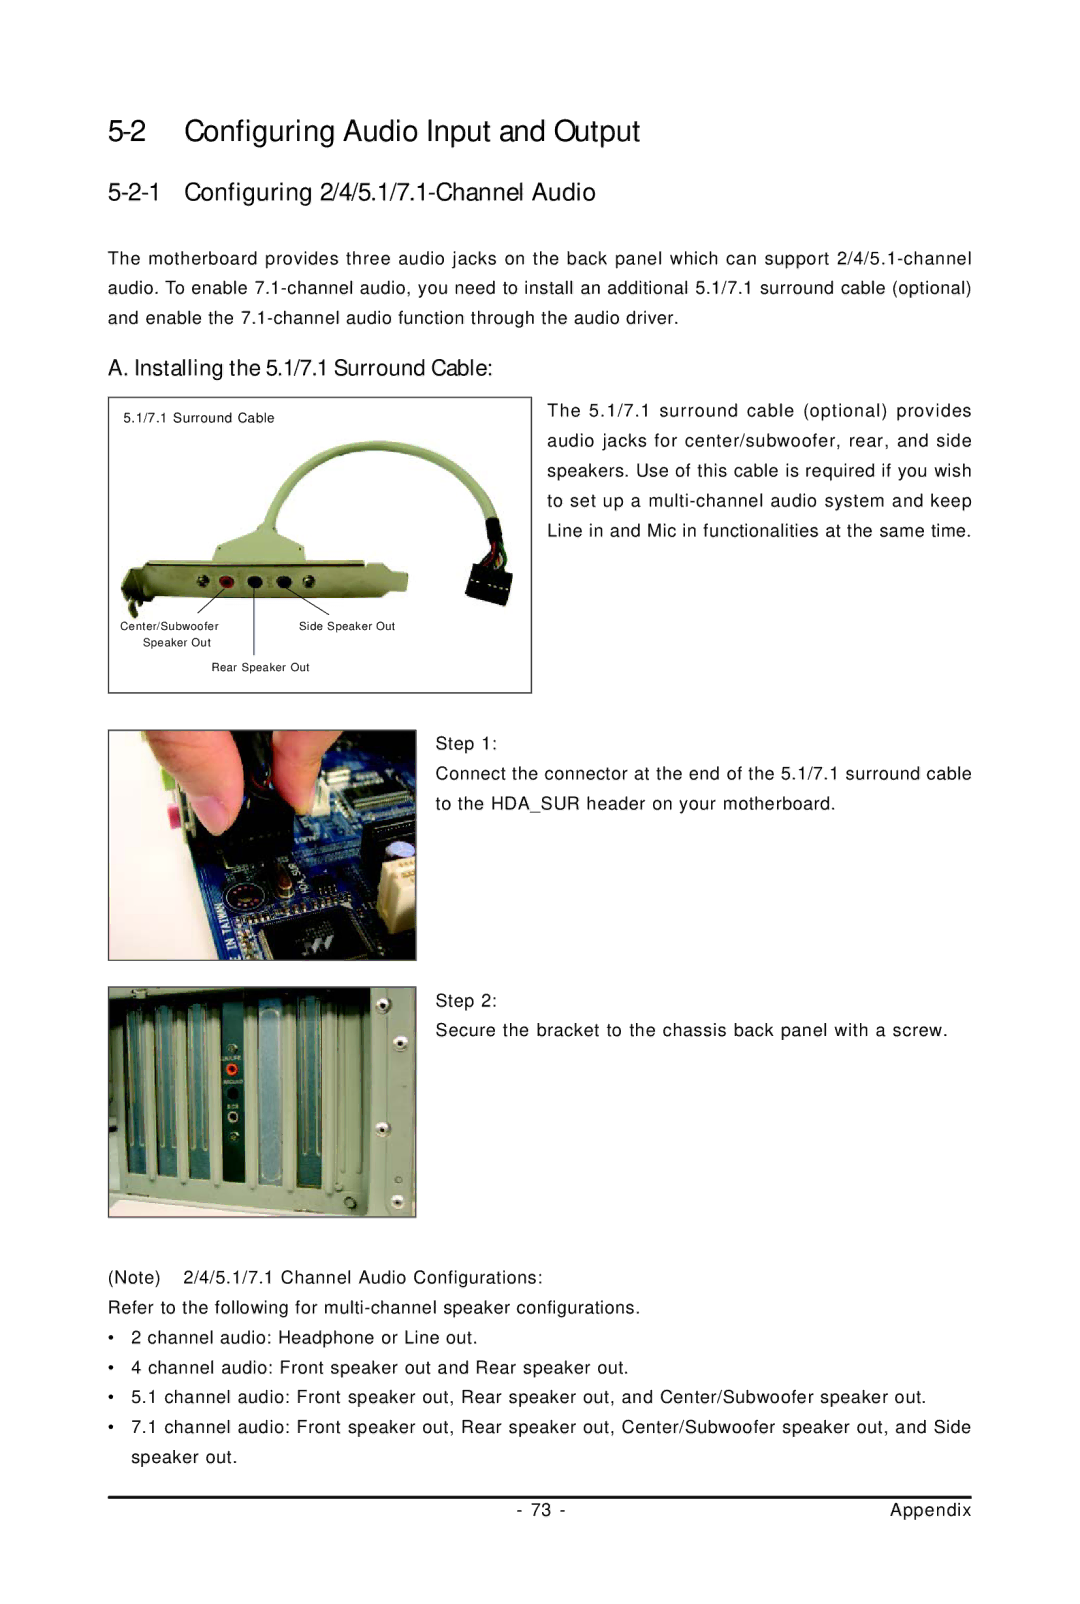
5.1/7.1 Surround Cable
Center/Subwoofer | Side Speaker Out |
Speaker Out
Rear Speaker Out
The 5.1/7.1 surround cable (optional) provides audio jacks for center/subwoofer, rear, and side speakers. Use of this cable is required if you wish to set up a
Step 1:
Connect the connector at the end of the 5.1/7.1 surround cable to the HDA_SUR header on your motherboard.
Step 2:
Secure the bracket to the chassis back panel with a screw.
(Note) 2/4/5.1/7.1 Channel Audio Configurations:
Refer to the following for
•2 channel audio: Headphone or Line out.
•4 channel audio: Front speaker out and Rear speaker out.
•5.1 channel audio: Front speaker out, Rear speaker out, and Center/Subwoofer speaker out.
•7.1 channel audio: Front speaker out, Rear speaker out, Center/Subwoofer speaker out, and Side speaker out.
- 73 - | Appendix |