Installation Instructions.
Read these instructions completely and carefully.


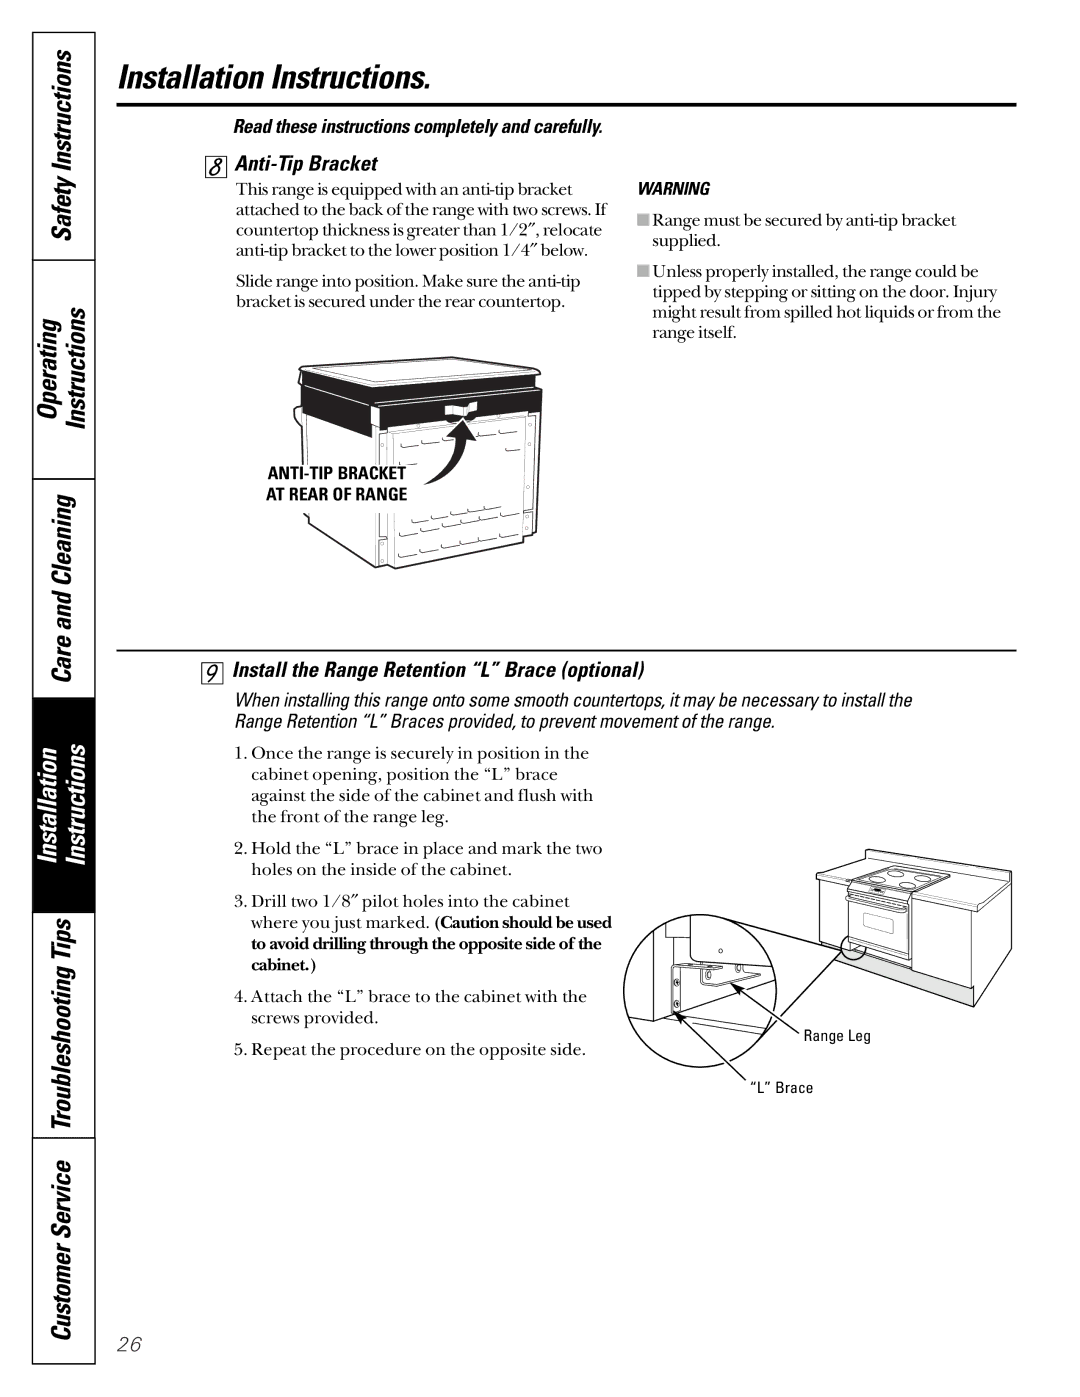
Anti-Tip Bracket
This range is equipped with an
Slide range into position. Make sure the
WARNING
■Range must be secured by
■Unless properly installed, the range could be tipped by stepping or sitting on the door. Injury might result from spilled hot liquids or from the range itself.
| Operating | Instructions |
|
| |
| Care and Cleaning | |
|
|
|
| Installation | Instructions |
|
| |
| Troubleshooting Tips | |
|
| |
| Customer Service | |
|
|
|
AT REAR OF RANGE


 Install the Range Retention “L” Brace (optional)
When installing this range onto some smooth countertops, it may be necessary to install the Range Retention “L” Braces provided, to prevent movement of the range.
1.Once the range is securely in position in the cabinet opening, position the “L” brace against the side of the cabinet and flush with the front of the range leg.
2.Hold the “L” brace in place and mark the two
holes on the inside of the cabinet.
3. Drill two 1/8″ pilot holes into the cabinet where you just marked. (Caution should be used to avoid drilling through the opposite side of the cabinet.)
4. Attach the “L” brace to the cabinet with the screws provided.
Range Leg
5. Repeat the procedure on the opposite side.
“L” Brace
26