Electrical

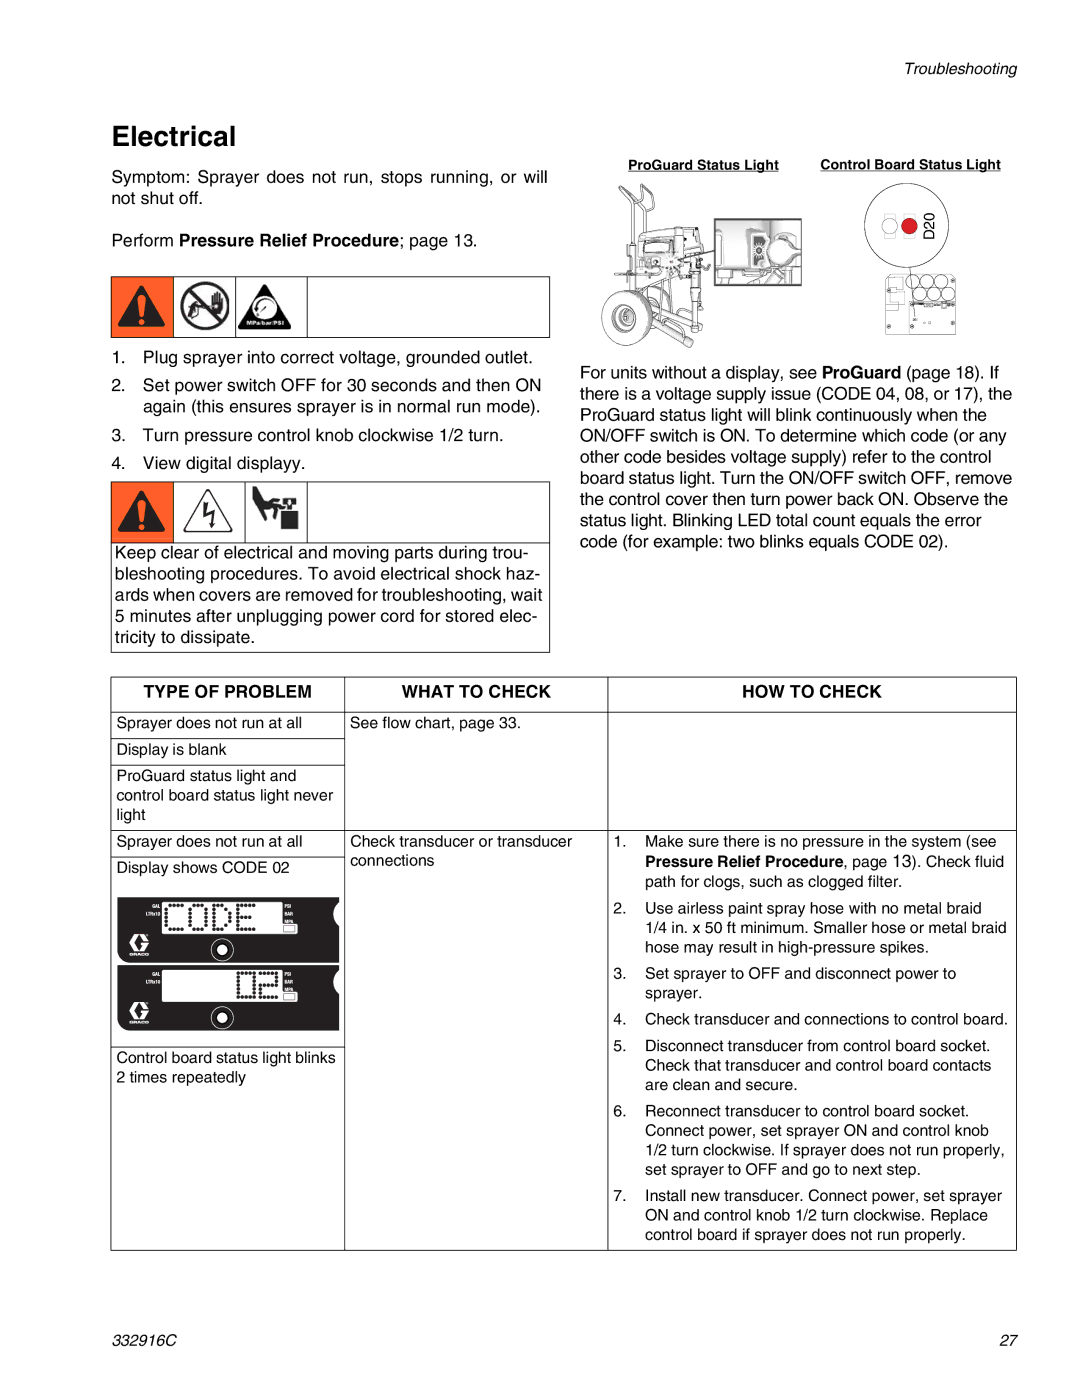
ProGuard Status Light

Symptom: Sprayer does not run, stops running, or will not shut off.

Perform Pressure Relief Procedure; page 13.

Troubleshooting

Control Board Status Light

D20

1.Plug sprayer into correct voltage, grounded outlet.

2.Set power switch OFF for 30 seconds and then ON again (this ensures sprayer is in normal run mode).

3.Turn pressure control knob clockwise 1/2 turn.

4.View digital displayy.

Keep clear of electrical and moving parts during trou- bleshooting procedures. To avoid electrical shock haz- ards when covers are removed for troubleshooting, wait 5 minutes after unplugging power cord for stored elec- tricity to dissipate.

For units without a display, see ProGuard (page 18). If there is a voltage supply issue (CODE 04, 08, or 17), the ProGuard status light will blink continuously when the ON/OFF switch is ON. To determine which code (or any other code besides voltage supply) refer to the control board status light. Turn the ON/OFF switch OFF, remove the control cover then turn power back ON. Observe the status light. Blinking LED total count equals the error code (for example: two blinks equals CODE 02).

TYPE OF PROBLEM

WHAT TO CHECK


HOW TO CHECK


Sprayer does not run at all

See flow chart, page 33.


Display is blank


ProGuard status light and


control board status light never


light


Sprayer does not run at all

Check transducer or transducer

1.

Make sure there is no pressure in the system (see


connections


Pressure Relief Procedure, page 13). Check fluid

Display shows CODE 02


path for clogs, such as clogged filter.


2.

Use airless paint spray hose with no metal braid


1/4 in. x 50 ft minimum. Smaller hose or metal braid


hose may result in high-pressure spikes.


3.

Set sprayer to OFF and disconnect power to


sprayer.


4.

Check transducer and connections to control board.


5.

Disconnect transducer from control board socket.

Control board status light blinks


Check that transducer and control board contacts

2 times repeatedly


are clean and secure.


6.

Reconnect transducer to control board socket.


Connect power, set sprayer ON and control knob


1/2 turn clockwise. If sprayer does not run properly,


set sprayer to OFF and go to next step.


7.

Install new transducer. Connect power, set sprayer


ON and control knob 1/2 turn clockwise. Replace


control board if sprayer does not run properly.


332916C

27

Page 27
Image 27
Graco Mark X, Mark VII, Mark IV, 795, 695, 1095, 1595 Electrical, Type of Problem What to Check HOW to Check

1095, 695, 1595, Mark IV, Mark VII specifications

The Graco Mark series is a renowned line of airless paint sprayers designed for professional contractors and serious DIY enthusiasts. Each model in this series brings its own unique features and technologies, catering to a range of applications and user preferences.

The Graco Mark VII is known for its high efficiency and durability. It features a powerful motor that allows for consistent pressure and delivery of a variety of coatings. This model is equipped with a proven piston pump technology, providing a smooth and reliable spray pattern. Its compact design makes it easy to transport, while enhanced filtration systems ensure a clean finish by minimizing clogs and maintaining a steady flow of paint.

Moving on to the Graco Mark IV, this model offers versatility for both small and medium-sized projects. The Mark IV’s lightweight design, combined with an adjustable pressure control, allows users to fine-tune their spray for different materials, from heavy latex paints to stains. The inclusion of 2-finger trigger control and ergonomic handle enhances user comfort during extended use. Additionally, the Mark IV comes with a range of tip sizes, accommodating various application needs.

The Graco Mark V takes performance a notch higher. It is equipped with advanced technology for increased efficiency and reduced overspray. The innovative SmartControl system enables operators to set the pressure for a perfect finish, whether they are working on detailed trim work or expansive wall surfaces. Furthermore, the Mark V’s robust build and high-capacity intake system make it ideal for larger projects, ensuring consistent output throughout.

The Graco 1595 model is designed for heavy-duty applications and is particularly favored for its reliable performance in tough conditions. It boasts a heavy-duty pump that can handle high viscosity materials without compromising the finish. Along with an adjustable flow rate, the durable construction ensures longevity, making it a worthwhile investment for contractors who frequently tackle extensive jobs.

Lastly, the Graco Mark X is another high-performance sprayer that stands out for its advanced technology integration. With features such as automatic pressure adjustment and a digital display, users can achieve a precise spray application with ease. The Mark X also emphasizes user safety with built-in safeguards, including automatic shut-off systems. Its larger capacity makes it suitable for commercial-grade projects, ensuring effective coverage and efficiency.

In summary, the Graco Mark series, including the Mark VII, Mark IV, Mark V, 1595, and Mark X, offers a range of options with varied features and capabilities. Whether for small DIY tasks or large-scale commercial jobs, there is a model to meet every need, ensuring professional-quality results and user satisfaction.