IMPORTANT SAFETY INSTRUCTIONS
For portable spray applications of architectural paints and coatings
Stand
Hi-Boy
Contents
Manual Conventions Warnings Component Identification Installation
Pressure Relief Procedure General Repair Information Troubleshooting
Displacement Pump Replacement Drive Housing Replacement Spin Test
Grounding Instructions
GROUNDING
FIRE AND EXPLOSION HAZARD
SKIN INJECTION HAZARD
EQUIPMENT MISUSE HAZARD
ELECTRIC SHOCK HAZARD
PRESSURIZED ALUMINUM PARTS HAZARD
BURN HAZARD
310824D
Component Identification
Component Identification
Installation
The sprayer requires
Never use an outlet that is not grounded or an adapter
Recommended extension cords for use with this sprayer
Pressure Relief Procedure
General Repair Information
Read Electric Shock Warning, page 3 and Burn Hazard Warning, page
Troubleshooting
Problem
placement Pump Replacement
Replacement
Power Cord Replacement
See page 22, Fuse Replacement
ment
Problem
Pump Replacement
23, Pressure Control Assembly Replace
cord. See page 7, Grounding and Electric
Requirements
14, Displacement Pump Replacement
Drive Housing Replacement
Problem
Replacement
1. Relieve pressure, page
Displacement Pump Replacement
Removal
Installation
Drive Housing Replacement
5. Install pump 9. Displacement Pump Replace- ment, page
Installation
Removal
Armature Short Circuit Test
Armature, Brushes, and Motor Wiring Open Circuit Test Continuity
Spin Test
Fan Replacement
Installation
Fan Replacement
Removal
Removal
Motor Brush Replacement
Installation
Removal
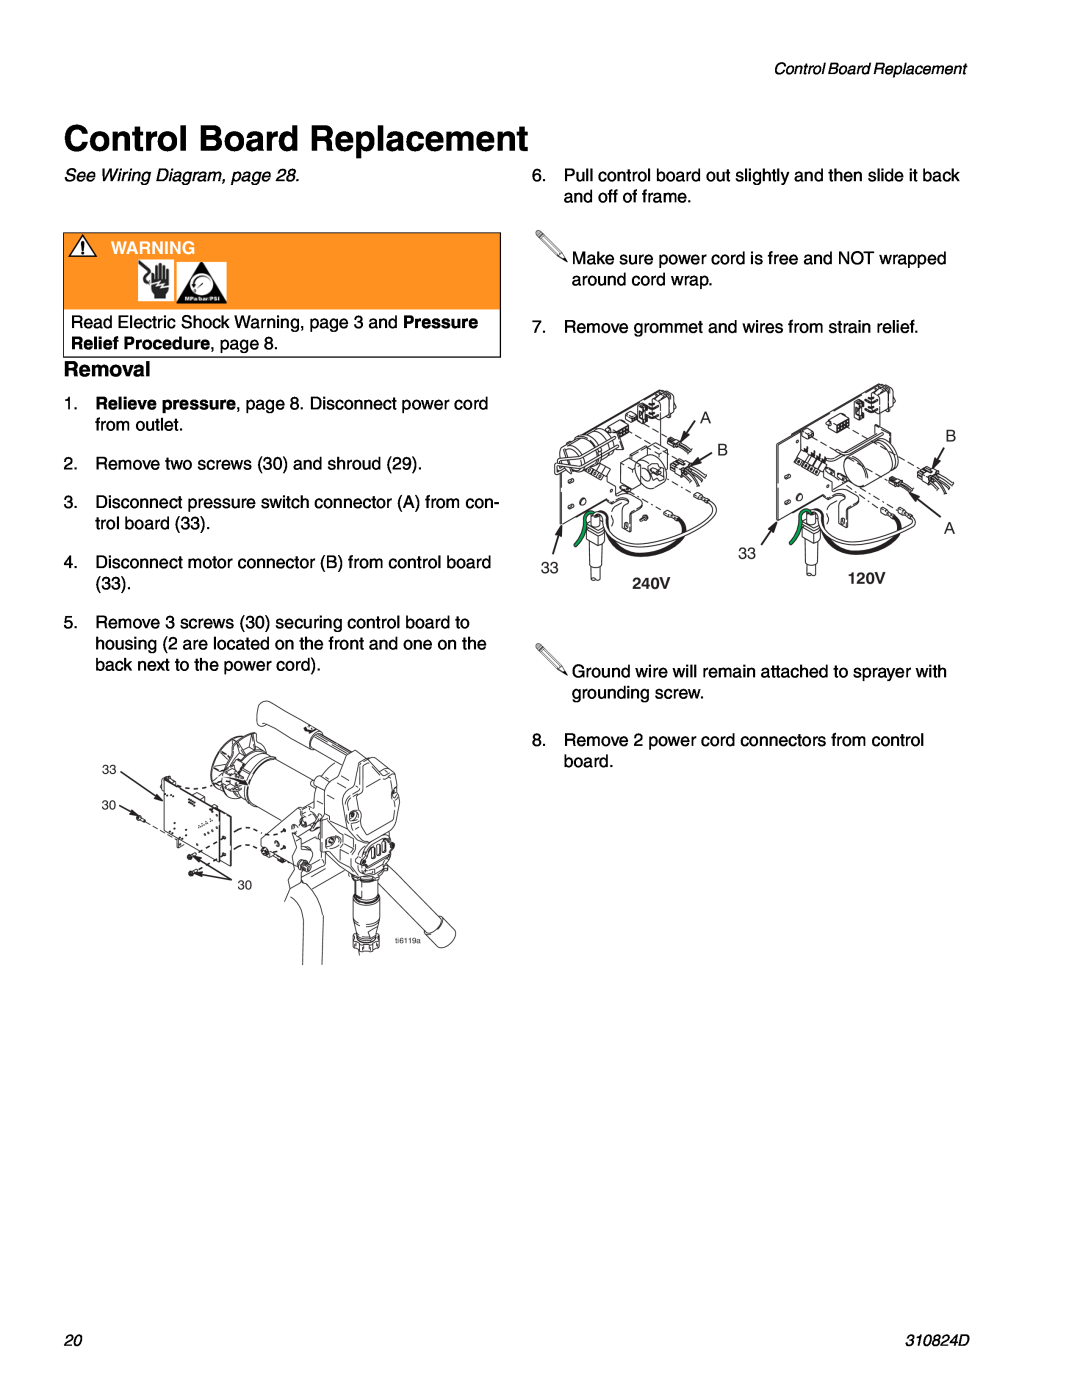
Control Board Replacement
Control Board Replacement
Installation
4. Replace 3 screws 30. Torque to 30-35 in-lbs 3.4-3.9 N.m
Fuse Replacement
Spare Fuse included n 110V and 120 models only
Installation
Fuse Replacement
Removal
Pressure Control Assembly Replacement
Installation
Manifold Replacement
Installation
Removal
ProStep
Removal
Drain Line Replacement
Installation
Removal
Power Cord Replacement
Installation
Motor Replacement
2. Remove pump 9. Displacement Pump Replace- ment, page
3. Remove drive housing, Drive Housing Replace- ment, page
6. Install pump 9. Displacement Pump Replace- ment, page
Wiring Diagram
120V Model
Wiring Diagram
from Motor 2 x Yellow Pressure Control Assembly
Technical Data
Graco Standard Warranty
Graco Headquarters Minneapolis
GRACO INC. P.O. BOX 1441 MINNEAPOLIS, MN
Graco reserves the right to make changes at any time without notice