Setup
Perform this setup procedure to get the pour gun ready for operation.
1. Close fluid valves A and B.
B
A
TI2411a
FIG. 5
2. Connect A and B fluid hoses to fluid manifold.
TI2417a
3.Engage piston safety lock. See page 13.
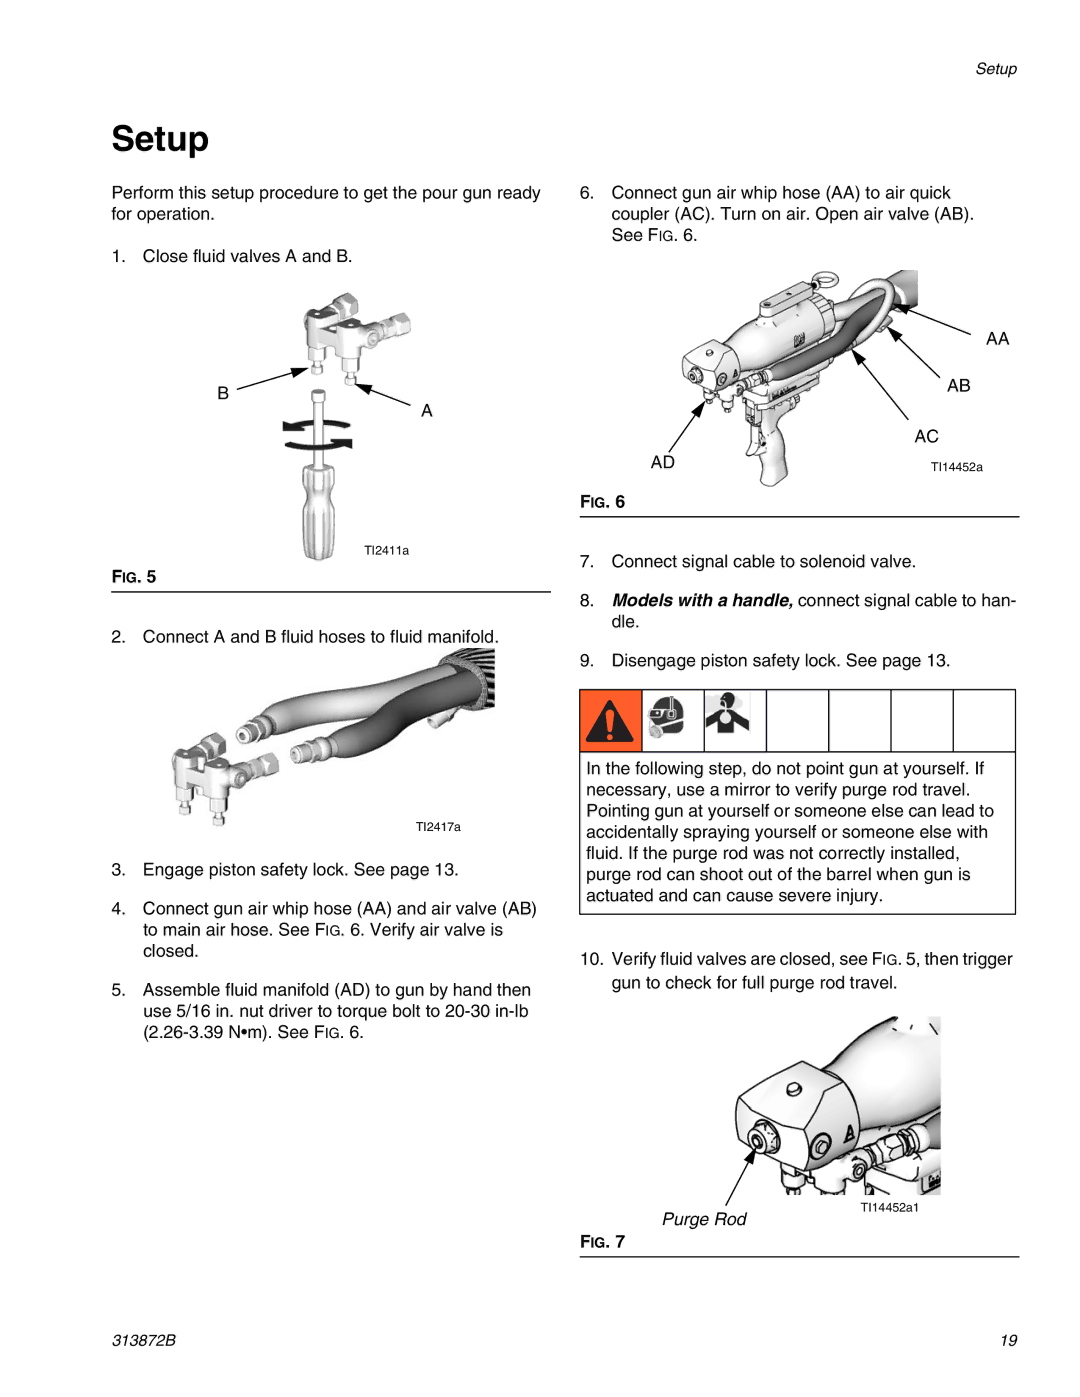
4.Connect gun air whip hose (AA) and air valve (AB) to main air hose. See FIG. 6. Verify air valve is closed.
5.Assemble fluid manifold (AD) to gun by hand then use 5/16 in. nut driver to torque bolt to
Setup
6.Connect gun air whip hose (AA) to air quick coupler (AC). Turn on air. Open air valve (AB). See FIG. 6.
AA
| AB |
| AC |
AD | TI14452a |
FIG. 6
7.Connect signal cable to solenoid valve.
8.Models with a handle, connect signal cable to han- dle.
9.Disengage piston safety lock. See page 13.
In the following step, do not point gun at yourself. If necessary, use a mirror to verify purge rod travel. Pointing gun at yourself or someone else can lead to accidentally spraying yourself or someone else with fluid. If the purge rod was not correctly installed, purge rod can shoot out of the barrel when gun is actuated and can cause severe injury.
10.Verify fluid valves are closed, see FIG. 5, then trigger gun to check for full purge rod travel.
TI14452a1
Purge Rod
FIG. 7
313872B | 19 |