Repair
Solenoid Valve
1.Follow Pressure Relief Procedure on page 22.
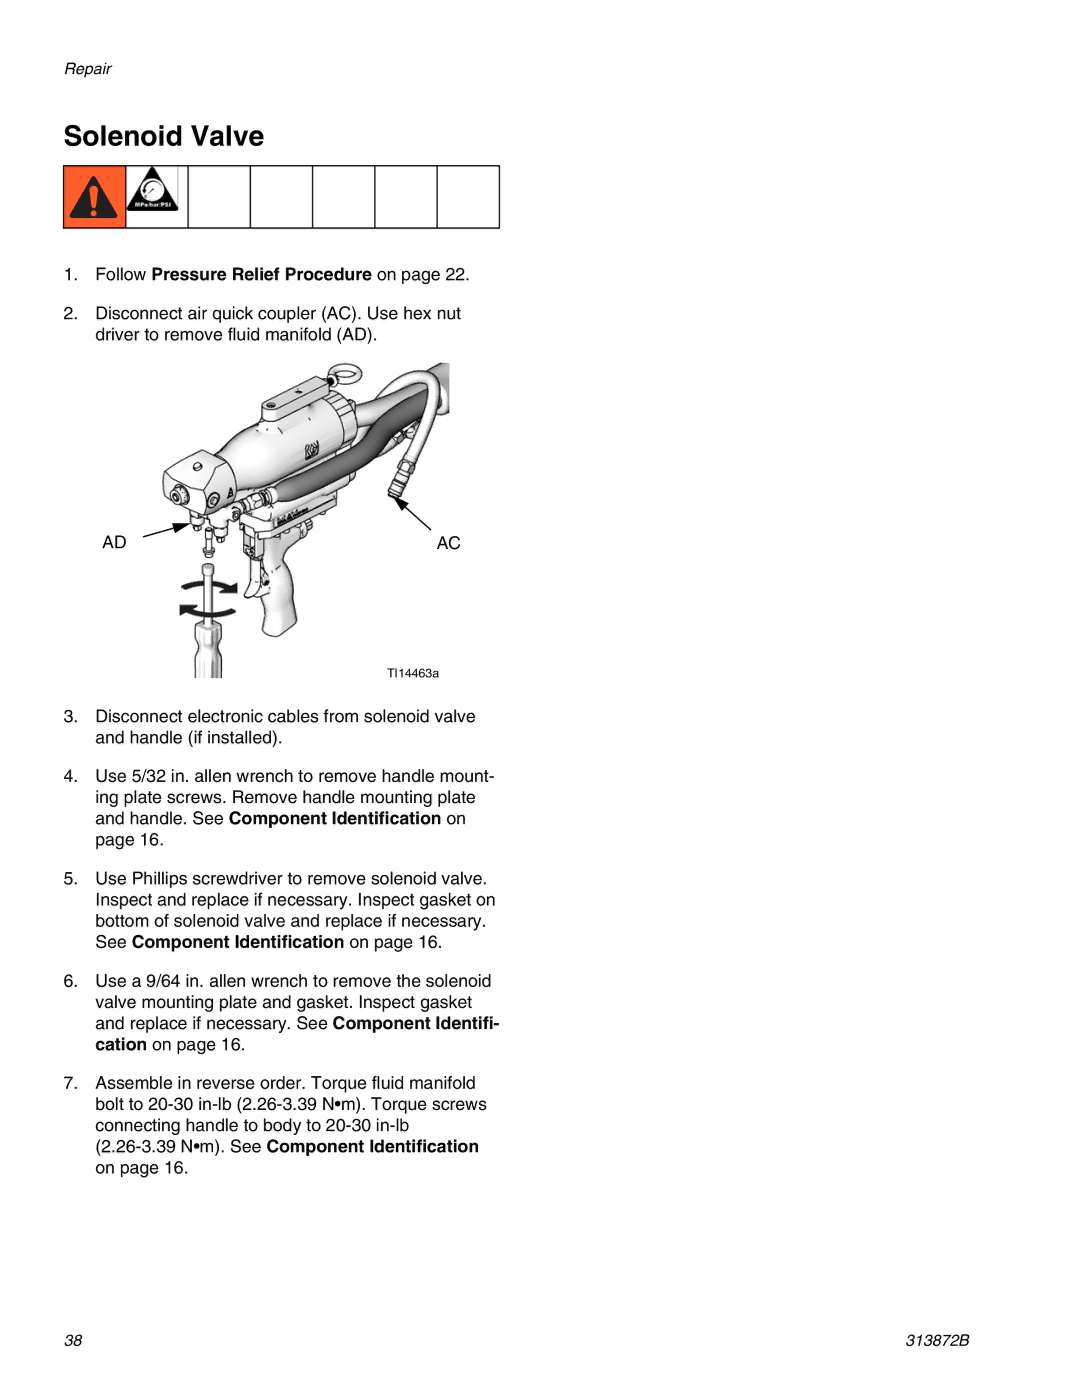
2.Disconnect air quick coupler (AC). Use hex nut driver to remove fluid manifold (AD).
AD | AC |
TI14463a
3.Disconnect electronic cables from solenoid valve and handle (if installed).
4.Use 5/32 in. allen wrench to remove handle mount- ing plate screws. Remove handle mounting plate and handle. See Component Identification on page 16.
5.Use Phillips screwdriver to remove solenoid valve. Inspect and replace if necessary. Inspect gasket on bottom of solenoid valve and replace if necessary. See Component Identification on page 16.
6.Use a 9/64 in. allen wrench to remove the solenoid valve mounting plate and gasket. Inspect gasket and replace if necessary. See Component Identifi- cation on page 16.
7.Assemble in reverse order. Torque fluid manifold bolt to
(2.26-3.39 N•m). See Component Identification on page 16.
38 | 313872B |
