Repair
2. Use hex nut driver to remove fluid manifold (AD).
AD
TI14463a1
3.Disconnect signal cable.
4.Remove Front End, see page 33.
5.Disconnect air quick coupler (AC).
AC
TI14463a1
6.Unscrew piston safety lock assembly and remove. Inspect
TI14465a
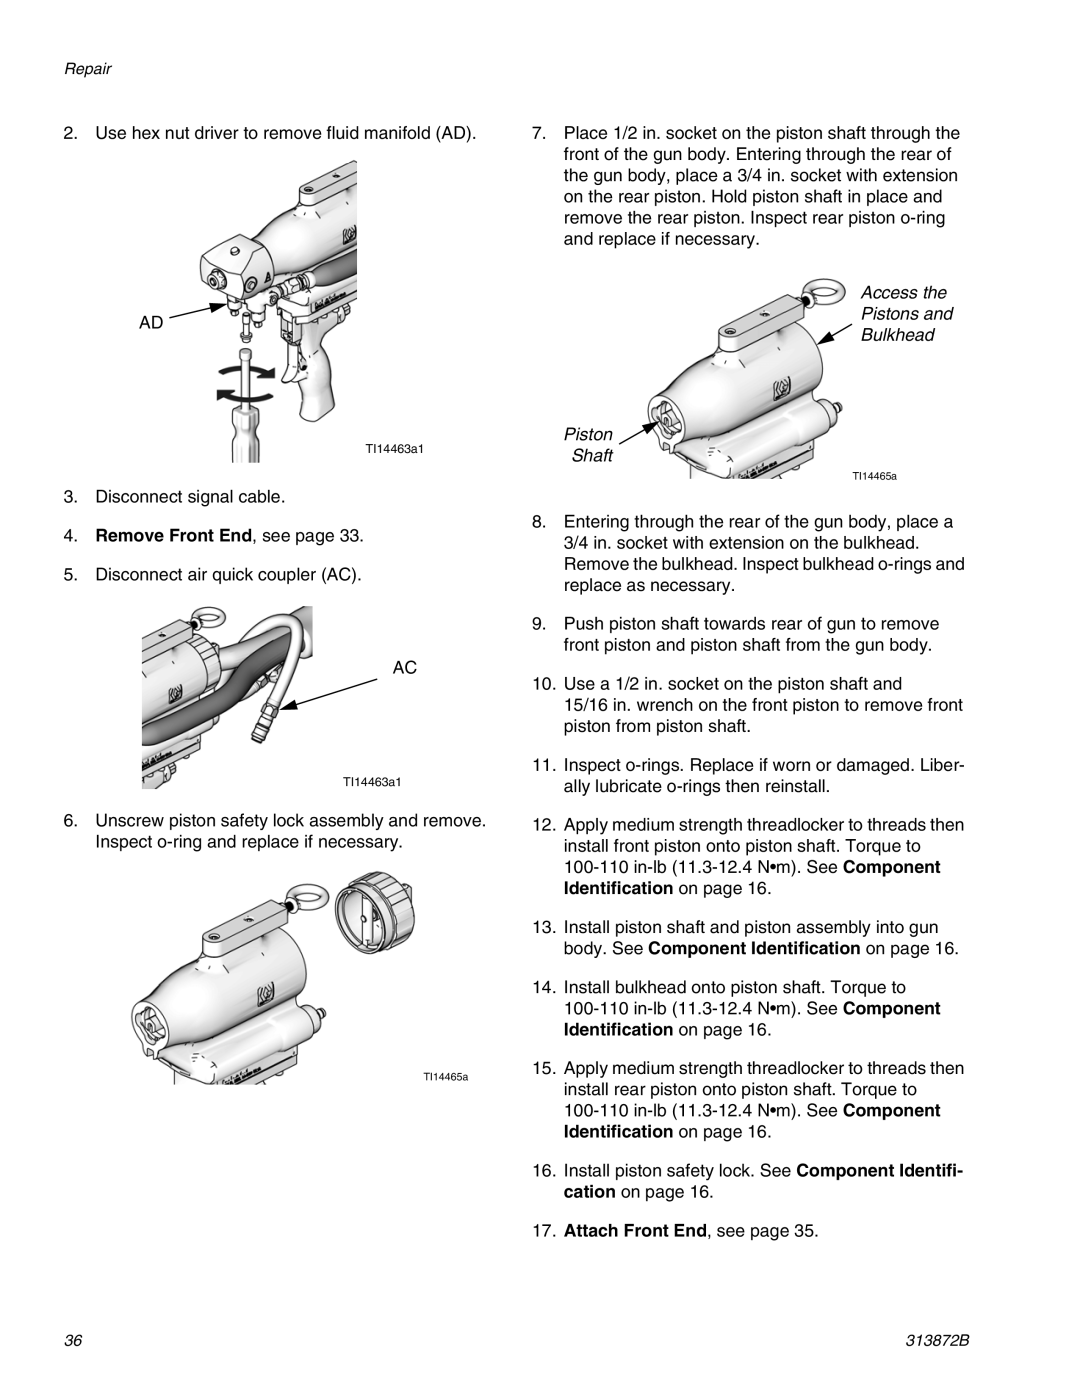
7.Place 1/2 in. socket on the piston shaft through the front of the gun body. Entering through the rear of the gun body, place a 3/4 in. socket with extension on the rear piston. Hold piston shaft in place and remove the rear piston. Inspect rear piston
Access the
Pistons and
 Bulkhead
Piston ![]()
Shaft
TI14465a
8.Entering through the rear of the gun body, place a 3/4 in. socket with extension on the bulkhead. Remove the bulkhead. Inspect bulkhead
9.Push piston shaft towards rear of gun to remove front piston and piston shaft from the gun body.
10.Use a 1/2 in. socket on the piston shaft and
15/16 in. wrench on the front piston to remove front piston from piston shaft.
11.Inspect
12.Apply medium strength threadlocker to threads then install front piston onto piston shaft. Torque to
13.Install piston shaft and piston assembly into gun body. See Component Identification on page 16.
14.Install bulkhead onto piston shaft. Torque to
15.Apply medium strength threadlocker to threads then install rear piston onto piston shaft. Torque to
16.Install piston safety lock. See Component Identifi- cation on page 16.
17.Attach Front End, see page 35.
36 | 313872B |