2.Remove the cutterhead guard from the table and lower the infeed and outfeed tables as far as they go. This will give you unrestricted access to the cutterhead.
3.Remove the rear access panel to expose the cutterhead pulley.
4.Rotate the cutterhead pulley to give you good access to one of the cutterhead knives.
5.Loosen the cutterhead gib bolts, starting in the middle, and alternating back and forth until all of the gib bolts are loose, but not fall- ing out.
6.Position the knife gauge over the knife as shown in Figure 51 and loosen the gib bolts until the knife is completely loose.
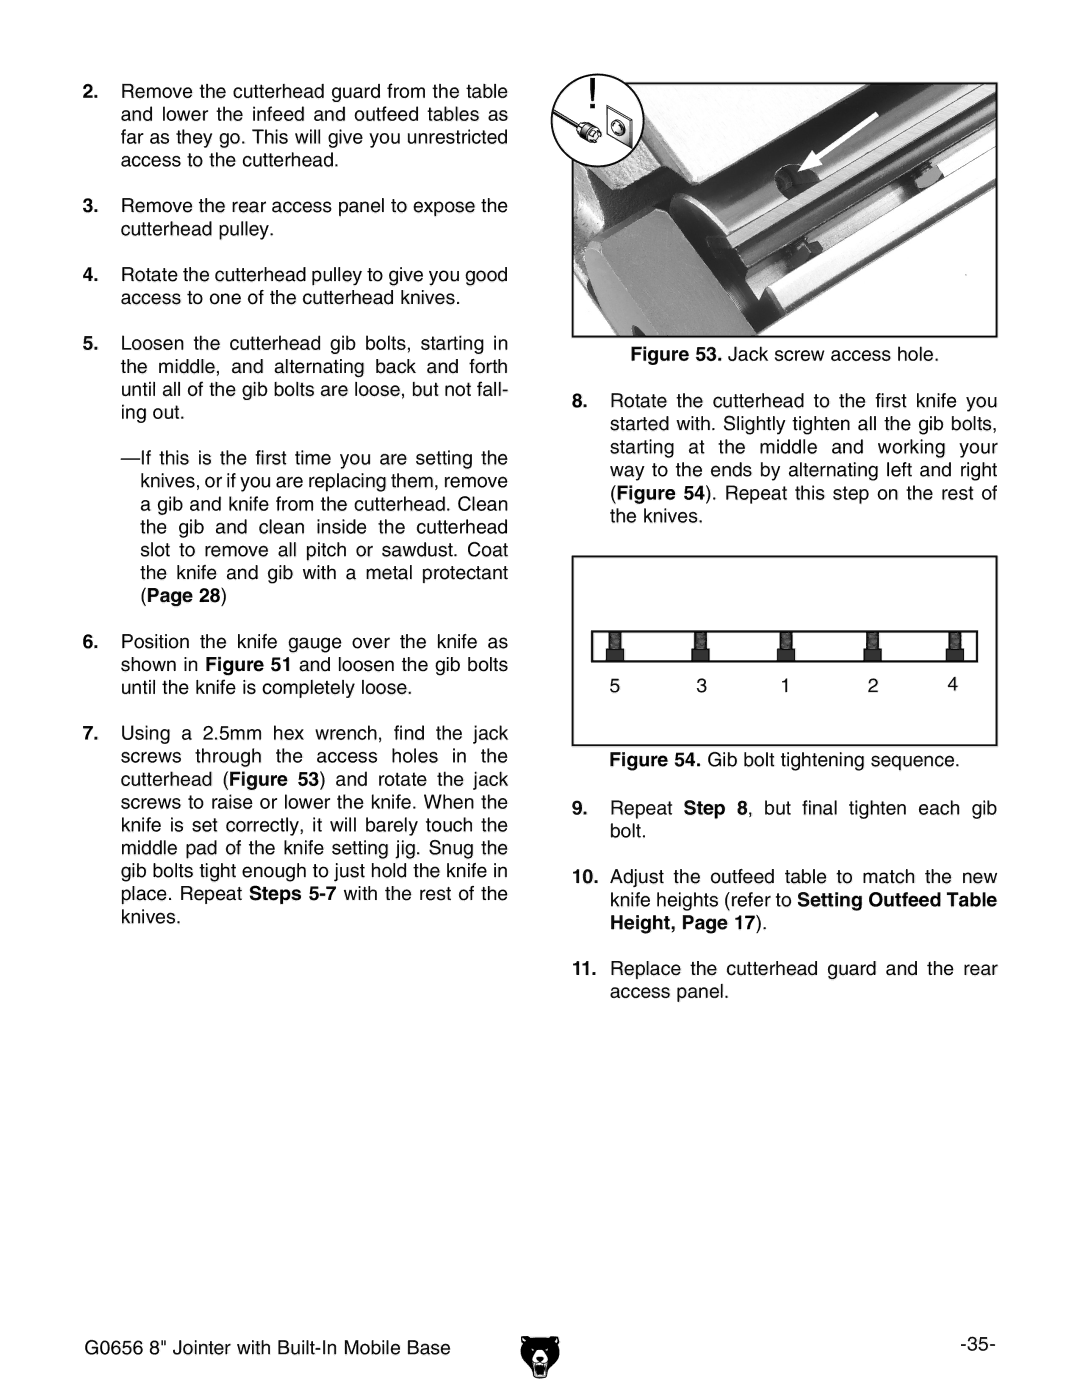
7.Using a 2.5mm hex wrench, find the jack screws through the access holes in the cutterhead (Figure 53) and rotate the jack screws to raise or lower the knife. When the knife is set correctly, it will barely touch the middle pad of the knife setting jig. Snug the gib bolts tight enough to just hold the knife in place. Repeat Steps
G0656 8" Jointer with Built-In Mobile Base
Figure 53. Jack screw access hole.
8.Rotate the cutterhead to the first knife you started with. Slightly tighten all the gib bolts, starting at the middle and working your way to the ends by alternating left and right (Figure 54). Repeat this step on the rest of the knives.
5 | 3 | 1 | 2 | 4 |