Fence Stops
There is a 90˚ and a 45˚ fence stop designed to allow the fence to quickly and accurately be moved to the 90˚ and 45˚ position.
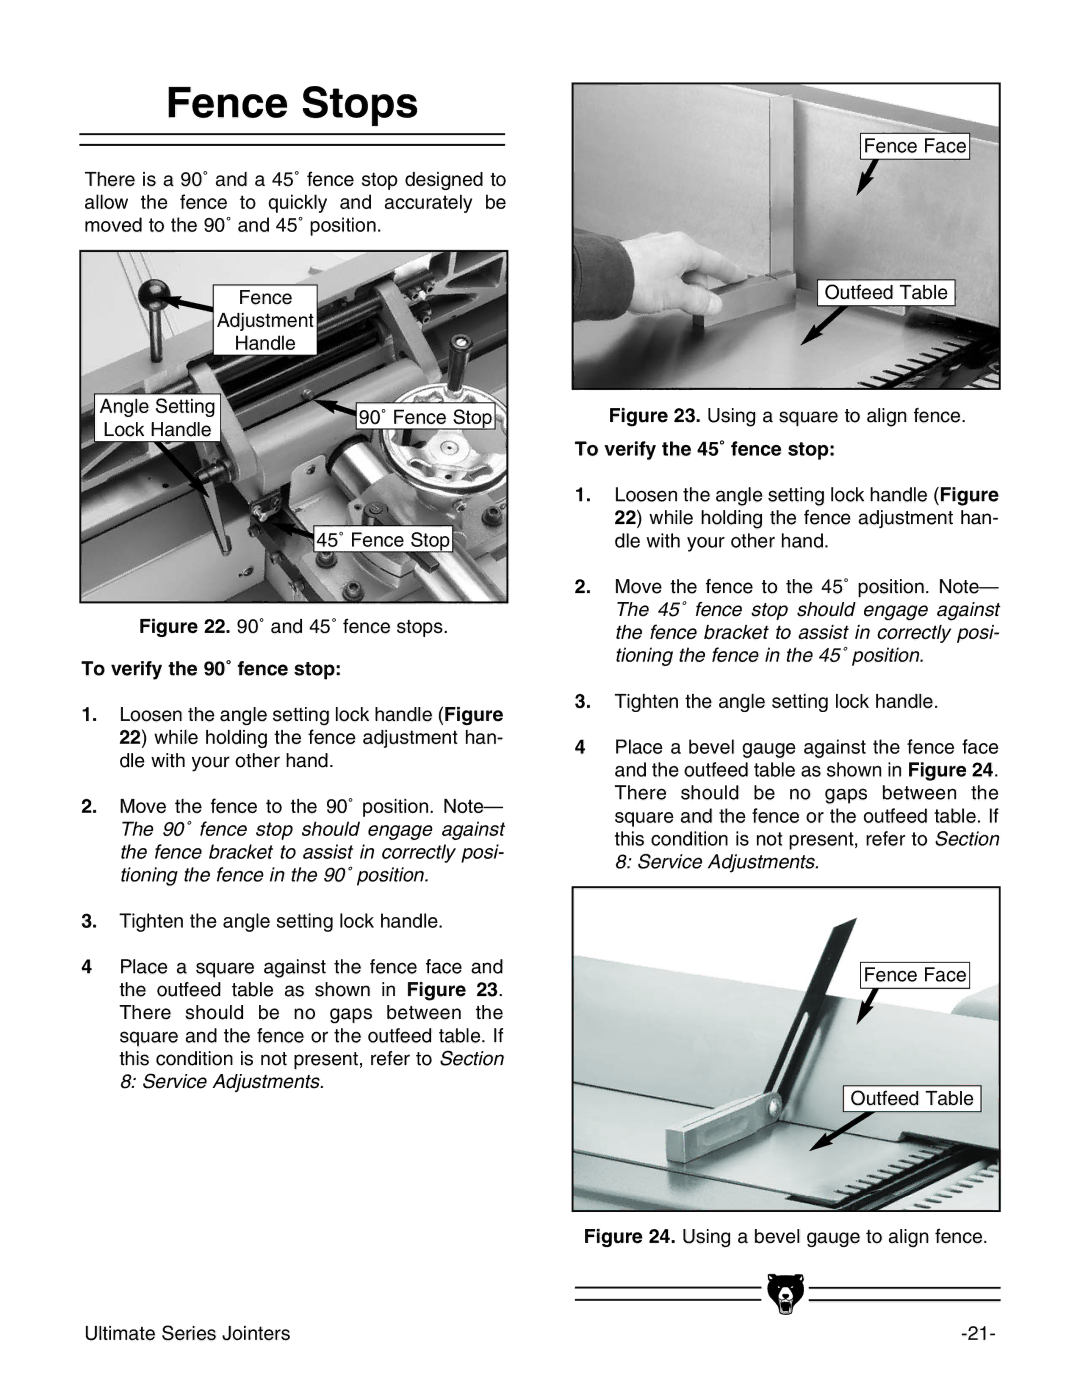
| Fence | |
| Adjustment | |
| Handle | |
Angle Setting | 90˚ Fence Stop | |
Lock Handle | ||
| ||
| 45˚ Fence Stop |
Figure 22. 90˚ and 45˚ fence stops.
To verify the 90˚ fence stop:
1.Loosen the angle setting lock handle (Figure 22) while holding the fence adjustment han- dle with your other hand.
2.Move the fence to the 90˚ position. Note— The 90˚ fence stop should engage against the fence bracket to assist in correctly posi- tioning the fence in the 90˚ position.
3.Tighten the angle setting lock handle.
4Place a square against the fence face and the outfeed table as shown in Figure 23. There should be no gaps between the square and the fence or the outfeed table. If this condition is not present, refer to Section 8: Service Adjustments.
Fence Face
Outfeed Table
Figure 23. Using a square to align fence.
To verify the 45˚ fence stop:
1.Loosen the angle setting lock handle (Figure 22) while holding the fence adjustment han- dle with your other hand.
2.Move the fence to the 45˚ position. Note— The 45˚ fence stop should engage against the fence bracket to assist in correctly posi- tioning the fence in the 45˚ position.
3.Tighten the angle setting lock handle.
4Place a bevel gauge against the fence face and the outfeed table as shown in Figure 24. There should be no gaps between the square and the fence or the outfeed table. If this condition is not present, refer to Section 8: Service Adjustments.
Fence Face
Outfeed Table
Figure 24. Using a bevel gauge to align fence.
Ultimate Series Jointers |