Install Closed Position Stop Plate
The closed position stop plate helps to stabilize the gate leaf in the closed position. To further enhance the stability and security of your gate, install the optional GTO Automatic Gate Lock ![]() [FM144]
[FM144]
Step 11
Remove hairpin, clevis pin, and 3/16” bushing from front mount and close the gate. Fasten the closed position stop plate to the end of the gate frame on the gate
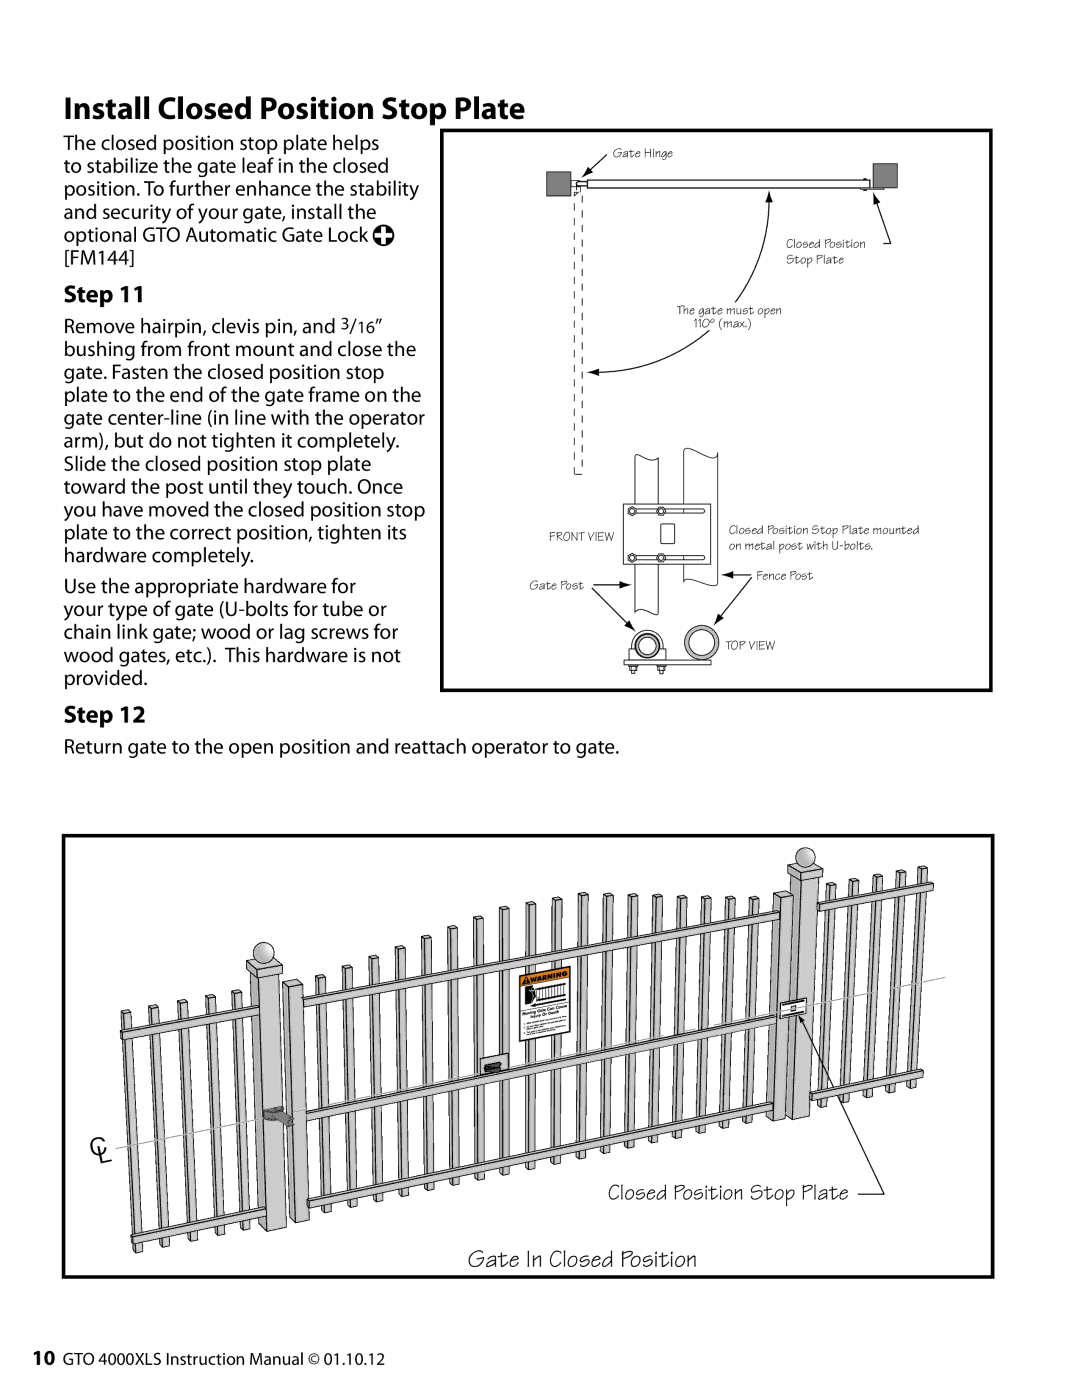
Gate Hinge
Closed Position
Stop Plate
The gate must open 110º (max.)
plate to the correct position, tighten its hardware completely.
Use the appropriate hardware for your type of gate
FRONT VIEW
Gate Post
Closed Position Stop Plate mounted on metal post with
![]() Fence Post
Fence Post
![]() TOP VIEW
TOP VIEW
Step 12
Return gate to the open position and reattach operator to gate.
C |
L |
Closed Position Stop Plate |
Gate In Closed Position |
10GTO 4000XLS Instruction Manual © 01.10.12