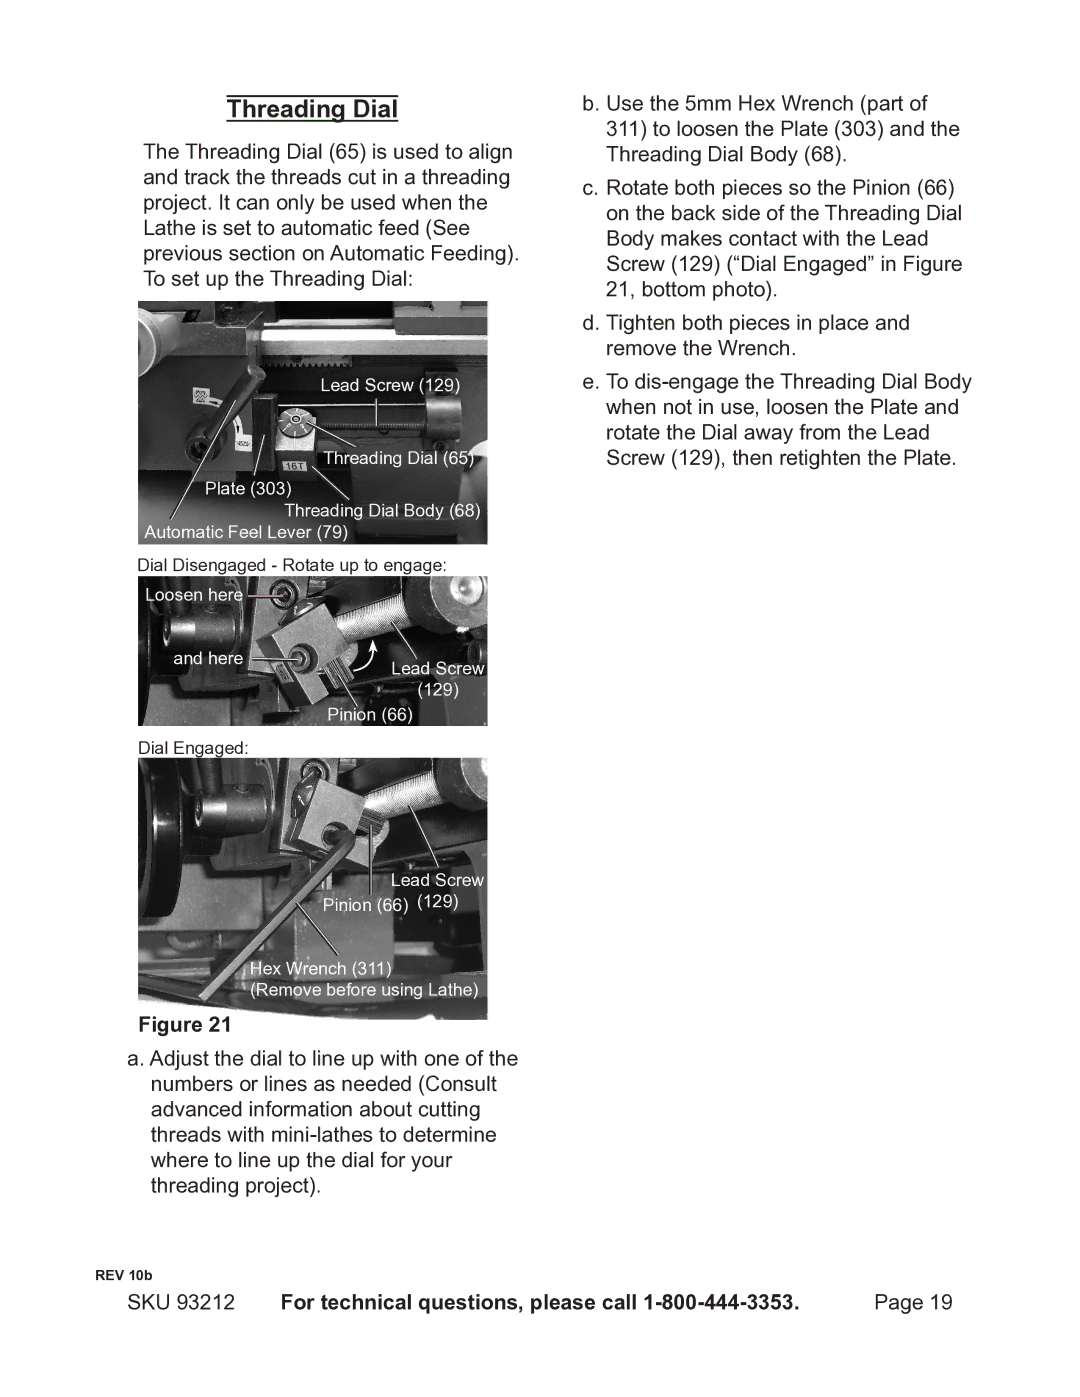
Threading Dial
The Threading Dial (65) is used to align and track the threads cut in a threading project. It can only be used when the Lathe is set to automatic feed (See previous section on Automatic Feeding). To set up the Threading Dial:
Lead Screw (129)
Threading Dial (65)
Plate (303)
Threading Dial Body (68)
Automatic Feel Lever (79)
Dial Disengaged - Rotate up to engage: Loosen here
and here | Lead Screw |
| |
| (129) |
| Pinion (66) |
Dial Engaged: |
|
Lead Screw
Pinion (66) (129)
Hex Wrench (311)
(Remove before using Lathe)
Figure 21
b. Use the 5mm Hex Wrench (part of
311) to loosen the Plate (303) and the Threading Dial Body (68).
c.Rotate both pieces so the Pinion (66) on the back side of the Threading Dial Body makes contact with the Lead Screw (129) (“Dial Engaged” in Figure 21, bottom photo).
d.Tighten both pieces in place and remove the Wrench.
e.To
a. Adjust the dial to line up with one of the numbers or lines as needed (Consult advanced information about cutting threads with
REV 10b |
|
|
SKU 93212 | For technical questions, please call | Page 19 |