SET UP
Initial Test Run
Before further
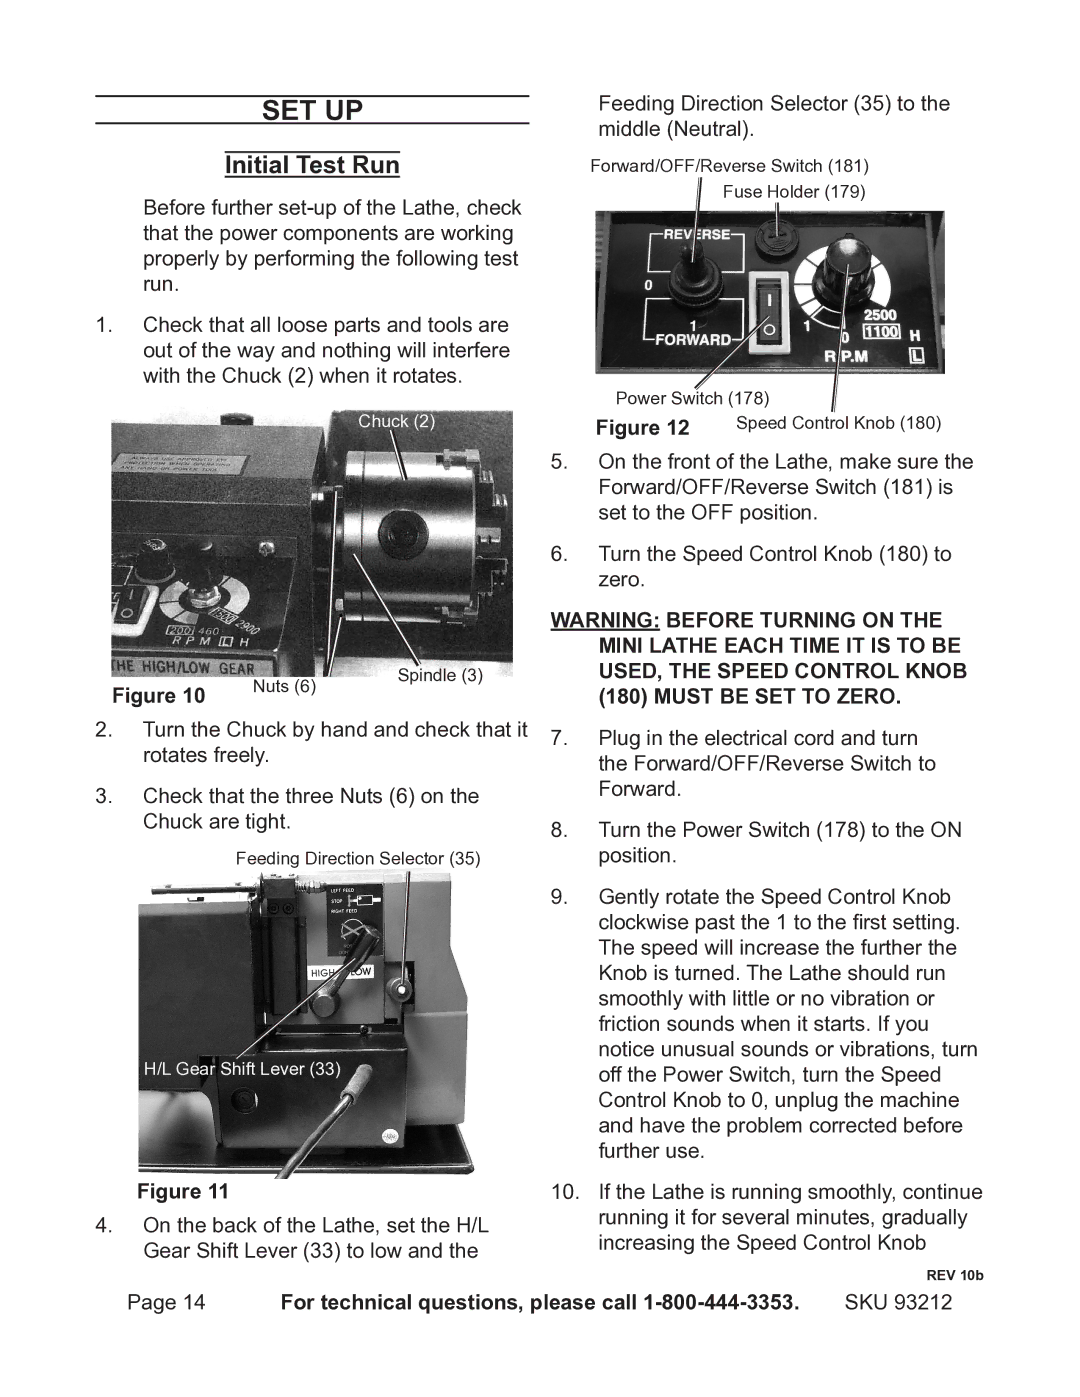
1.Check that all loose parts and tools are out of the way and nothing will interfere with the Chuck (2) when it rotates.
Chuck (2)
Figure 10 | Nuts (6) | Spindle (3) |
| ||
|
|
2.Turn the Chuck by hand and check that it rotates freely.
3.Check that the three Nuts (6) on the Chuck are tight.
Feeding Direction Selector (35)
H/L Gear Shift Lever (33)
Figure 11
4.On the back of the Lathe, set the H/L Gear Shift Lever (33) to low and the
Feeding Direction Selector (35) to the middle (Neutral).
Forward/OFF/Reverse Switch (181)
Fuse Holder (179)
Power Switch (178)
Figure 12 | Speed Control Knob (180) |
5.On the front of the Lathe, make sure the Forward/OFF/Reverse Switch (181) is set to the OFF position.
6.Turn the Speed Control Knob (180) to zero.
WARNING: BEFORE TURNING ON THE MINI LATHE EACH TIME IT IS TO BE USED, THE SPEED CONTROL KNOB
(180) MUST BE SET TO ZERO.
7.Plug in the electrical cord and turn the Forward/OFF/Reverse Switch to Forward.
8.Turn the Power Switch (178) to the ON position.
9.Gently rotate the Speed Control Knob clockwise past the 1 to the first setting.
The speed will increase the further the Knob is turned. The Lathe should run smoothly with little or no vibration or friction sounds when it starts. If you notice unusual sounds or vibrations, turn off the Power Switch, turn the Speed Control Knob to 0, unplug the machine and have the problem corrected before further use.
10.If the Lathe is running smoothly, continue running it for several minutes, gradually increasing the Speed Control Knob
REV 10b
Page 14 | For technical questions, please call | SKU 93212 |
