3.Place the dead center in the Tailstock.
4.Attach a Lathe Dog (part of SKU 3448 - sold separately) the to 6” piece from step 1 and mount between centers.
5.Turn approximately 0.010” off of the diameter of the mounted workpiece.
6.Measure the workpiece with a micrometer at the Tailstock end and the Chuck end. Divide any difference by two. If it is thicker at the Chuck (2) end, move the tailstock away from you by the resulting amount. If it is thicker at the Tailstock end, move the Tailstock closer to you by the resulting amount.
7.Turn another 0.010” off of the workpiece.
8.Repeat steps 5 and 6 as needed until there is no taper and/or the desired amount of accuracy is achieved.
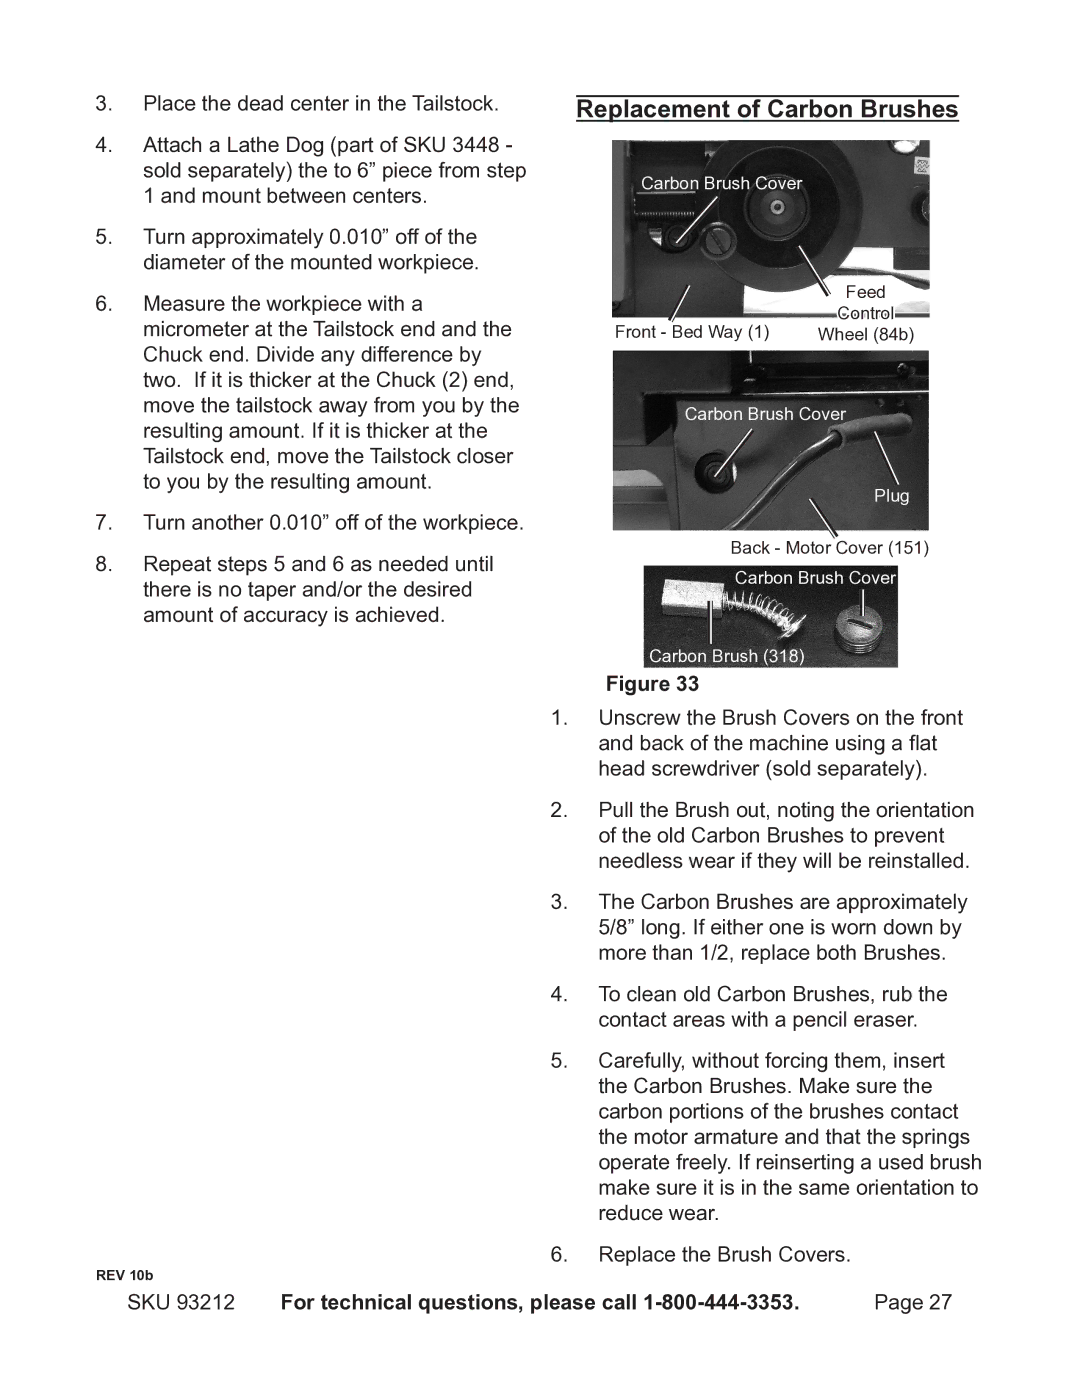
Replacement of Carbon Brushes
Carbon Brush Cover
| Feed |
Front - Bed Way (1) | Control |
Wheel (84b) |
Carbon Brush Cover
Plug
Back - Motor Cover (151)
Carbon Brush Cover
Carbon Brush (318)
Figure 33
1. Unscrew the Brush Covers on the front and back of the machine using a flat head screwdriver (sold separately).
2. Pull the Brush out, noting the orientation of the old Carbon Brushes to prevent needless wear if they will be reinstalled.
3. The Carbon Brushes are approximately 5/8” long. If either one is worn down by more than 1/2, replace both Brushes.
4. To clean old Carbon Brushes, rub the contact areas with a pencil eraser.
5. Carefully, without forcing them, insert the Carbon Brushes. Make sure the carbon portions of the brushes contact the motor armature and that the springs operate freely. If reinserting a used brush make sure it is in the same orientation to reduce wear.
6. Replace the Brush Covers.
REV 10b
SKU 93212 | For technical questions, please call | Page 27 |