System Configuration
reduce the noise level. Inexpensive foam-style ear plugs, available at most drug stores, may be used to reduce the sound level to a tolerable level. If you are uncomfortable with, or cannot tolerate, loud sounds and do not use some sort of ear protection, we strongly recommend that you leave the room and ask someone else to run the EzSet/EQ process, or that you do not use EzSet/EQ and enter the configuration settings manually, as described on pages 23 through 27.
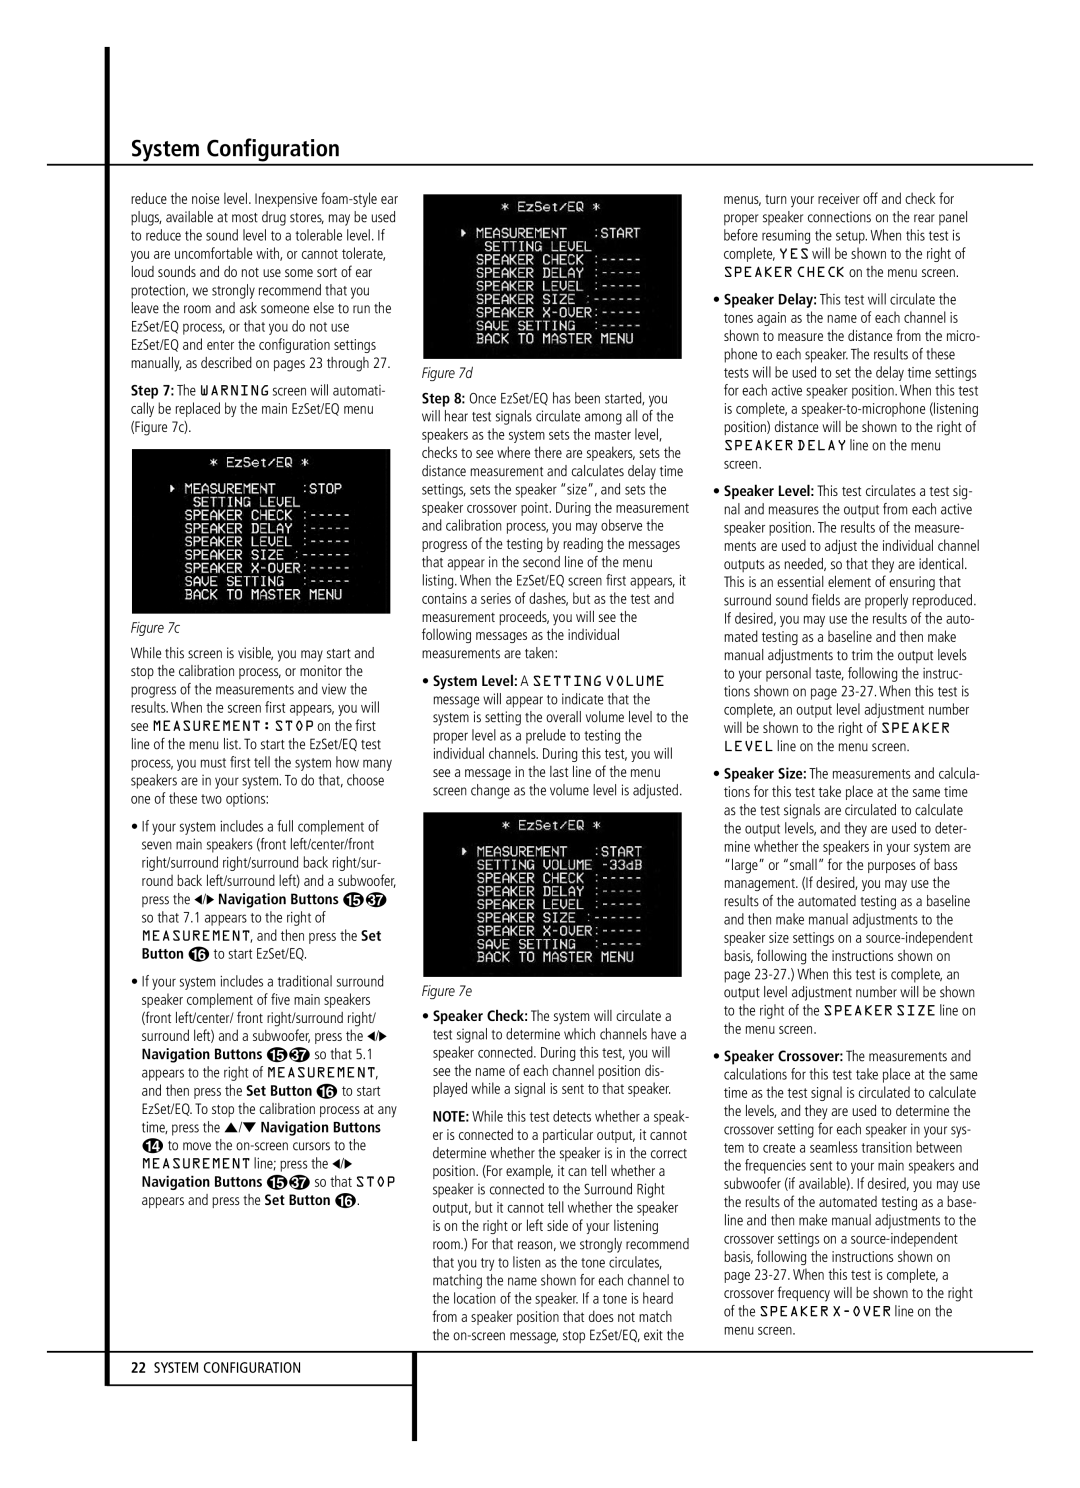
Step 7: The WARNING screen will automati- cally be replaced by the main EzSet/EQ menu (Figure 7c).
Figure 7c
While this screen is visible, you may start and stop the calibration process, or monitor the progress of the measurements and view the results. When the screen first appears, you will see MEASUREMENT: STOP on the first line of the menu list. To start the EzSet/EQ test process, you must first tell the system how many speakers are in your system. To do that, choose one of these two options:
•If your system includes a full complement of seven main speakers (front left/center/front right/surround right/surround back right/sur- round back left/surround left) and a subwoofer, press the ‹/› Navigation Buttons E
so that 7.1 appears to the right of MEASUREMENT, and then press the Set Button F to start EzSet/EQ.
•If your system includes a traditional surround speaker complement of five main speakers (front left/center/ front right/surround right/ surround left) and a subwoofer, press the ‹/›
Navigation Buttons E so that 5.1 appears to the right of MEASUREMENT, and then press the Set Button F to start EzSet/EQ. To stop the calibration process at any time, press the ⁄/¤ Navigation Buttons
Dto move the on-screen cursors to the MEASUREMENT line; press the ‹/›
Navigation Buttons E so that STOP appears and press the Set Button F.
22SYSTEM CONFIGURATION
Figure 7d
Step 8: Once EzSet/EQ has been started, you will hear test signals circulate among all of the speakers as the system sets the master level, checks to see where there are speakers, sets the distance measurement and calculates delay time settings, sets the speaker “size”, and sets the speaker crossover point. During the measurement and calibration process, you may observe the progress of the testing by reading the messages that appear in the second line of the menu listing. When the EzSet/EQ screen first appears, it contains a series of dashes, but as the test and measurement proceeds, you will see the following messages as the individual measurements are taken:
•System Level: A SETTING VOLUME message will appear to indicate that the system is setting the overall volume level to the proper level as a prelude to testing the individual channels. During this test, you will see a message in the last line of the menu screen change as the volume level is adjusted.
Figure 7e
•Speaker Check: The system will circulate a test signal to determine which channels have a speaker connected. During this test, you will see the name of each channel position dis- played while a signal is sent to that speaker.
NOTE: While this test detects whether a speak- er is connected to a particular output, it cannot determine whether the speaker is in the correct position. (For example, it can tell whether a speaker is connected to the Surround Right output, but it cannot tell whether the speaker is on the right or left side of your listening room.) For that reason, we strongly recommend that you try to listen as the tone circulates, matching the name shown for each channel to the location of the speaker. If a tone is heard from a speaker position that does not match the on-screen message, stop EzSet/EQ, exit the
menus, turn your receiver off and check for proper speaker connections on the rear panel before resuming the setup. When this test is complete, YES will be shown to the right of SPEAKER CHECK on the menu screen.
•Speaker Delay: This test will circulate the tones again as the name of each channel is shown to measure the distance from the micro- phone to each speaker. The results of these tests will be used to set the delay time settings for each active speaker position. When this test is complete, a speaker-to-microphone (listening position) distance will be shown to the right of SPEAKER DELAY line on the menu screen.
•Speaker Level: This test circulates a test sig- nal and measures the output from each active speaker position. The results of the measure- ments are used to adjust the individual channel outputs as needed, so that they are identical. This is an essential element of ensuring that surround sound fields are properly reproduced. If desired, you may use the results of the auto- mated testing as a baseline and then make manual adjustments to trim the output levels to your personal taste, following the instruc- tions shown on page 23-27. When this test is complete, an output level adjustment number will be shown to the right of SPEAKER LEVEL line on the menu screen.
•Speaker Size: The measurements and calcula- tions for this test take place at the same time as the test signals are circulated to calculate the output levels, and they are used to deter- mine whether the speakers in your system are “large” or “small” for the purposes of bass management. (If desired, you may use the results of the automated testing as a baseline and then make manual adjustments to the speaker size settings on a source-independent basis, following the instructions shown on page 23-27.) When this test is complete, an output level adjustment number will be shown to the right of the SPEAKER SIZE line on the menu screen.
•Speaker Crossover: The measurements and calculations for this test take place at the same time as the test signal is circulated to calculate the levels, and they are used to determine the crossover setting for each speaker in your sys- tem to create a seamless transition between the frequencies sent to your main speakers and subwoofer (if available). If desired, you may use the results of the automated testing as a base- line and then make manual adjustments to the crossover settings on a source-independent basis, following the instructions shown on page 23-27. When this test is complete, a crossover frequency will be shown to the right of the SPEAKER X-OVERline on the menu screen.