Brake Maintenance
Servicing the Parking Brake
Service Interval: Before each use or daily
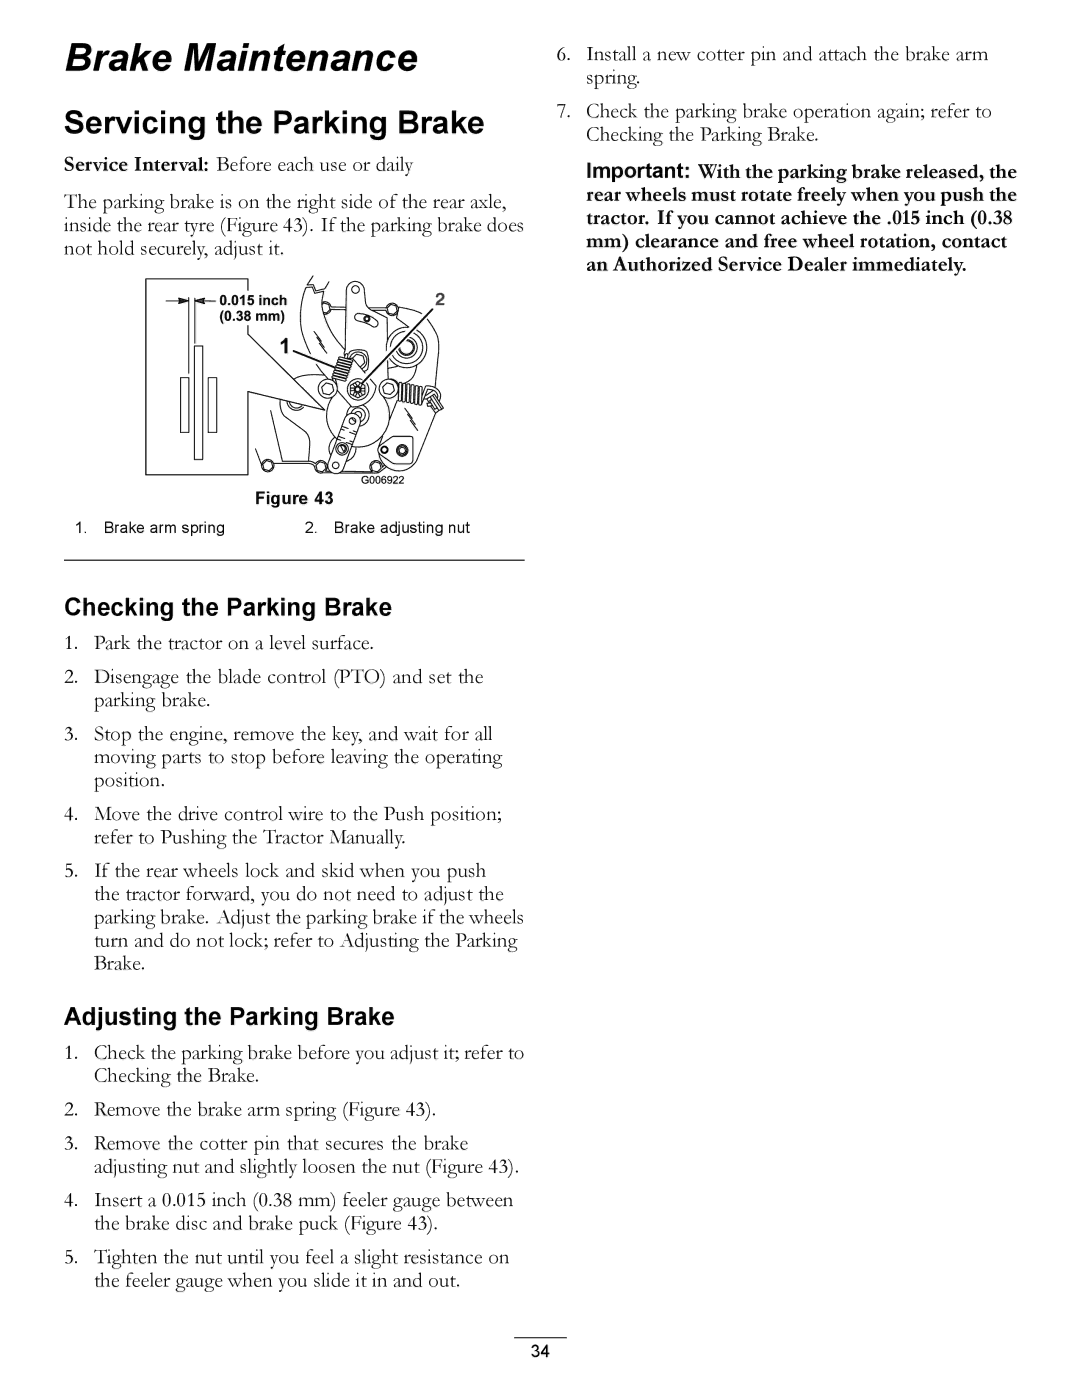
The parking brake is on the right side of the rear axle, inside the rear tyre (Figure 43). If the parking brake does not hold securely, adjust it.
6.Install a new cotter pin and attach the brake arm spring.
7.Check the parking brake operation again; refer to Checking the Parking Brake.
Important: With the parking brake released, the rear wheels must rotate freely when you push the tractor. If you cannot achieve the .015 inch (0.38 mm) clearance and free wheel rotation, contact an Authorized Service Dealer immediately.
Figure 43
1. Brake arm spring | 2. Brake adjusting nut |
|
|
Checking the Parking Brake
1.Park the tractor on a level surface.
2.Disengage the blade control (PTO) and set the parking brake.
3.Stop the engine, remove the key, and wait for all moving parts to stop before leaving the operating position.
4.Move the drive control wire to the Push position; refer to Pushing the Tractor Manually.
5.If the rear wheels lock and skid when you push the tractor forward, you do not need to adjust the parking brake. Adjust the parking brake if the wheels turn and do not lock; refer to Adjusting the Parking Brake.
Adjusting the Parking Brake
1.Check the parking brake before you adjust it; refer to Checking the Brake.
2.Remove the brake arm spring (Figure 43).
3.Remove the cotter pin that secures the brake adjusting nut and slightly loosen the nut (Figure 43).
4.Insert a 0.015 inch (0.38 mm) feeler gauge between the brake disc and brake puck (Figure 43).
5.Tighten the nut until you feel a slight resistance on the feeler gauge when you slide it in and out.
34
