|
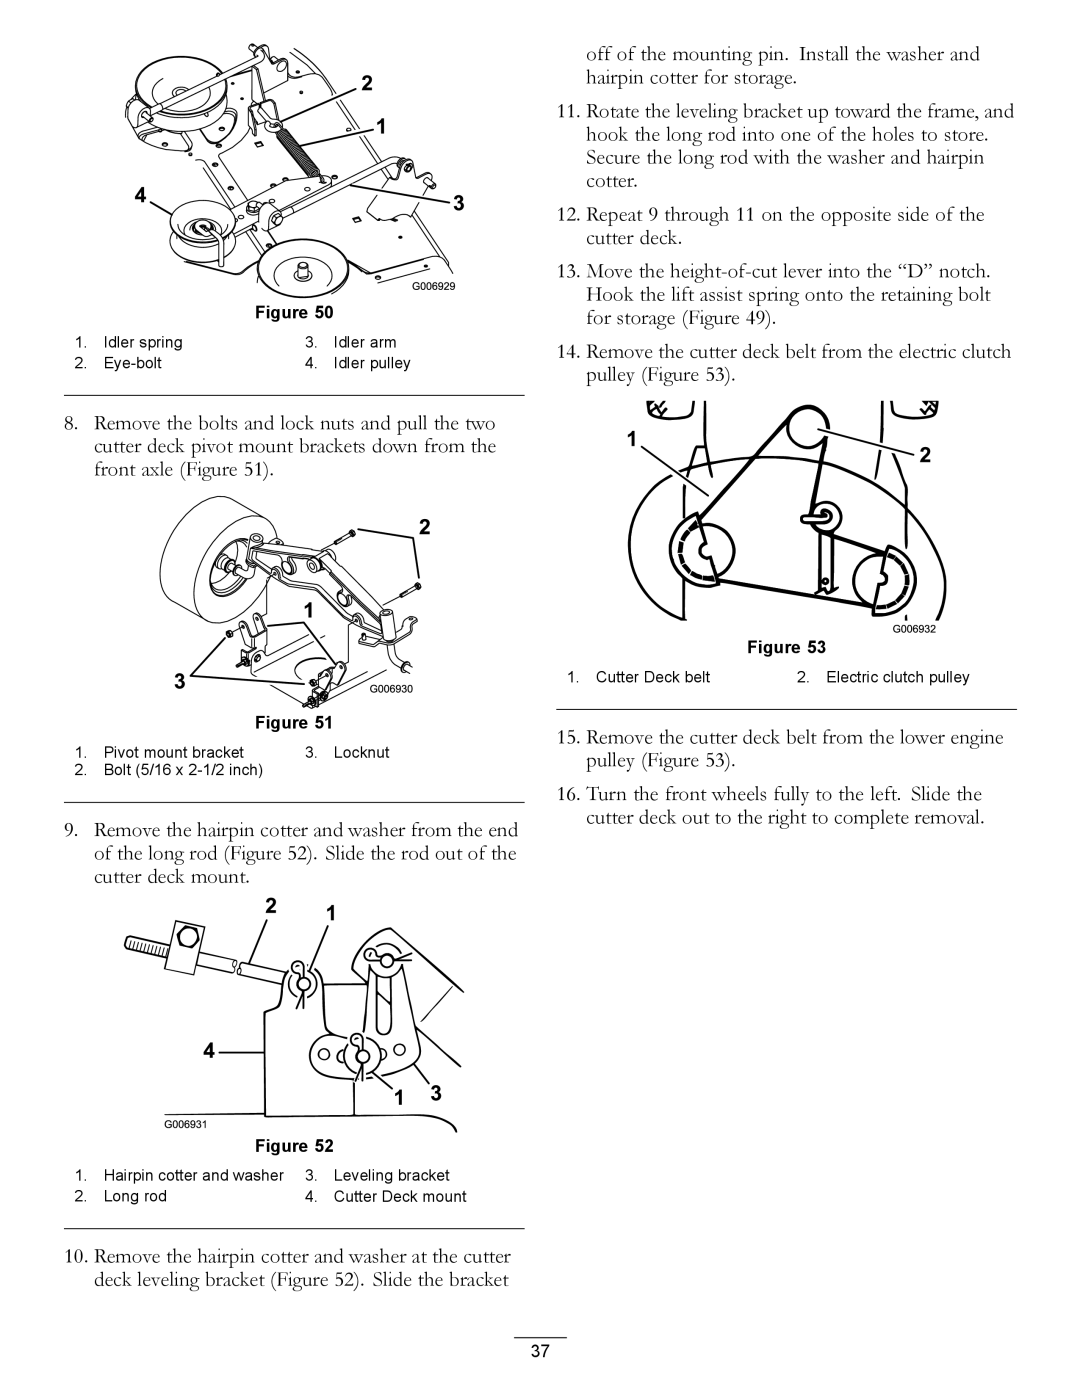
| Figure 50 |
|
1. | Idler spring | 3. | Idler arm |
2. |
| 4. | Idler pulley |
8.Remove the bolts and lock nuts and pull the two cutter deck pivot mount brackets down from the front axle (Figure 51).
off of the mounting pin. Install the washer and hairpin cotter for storage.
11.Rotate the leveling bracket up toward the frame, and hook the long rod into one of the holes to store. Secure the long rod with the washer and hairpin cotter.
12.Repeat 9 through 11 on the opposite side of the cutter deck.
13.Move the
14.Remove the cutter deck belt from the electric clutch pulley (Figure 53).
Figure 51
1. Pivot mount bracket | 3. Locknut |
2.Bolt (5/16 x
9.Remove the hairpin cotter and washer from the end of the long rod (Figure 52). Slide the rod out of the cutter deck mount.
Figure 52
1. | Hairpin cotter and washer | 3. | Leveling bracket |
2. | Long rod | 4. | Cutter Deck mount |
10.Remove the hairpin cotter and washer at the cutter deck leveling bracket (Figure 52). Slide the bracket
Figure 53
1. Cutter Deck belt | 2. Electric clutch pulley |
15.Remove the cutter deck belt from the lower engine pulley (Figure 53).
16.Turn the front wheels fully to the left. Slide the cutter deck out to the right to complete removal.
37