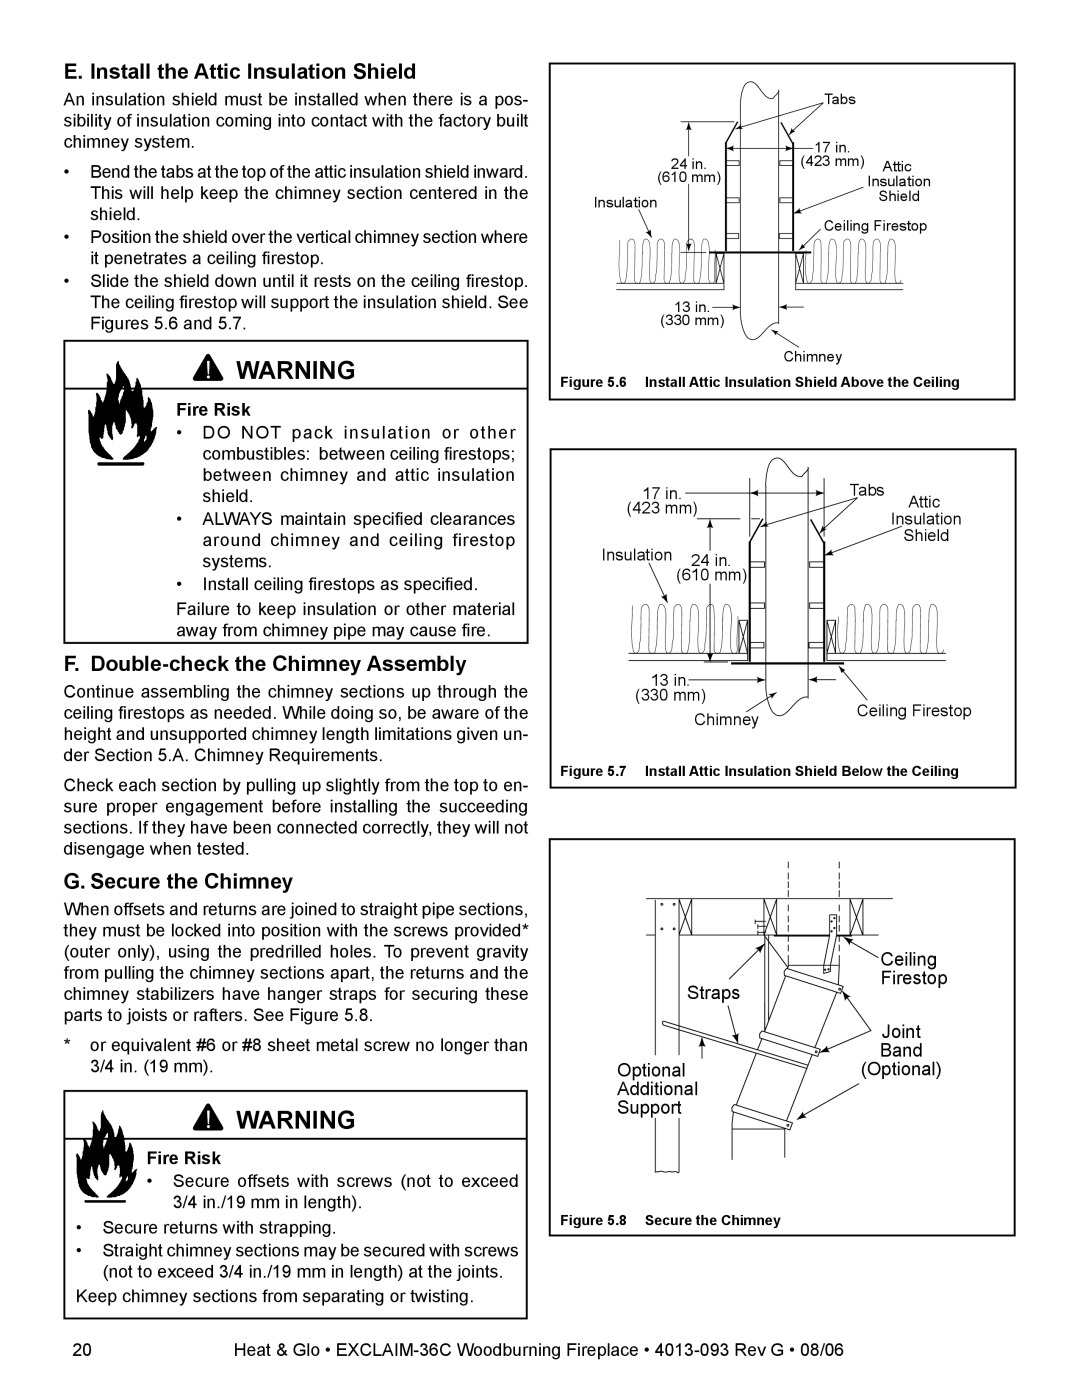
E. Install the Attic Insulation Shield
An insulation shield must be installed when there is a pos- sibility of insulation coming into contact with the factory built chimney system.
•Bend the tabs at the top of the attic insulation shield inward. This will help keep the chimney section centered in the shield.
•Position the shield over the vertical chimney section where it penetrates a ceiling firestop.
•Slide the shield down until it rests on the ceiling firestop. The ceiling firestop will support the insulation shield. See Figures 5.6 and 5.7.
![]() WARNING
WARNING
Fire Risk
•DO NOT pack insulation or other combustibles: between ceiling firestops; between chimney and attic insulation shield.
•ALWAYS maintain specified clearances around chimney and ceiling firestop systems.
•Install ceiling firestops as specified.
Failure to keep insulation or other material away from chimney pipe may cause fire.
F. Double-check the Chimney Assembly
Continue assembling the chimney sections up through the ceiling firestops as needed. While doing so, be aware of the height and unsupported chimney length limitations given un- der Section 5.A. Chimney Requirements.
Check each section by pulling up slightly from the top to en- sure proper engagement before installing the succeeding sections. If they have been connected correctly, they will not disengage when tested.
G. Secure the Chimney
|
|
|
|
|
|
|
|
|
|
| Tabs |
|
|
|
|
|
|
|
|
|
|
| 17 in. |
|
|
|
|
|
|
|
|
|
|
| |
|
|
|
|
|
|
|
|
|
|
| |
|
|
|
|
|
|
|
|
|
|
| |
24 | in. |
|
|
|
| (423 mm) Attic | |||||
(610 | mm) |
|
|
|
|
|
| Insulation | |||
Insulation |
|
|
|
|
|
|
|
|
| Shield | |
|
|
|
|
|
|
|
|
| |||
|
|
|
|
|
|
|
|
|
|
| Ceiling Firestop |
|
|
|
|
|
|
|
|
|
|
|
|
|
|
|
|
|
|
|
|
|
|
|
|
13 in.![]()
(330 mm)
Chimney
Figure 5.6 Install Attic Insulation Shield Above the Ceiling
17 in. |
|
|
|
|
|
|
|
|
|
| Tabs | Attic |
|
|
|
|
|
|
|
|
|
| |||
(423 mm) |
|
|
|
|
|
| ||||||
|
|
|
|
|
| Insulation | ||||||
|
|
|
|
|
|
|
|
|
|
|
| |
Insulation |
|
|
|
|
|
|
|
|
|
|
| Shield |
24 | in. |
|
|
|
|
|
|
| ||||
(610 mm) |
|
|
|
|
|
|
| |||||
|
|
|
|
|
|
|
|
|
|
|
|
|
|
|
|
|
|
|
|
|
|
|
|
|
|
|
|
|
|
|
|
|
|
|
|
|
|
|
13 in.
(330 mm)
Chimney | Ceiling Firestop |
|
Figure 5.7 Install Attic Insulation Shield Below the Ceiling
When offsets and returns are joined to straight pipe sections, they must be locked into position with the screws provided* (outer only), using the predrilled holes. To prevent gravity from pulling the chimney sections apart, the returns and the chimney stabilizers have hanger straps for securing these parts to joists or rafters. See Figure 5.8.
* or equivalent #6 or #8 sheet metal screw no longer than |
Straps
 Ceiling Firestop
Joint
Band
3/4 in. (19 mm). |
![]() WARNING
WARNING
Fire Risk
•Secure offsets with screws (not to exceed 3/4 in./19 mm in length).
•Secure returns with strapping.
•Straight chimney sections may be secured with screws (not to exceed 3/4 in./19 mm in length) at the joints.
Keep chimney sections from separating or twisting.
Optional(Optional)
Additional
Support
Figure 5.8 Secure the Chimney
20 | Heat & Glo • |