Step 11. Installing Trim, Logs,
and Ember Material
Installing the Trim
Combustible materials may be brought up to the specified clearances on the side and top front edges of the fireplace, but MUST NEVER overlap onto the front face. The joints between the finished wall and the fireplace top and sides can only be sealed with a 300° F. (149° C) minimum sealant.
WARNING: WHEN FINISHING THE FIREPLACE,
!
NEVER OBSTRUCT OR MODIFY THE AIR INLET/ OUTLET GRILLES IN ANY MANNER.
Install optional marble and brass trim surround kits as desired. Marble, brass, brick, tile, or other
Do not obstruct or modify the air inlet/outlet grilles. When overlapping on both sides, leave enough space so that the bottom grille can be lowered and the trim door removed.
Positioning the Logs
If the gas logs have been factory installed they should not need to be positioned. If the logs have been packaged separately, refer to the instructions that accompany the logs. Save the log instructions with this manual.
If sooting occurs, the logs might need to be repositioned slightly to avoid excessive flame impingement.
Placing the Ember Material
Ember material is shipped with this gas fireplace. To place the ember material:
•Pull the four glass latches out of the groove on the glass frame. Remove glass door from the unit (see Figure 33).
•Embers CANNOT be placed directly over ports. Care should be taken not to cover the lighting trail of ports (from back to front).
Ε Place dime size pieces of mineral wool embers about 1/2 inch apart near port holes in burner top. Do NOT press embers into burner ports. Cover the top of the burner with a single layer of ember material. For best perfor- mance do NOT place embers on the ports at the rear of the burner (Figure 33). Failure to follow this procedure will likely cause lighting and sooting problems.
EMBER |
PLACEMENT |
Figure 33 |
•Save the remaining ember materials for use during fire- place servicing.
•Replace the glass door and a front trim door on the unit.
•Pull out and latch the glass clips into the groove on the glass frame.
LATCHES |
(BOTH BOTTOM |
AND TOP) |
GLASS |
ASSEMBLY |
Figure 34. Glass Assembly |
Glass Specifications:
GEM42: CERAMIC
| Note shutter |
| position |
| REMOVE 2 |
| SCREWS |
Figure 35. | Í |
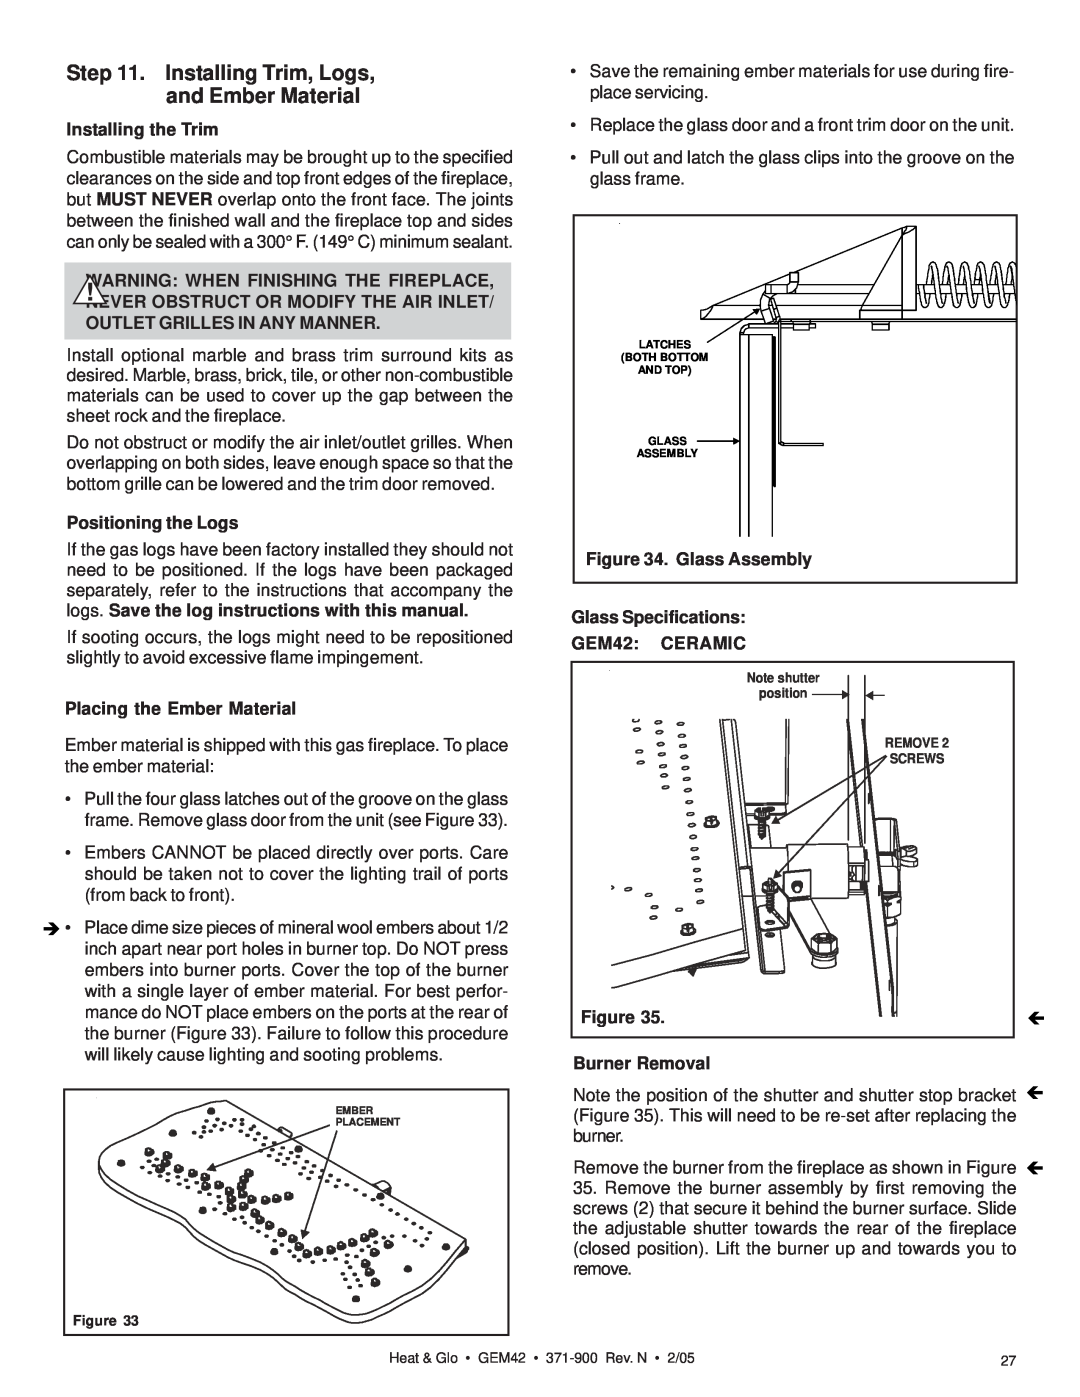
Burner Removal
Note the position of the shutter and shutter stop bracket Í (Figure 35). This will need to be
Remove the burner from the fireplace as shown in Figure Í
35.Remove the burner assembly by first removing the screws (2) that secure it behind the burner surface. Slide the adjustable shutter towards the rear of the fireplace (closed position). Lift the burner up and towards you to remove.
Heat & Glo • GEM42 • | 27 |