Step 2. Framing the Fireplace
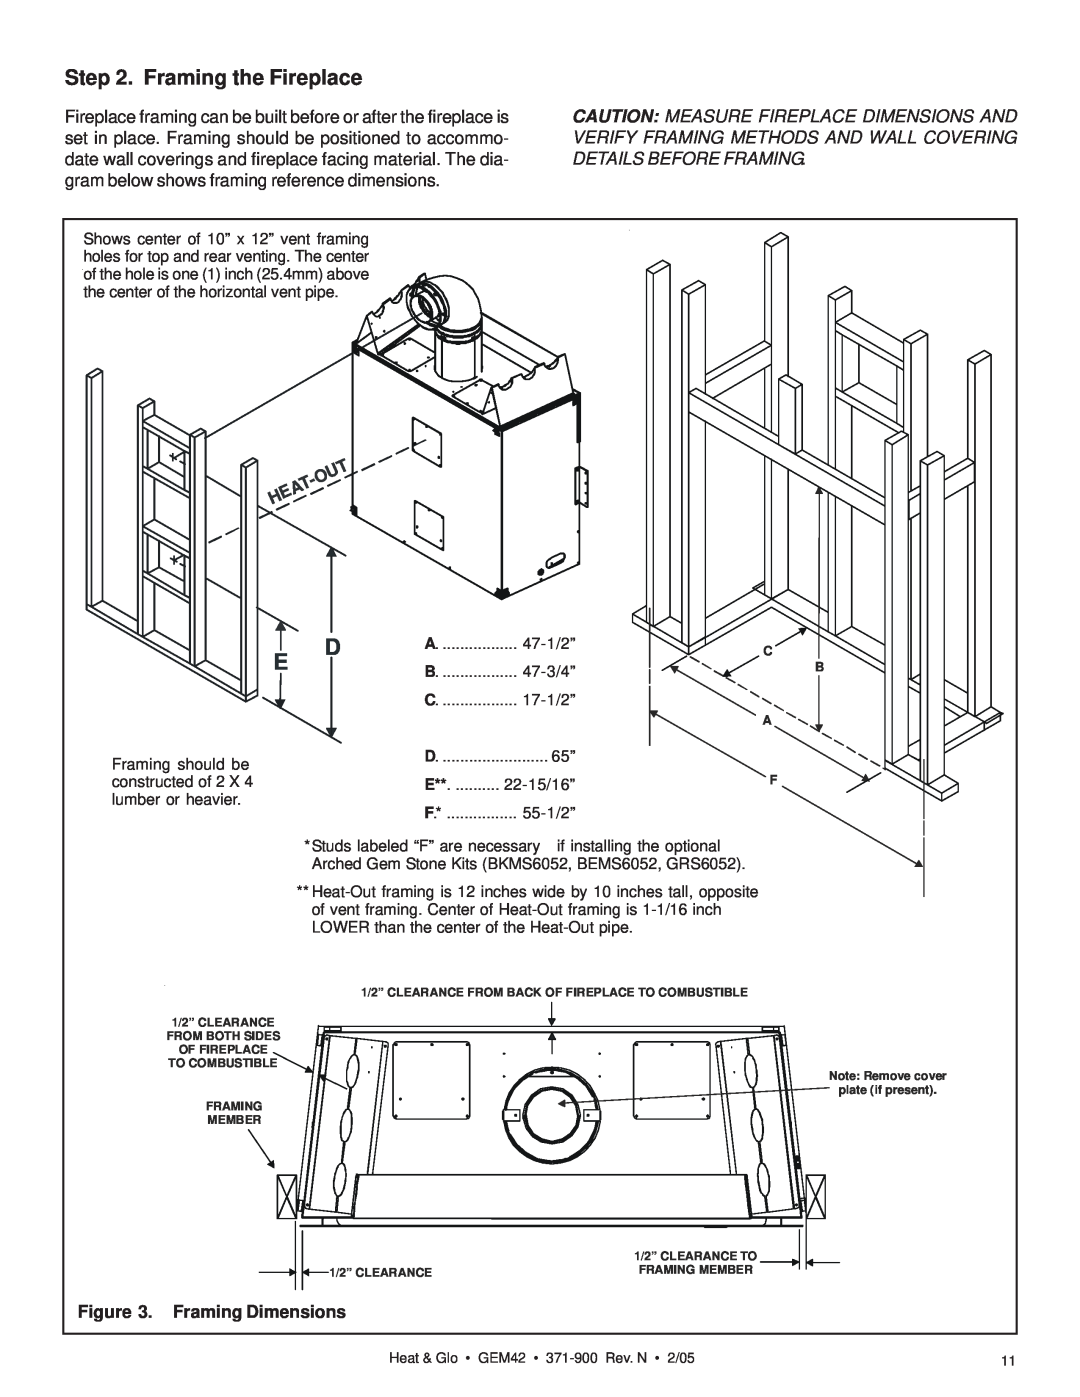
Fireplace framing can be built before or after the fireplace is set in place. Framing should be positioned to accommo- date wall coverings and fireplace facing material. The dia- gram below shows framing reference dimensions.
CAUTION: MEASURE FIREPLACE DIMENSIONS AND VERIFY FRAMING METHODS AND WALL COVERING DETAILS BEFORE FRAMING.
Shows center of 10” x 12” vent framing holes for top and rear venting. The center of the hole is one (1) inch (25.4mm) above the center of the horizontal vent pipe.
|
|
|
|
| T |
|
|
|
| U | |
|
|
| O |
| |
|
|
| - |
|
|
|
| T |
|
| |
| A |
|
|
| |
E |
|
|
|
| |
H |
|
|
|
|
|
|
| D | .................A. |
| |
E |
|
| B. |
| |
|
| ||||
|
|
|
| C |
|
|
|
|
|
|
|
C
B
A
Framing should be constructed of 2 X 4 lumber or heavier.
D | 65” |
|
E** |
| F |
F.* |
|
|
*Studs labeled “F” are necessary if installing the optional Arched Gem Stone Kits (BKMS6052, BEMS6052, GRS6052).
**
1/2” CLEARANCE FROM BACK OF FIREPLACE TO COMBUSTIBLE
1/2” CLEARANCE
FROM BOTH SIDES OF FIREPLACE
TO COMBUSTIBLE
Note: Remove cover plate (if present).
FRAMING
MEMBER
| 1/2” CLEARANCE TO |
1/2” CLEARANCE | FRAMING MEMBER |
Figure 3. Framing Dimensions
Heat & Glo • GEM42 • | 11 |