|
| Appliance Setup |
|
A. | Remove Shipping Materials | C. Flue Restrictor Installation | |
8 |
| ||
Remove shipping materials from inside or underneath the firebox.
When your installation falls within a shaded area on the vent graph (page 11), a flue restrictor must be installed for proper operation.
B. Leg Leveling System
Figure 8.1 Thread Allen bolts through nuts until flush. The Allen bolts and nuts are included in the component pack inside the appliance firebox.
Figure 8.2 Slide assembled nuts and bolts into the slots on the legs with the nuts on the bottom.
Figure 8.3 Use a 5/32 in. 4mm) Allen wrench to adjust legs up and down to desired level.
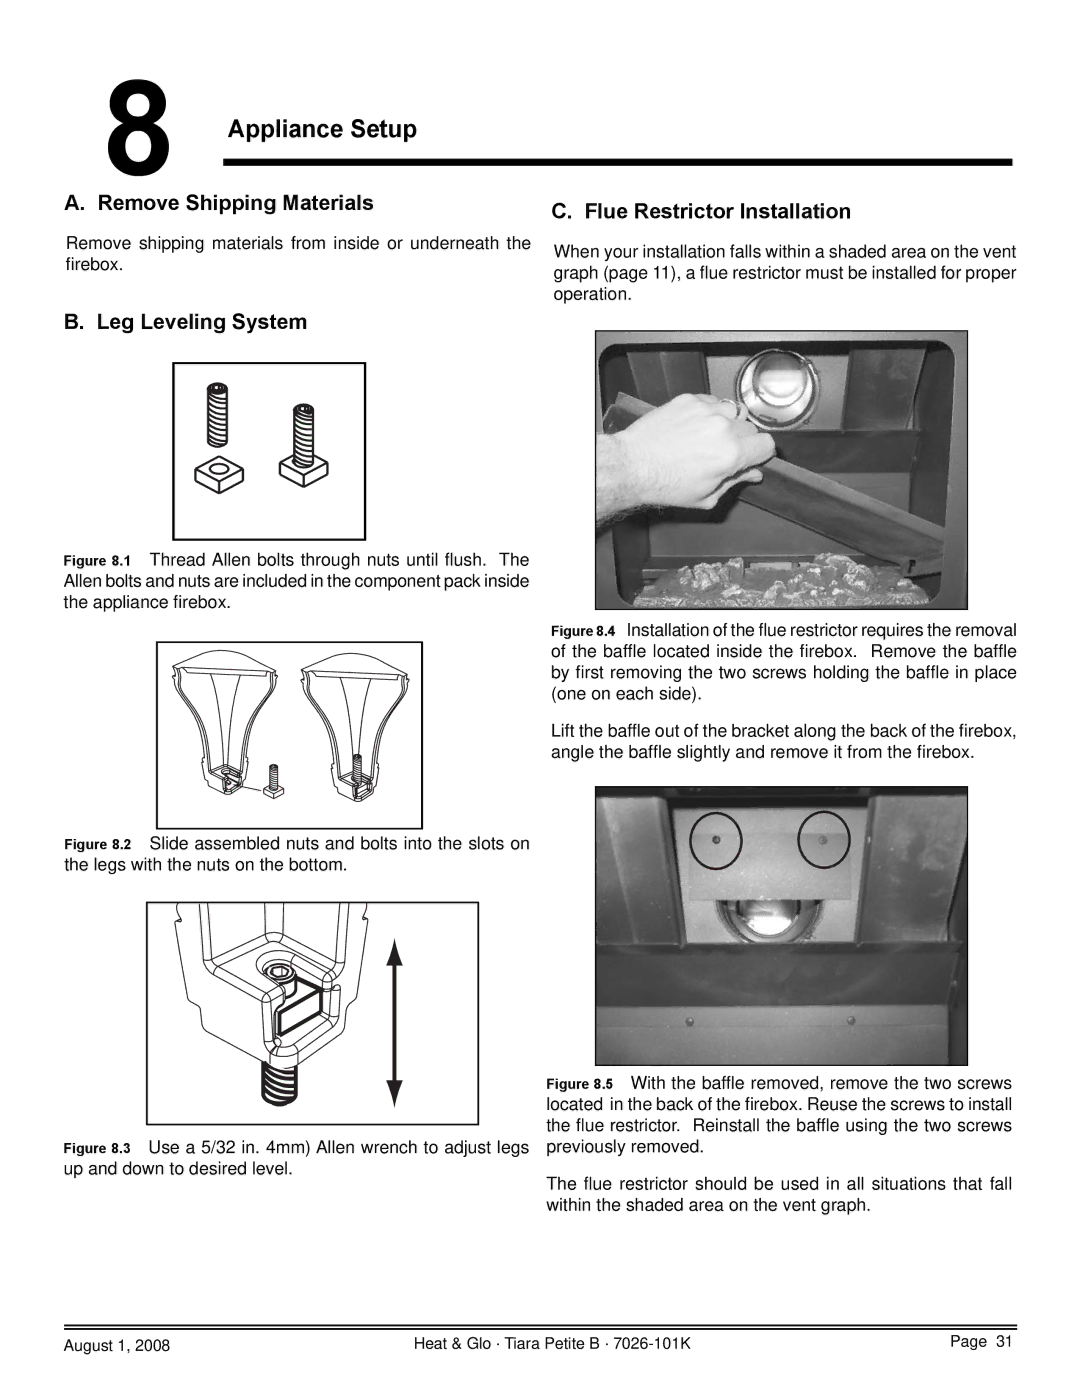
Figure 8.4 Installation of the flue restrictor requires the removal of the baffle located inside the firebox. Remove the baffle by first removing the two screws holding the baffle in place (one on each side).
Lift the baffle out of the bracket along the back of the firebox, angle the baffle slightly and remove it from the firebox.
Figure 8.5 With the baffle removed, remove the two screws located in the back of the firebox. Reuse the screws to install the flue restrictor. Reinstall the baffle using the two screws previously removed.
The flue restrictor should be used in all situations that fall within the shaded area on the vent graph.
August 1, 2008 | Heat & Glo · Tiara Petite B · | Page 31 |