2. Valve Regulator Replacement
![]() WARNING
WARNING
Fire Risk.
Explosion Risk.
•Disconnect any electrical cords and turn off gas supply to unit before proceeding if converting fuel on an appliance already fully installed.
Remove upper and lower back shield. Loosen the set col- lars on the extension rods with the 3/32 in. Allen wrench. Remove the rods and adapter cap.
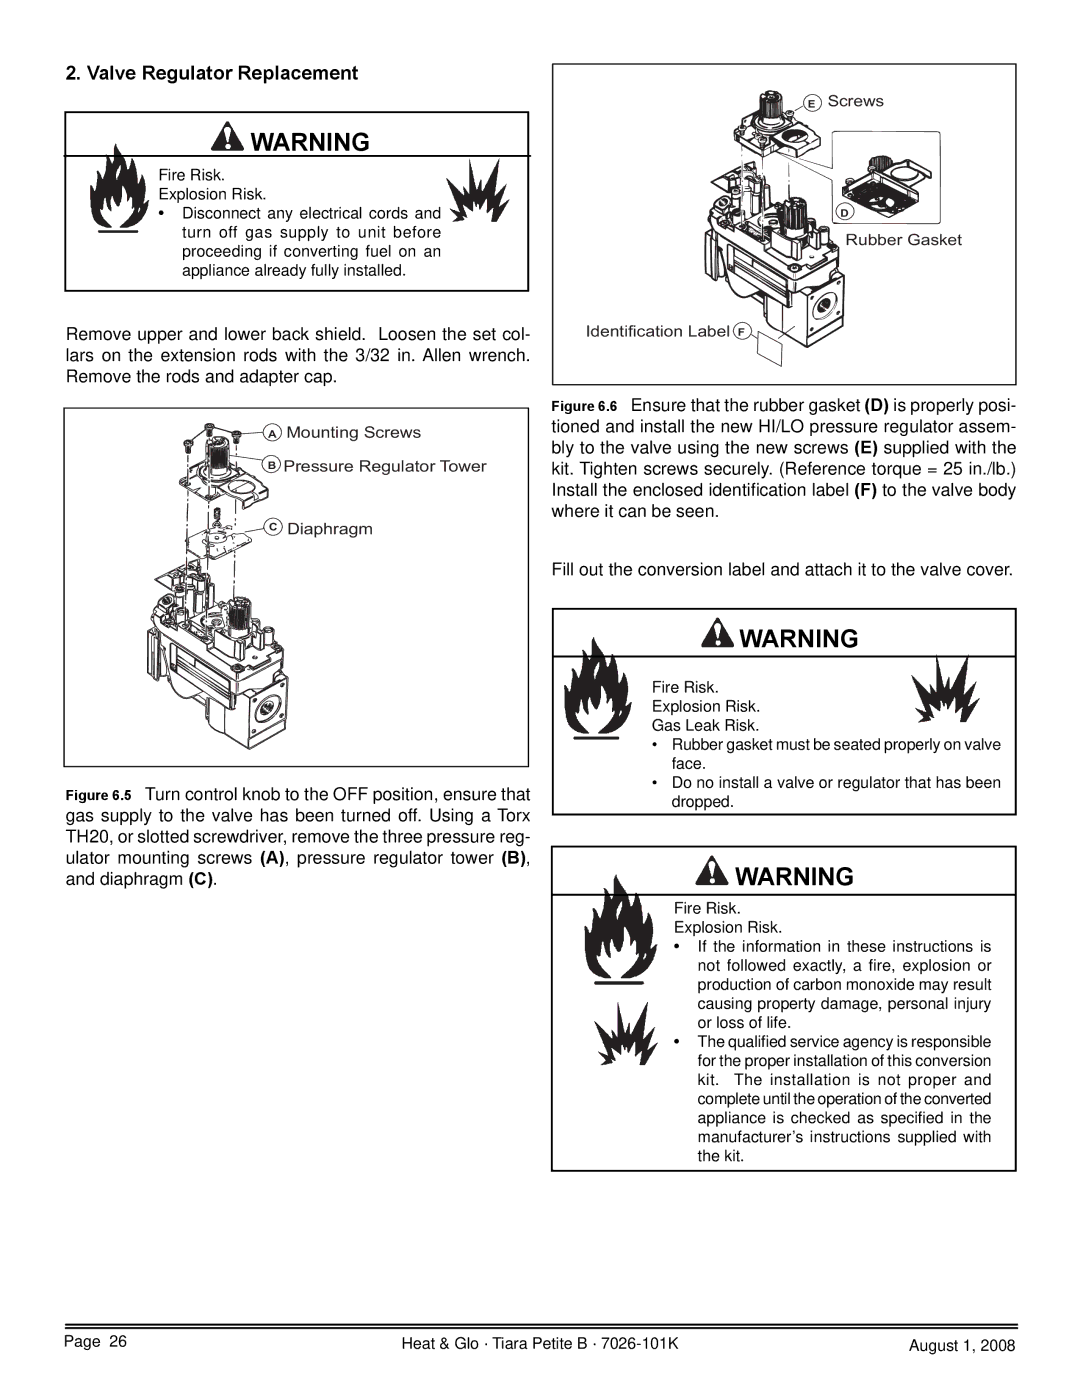
AMounting Screws
BPressure Regulator Tower
CDiaphragm
Figure 6.5 Turn control knob to the OFF position, ensure that gas supply to the valve has been turned off. Using a Torx TH20, or slotted screwdriver, remove the three pressure reg- ulator mounting screws (A), pressure regulator tower (B), and diaphragm (C).
E Screws
D
Rubber Gasket
Identification Label F 

Figure 6.6 Ensure that the rubber gasket (D) is properly posi- tioned and install the new HI/LO pressure regulator assem- bly to the valve using the new screws (E) supplied with the kit. Tighten screws securely. (Reference torque = 25 in./lb.) Install the enclosed identification label (F) to the valve body where it can be seen.
Fill out the conversion label and attach it to the valve cover.
![]() WARNING
WARNING
Fire Risk.
Explosion Risk.
Gas Leak Risk.
•Rubber gasket must be seated properly on valve face.
•Do no install a valve or regulator that has been dropped.
![]() WARNING
WARNING
Fire Risk.
Explosion Risk.
•If the information in these instructions is not followed exactly, a fire, explosion or production of carbon monoxide may result causing property damage, personal injury or loss of life.
•The qualified service agency is responsible for the proper installation of this conversion kit. The installation is not proper and complete until the operation of the converted appliance is checked as specified in the manufacturer’s instructions supplied with the kit.
Page 26 | Heat & Glo · Tiara Petite B · | August 1, 2008 |
