CHAPTER 2 |
| |
Setup and Configuration |
| |
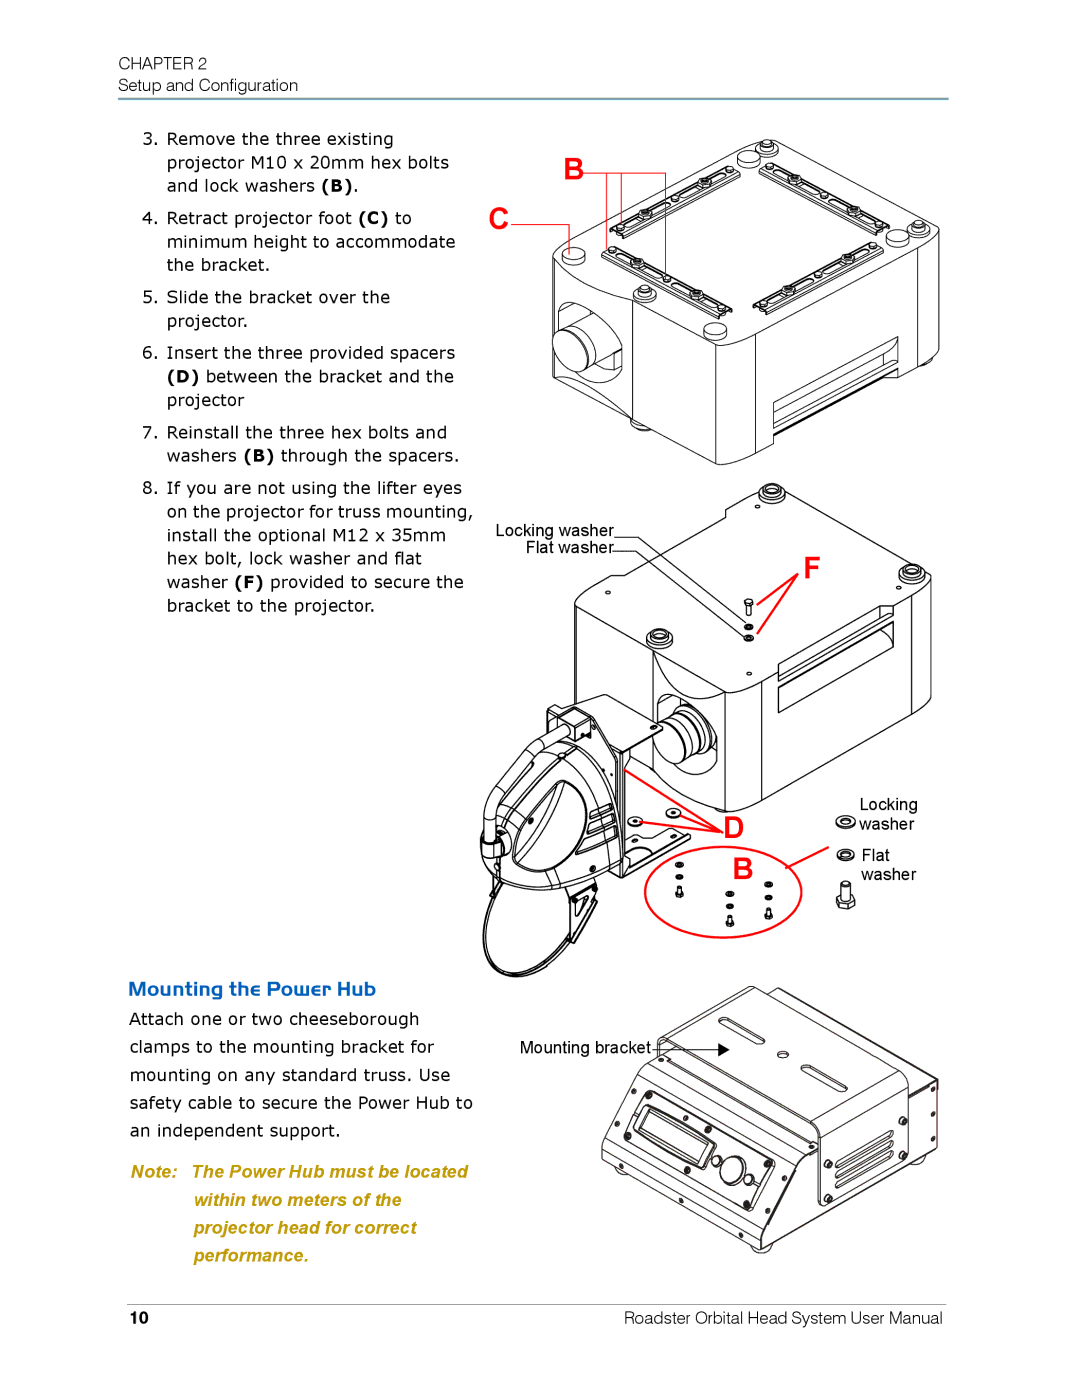
3. | Remove the three existing |
|
| projector M10 x 20mm hex bolts | B |
| and lock washers (B). | |
4. | Retract projector foot (C) to | C |
| ||
| minimum height to accommodate |
|
| the bracket. |
|
5.Slide the bracket over the projector.
6.Insert the three provided spacers
(D) between the bracket and the projector
7.Reinstall the three hex bolts and washers (B) through the spacers.
8.If you are not using the lifter eyes on the projector for truss mounting, install the optional M12 x 35mm hex bolt, lock washer and flat washer (F) provided to secure the bracket to the projector.
Locking washer
Flat washer
F
![]() D
D
B
Locking washer
Flat washer
Mounting the Power Hub
Attach one or two cheeseborough
clamps to the mounting bracket for Mounting bracket![]() mounting on any standard truss. Use
mounting on any standard truss. Use
safety cable to secure the Power Hub to an independent support.
Note: The Power Hub must be located within two meters of the projector head for correct performance.
10 | Roadster Orbital Head System User Manual |