CHAPTER 2
Setup and Configuration
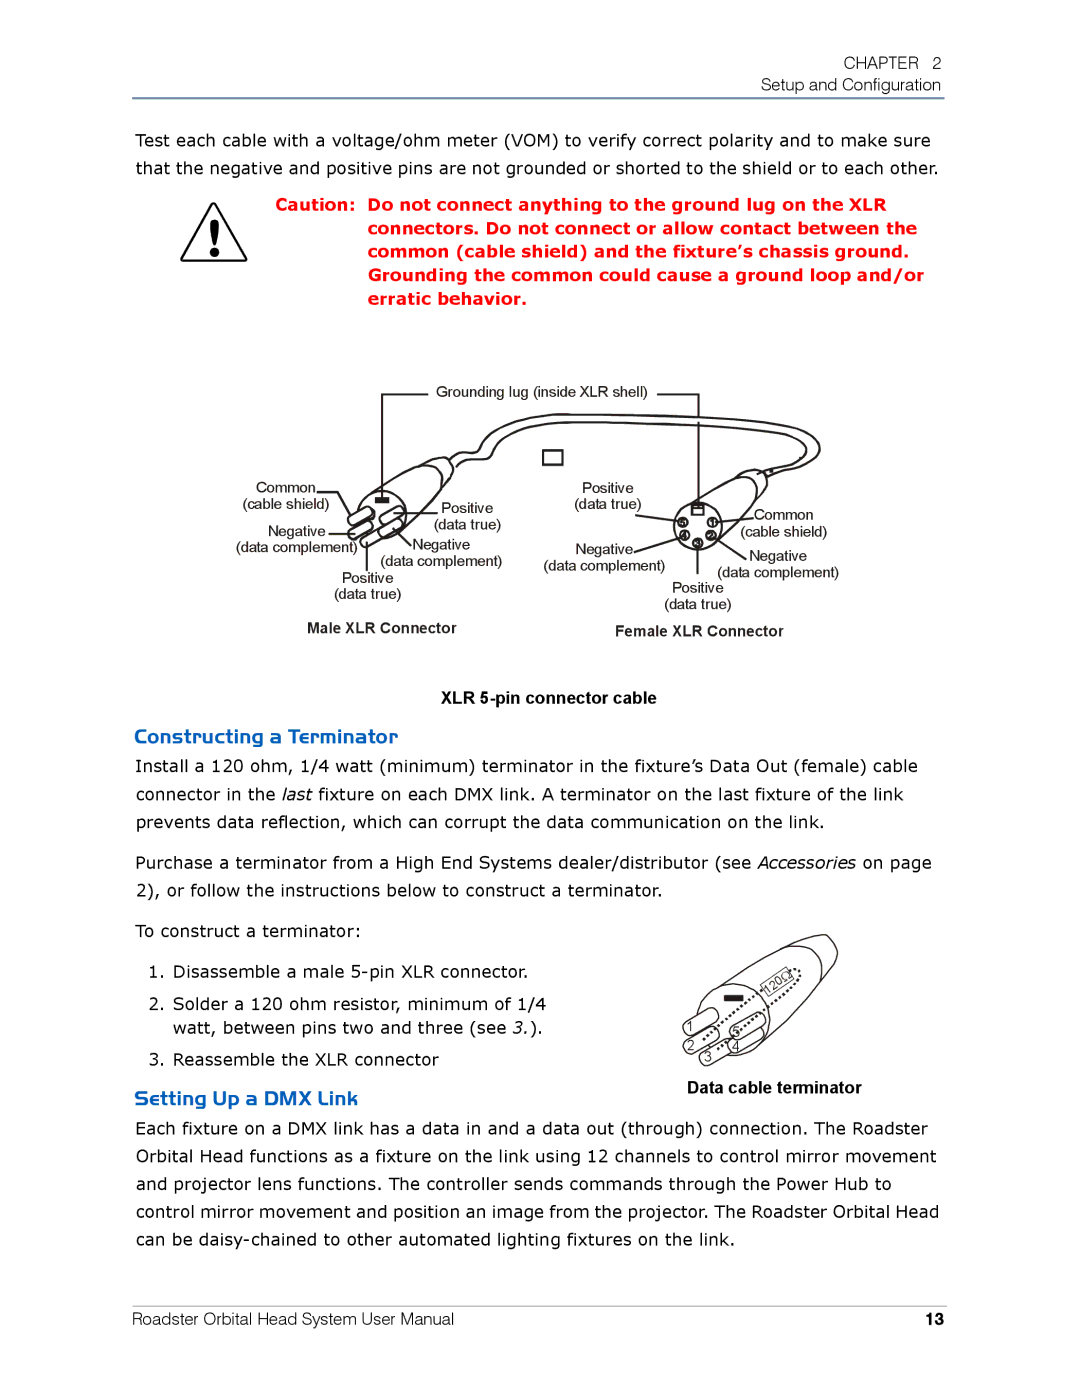
Test each cable with a voltage/ohm meter (VOM) to verify correct polarity and to make sure that the negative and positive pins are not grounded or shorted to the shield or to each other.
Caution: Do not connect anything to the ground lug on the XLR connectors. Do not connect or allow contact between the common (cable shield) and the fixture’s chassis ground. Grounding the common could cause a ground loop and/or erratic behavior.
| Grounding lug (inside XLR shell) |
|
| ||
Common |
| Positive |
|
| |
(cable shield) | Positive | (data true) |
| Common | |
Negative | (data true) |
|
| ||
|
| (cable shield) | |||
Negative |
|
| |||
(data complement) | Negative |
| Negative | ||
(data complement) | (data complement) | ||||
(data complement) | |||||
Positive |
|
|
| ||
|
|
| Positive | ||
(data true) |
|
|
| ||
|
| (data true) | |||
|
|
| |||
Male XLR Connector | Female XLR Connector | ||||
XLR 5-pin connector cable
Constructing a Terminator
Install a 120 ohm, 1/4 watt (minimum) terminator in the fixture’s Data Out (female) cable connector in the last fixture on each DMX link. A terminator on the last fixture of the link prevents data reflection, which can corrupt the data communication on the link.
Purchase a terminator from a High End Systems dealer/distributor (see Accessories on page 2), or follow the instructions below to construct a terminator.
To construct a terminator:
1.Disassemble a male
2.Solder a 120 ohm resistor, minimum of 1/4 watt, between pins two and three (see 3.).
3.Reassemble the XLR connector
Setting Up a DMX Link
Ω 0 2 ![]() 1
1 ![]()
1![]()
![]()
![]()
![]() 5
5![]()
![]()
2 3 ![]()
![]() 4
4
Data cable terminator
Each fixture on a DMX link has a data in and a data out (through) connection. The Roadster Orbital Head functions as a fixture on the link using 12 channels to control mirror movement and projector lens functions. The controller sends commands through the Power Hub to control mirror movement and position an image from the projector. The Roadster Orbital Head can be
Roadster Orbital Head System User Manual | 13 |