Focusing When Recording Movie
This DVD video camera/recorder automatically focuses a subject at the center of screen
Focusing range
You can switch the display mode of
•On T (tele) side: approximately 3.6 feet (1 m) from lens surface to infinity
•On W (wide) side: approximately 3/8” (1 cm) from lens surface to infinity
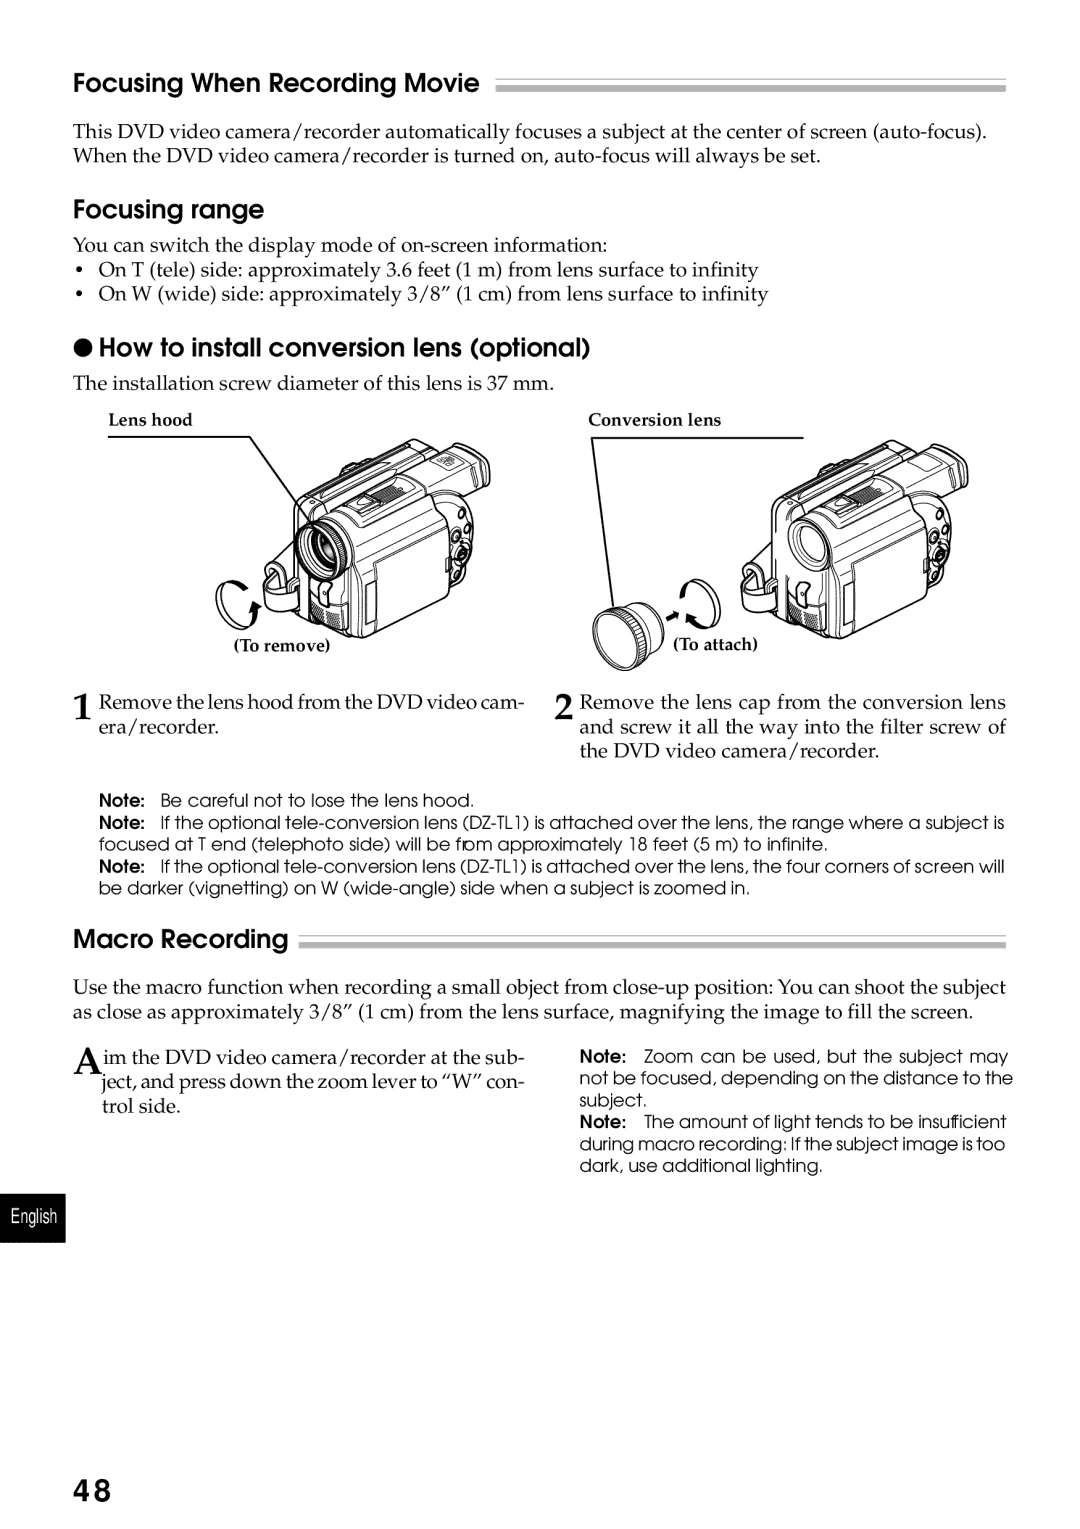
●How to install conversion lens (optional)
The installation screw diameter of this lens is 37 mm.
Lens hood | Conversion lens |
(To remove) | (To attach) |
1 Remove the lens hood from the DVD video cam- era/recorder.
2 Remove the lens cap from the conversion lens and screw it all the way into the filter screw of the DVD video camera/recorder.
Note: Be careful not to lose the lens hood.
Note: If the optional
Note: If the optional
Macro Recording
Use the macro function when recording a small object from
Aim the DVD video camera/recorder at the sub- ject, and press down the zoom lever to “W” con- trol side.
Note: Zoom can be used, but the subject may not be focused, depending on the distance to the subject.
Note: The amount of light tends to be insufficient
during macro recording: If the subject image is too dark, use additional lighting.
English
48
