12.2 Jumper socket setting
The Jumper sockets should be set only when the power is off.
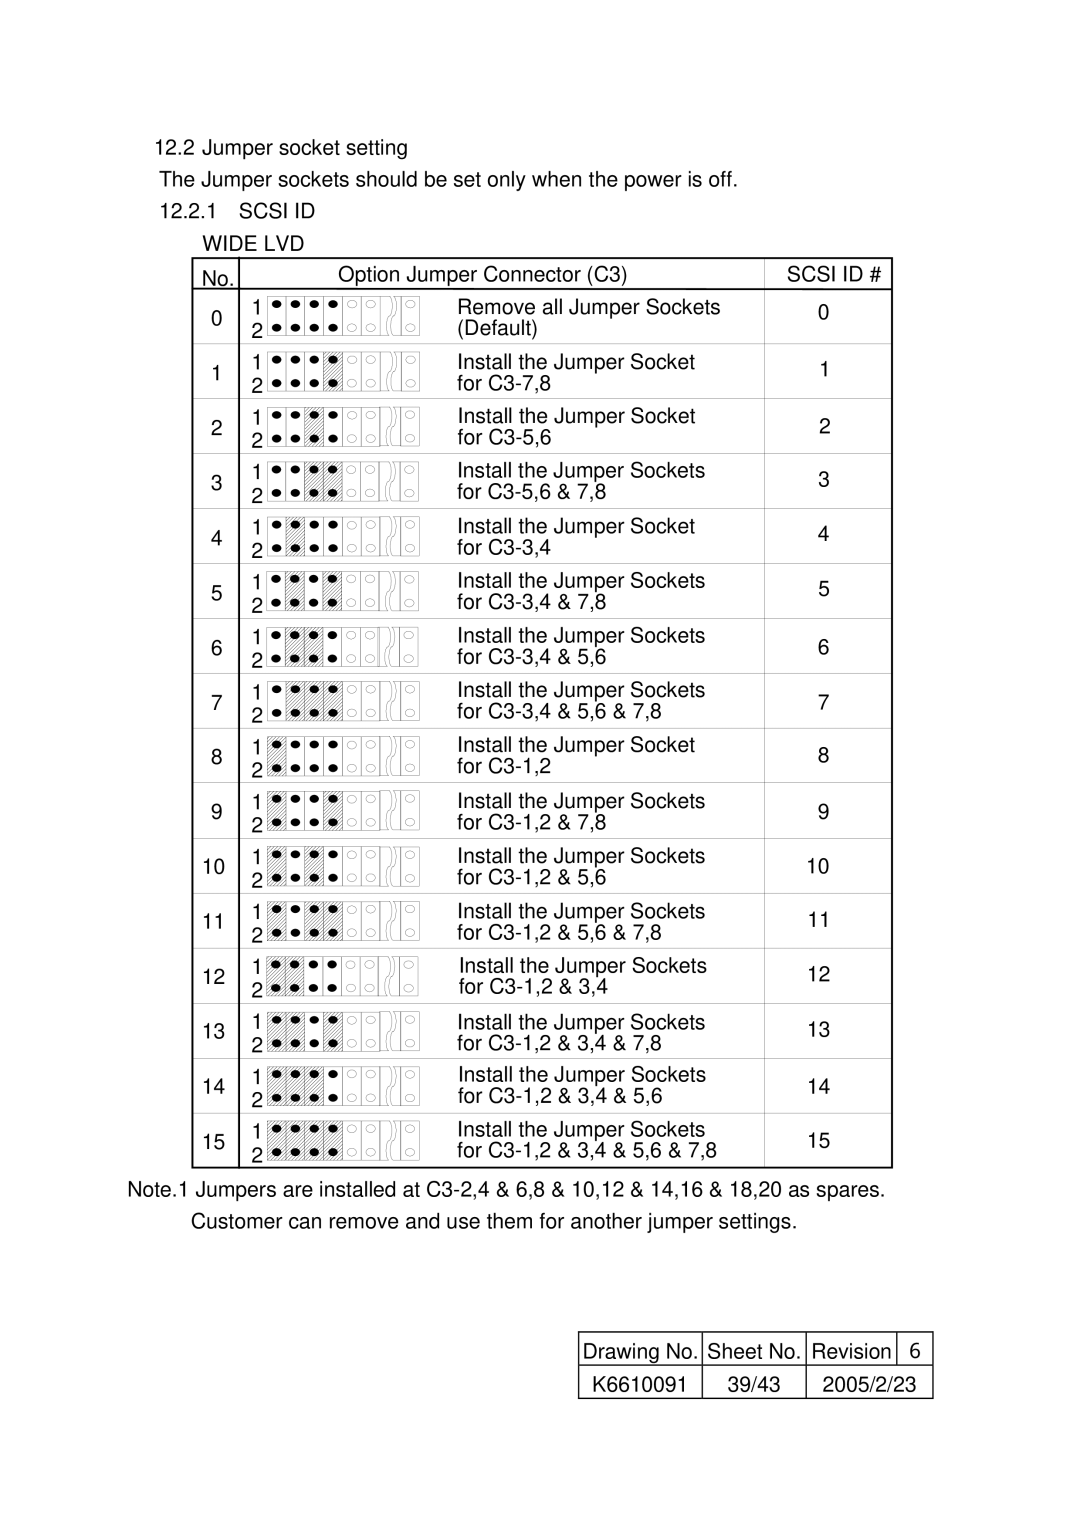
12.2.1SCSI ID WIDE LVD
No.
Option Jumper Connector (C3)
SCSI ID #
0
1
2
3
4
5
6
7
8
9
10
11
12
13
14
15
1 ![]()
![]()
![]()
![]() 2
2 ![]()
![]()
![]()
![]()
1 ![]()
![]()
![]() 2
2 ![]()
![]()
![]()
1 ![]()
![]()
![]()
![]() 2
2 ![]()
![]()
![]()
![]()
1 ![]()
![]()
![]()
![]() 2
2 ![]()
![]()
![]()
![]()
1 ![]()
![]()
![]() 2
2 ![]()
![]()
![]()
1 ![]()
![]() 2
2 ![]()
![]()
1 ![]()
![]()
![]()
![]() 2
2 ![]()
![]()
![]()
![]()
1 ![]()
![]() 2
2 ![]()
![]()
1 ![]()
![]()
![]() 2
2 ![]()
![]()
![]()
1 ![]()
![]()
![]() 2
2 ![]()
![]()
![]()
1 ![]()
![]() 2
2 ![]()
![]()
1 ![]()
![]() 2
2 ![]()
![]()
1 ![]()
![]() 2
2 ![]()
![]()
1 ![]()
![]() 2
2 ![]()
![]()
1 ![]()
![]() 2
2 ![]()
![]()
1 ![]()
![]() 2
2 ![]()
![]()
Remove all Jumper Sockets (Default)
Install the Jumper Socket for
Install the Jumper Socket for
Install the Jumper Sockets for
Install the Jumper Socket for
Install the Jumper Sockets for
Install the Jumper Sockets for
Install the Jumper Sockets for
Install the Jumper Socket for
Install the Jumper Sockets for
Install the Jumper Sockets for
Install the Jumper Sockets for
Install the Jumper Sockets for
Install the Jumper Sockets for
Install the Jumper Sockets for
Install the Jumper Sockets for
0
1
2
3
4
5
6
7
8
9
10
11
12
13
14
15
Note.1 Jumpers are installed at
Drawing No. Sheet No. Revision 6 | ||
K6610091 | 39/43 | 2005/2/23 |