.A complete Parts List is available at www.HobartWelders.com
4-11. Installing Alternative Plug
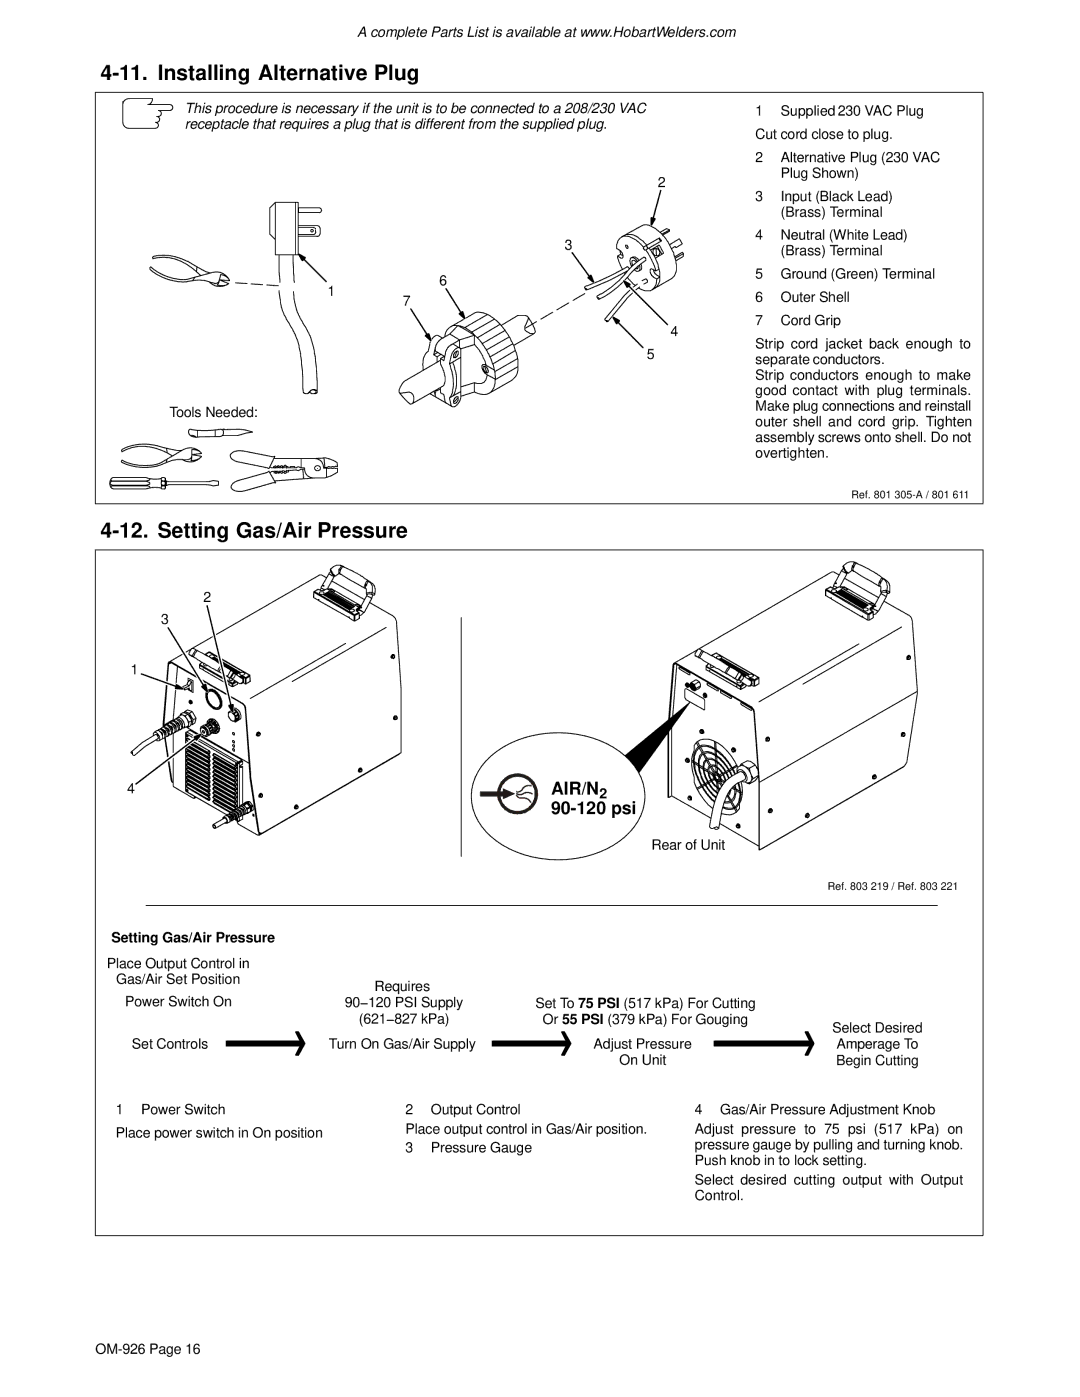
This procedure is necessary if the unit is to be connected to a 208/230 VAC receptacle that requires a plug that is different from the supplied plug.
1 Supplied 230 VAC Plug
Cut cord close to plug.
1
Tools Needed:
2
3
6
7
4
5
2Alternative Plug (230 VAC Plug Shown)
3Input (Black Lead) (Brass) Terminal
4Neutral (White Lead) (Brass) Terminal
5Ground (Green) Terminal
6Outer Shell
7Cord Grip
Strip cord jacket back enough to separate conductors.
Strip conductors enough to make good contact with plug terminals. Make plug connections and reinstall outer shell and cord grip. Tighten assembly screws onto shell. Do not overtighten.
Ref. 801
4-12. Setting Gas/Air Pressure
2
3
1
4
AIR/N2
90-120 psi
Rear of Unit
Ref. 803 219 / Ref. 803 221
Setting Gas/Air Pressure |
|
|
|
|
| |
Place Output Control in |
|
|
|
|
| |
Gas/Air Set Position | Requires |
|
|
|
| |
Power Switch On |
|
|
|
| ||
90−120 PSI Supply | Set To 75 PSI (517 kPa) For Cutting |
| ||||
|
| (621−827 kPa) | Or 55 PSI (379 kPa) For Gouging | Select Desired | ||
|
|
|
|
|
| |
Set Controls |
| Turn On Gas/Air Supply |
| Adjust Pressure |
| Amperage To |
|
|
| ||||
|
|
| ||||
|
|
|
| On Unit | Begin Cutting | |
1 Power Switch | 2 | Output Control |
Place power switch in On position | Place output control in Gas/Air position. | |
| 3 | Pressure Gauge |
4 Gas/Air Pressure Adjustment Knob
Adjust pressure to 75 psi (517 kPa) on pressure gauge by pulling and turning knob. Push knob in to lock setting.
Select desired cutting output with Output Control.
