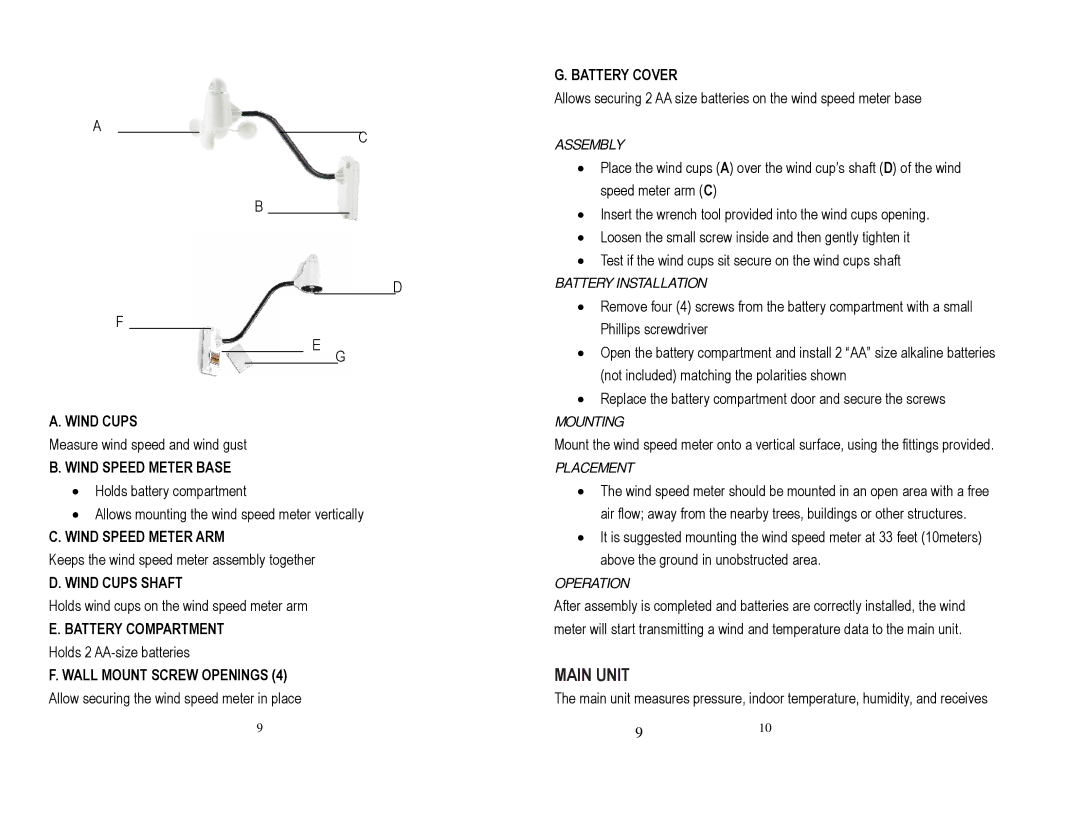
A
C
G. BATTERY COVER
Allows securing 2 AA size batteries on the wind speed meter base
ASSEMBLY
B
F
E
A. WIND CUPS
Measure wind speed and wind gust
B. WIND SPEED METER BASE
D
G
• Place the wind cups (A) over the wind cup’s shaft (D) of the wind |
speed meter arm (C) |
• Insert the wrench tool provided into the wind cups opening. |
• Loosen the small screw inside and then gently tighten it |
• Test if the wind cups sit secure on the wind cups shaft |
BATTERY INSTALLATION |
• Remove four (4) screws from the battery compartment with a small |
Phillips screwdriver |
• Open the battery compartment and install 2 “AA” size alkaline batteries |
(not included) matching the polarities shown |
• Replace the battery compartment door and secure the screws |
MOUNTING |
Mount the wind speed meter onto a vertical surface, using the fittings provided. |
PLACEMENT |
•Holds battery compartment
•Allows mounting the wind speed meter vertically
C. WIND SPEED METER ARM
Keeps the wind speed meter assembly together
D. WIND CUPS SHAFT
Holds wind cups on the wind speed meter arm
E. BATTERY COMPARTMENT
Holds 2
F. WALL MOUNT SCREW OPENINGS (4)
Allow securing the wind speed meter in place
9
• | The wind speed meter should be mounted in an open area with a free |
| air flow; away from the nearby trees, buildings or other structures. |
• | It is suggested mounting the wind speed meter at 33 feet (10meters) |
| above the ground in unobstructed area. |
OPERATION
After assembly is completed and batteries are correctly installed, the wind meter will start transmitting a wind and temperature data to the main unit.
MAIN UNIT
The main unit measures pressure, indoor temperature, humidity, and receives
910