ASSEMBLY
Assembly requires two people. Set the treadmill in a cleared area and pose of the packing materials until assembly is completed. Assembly
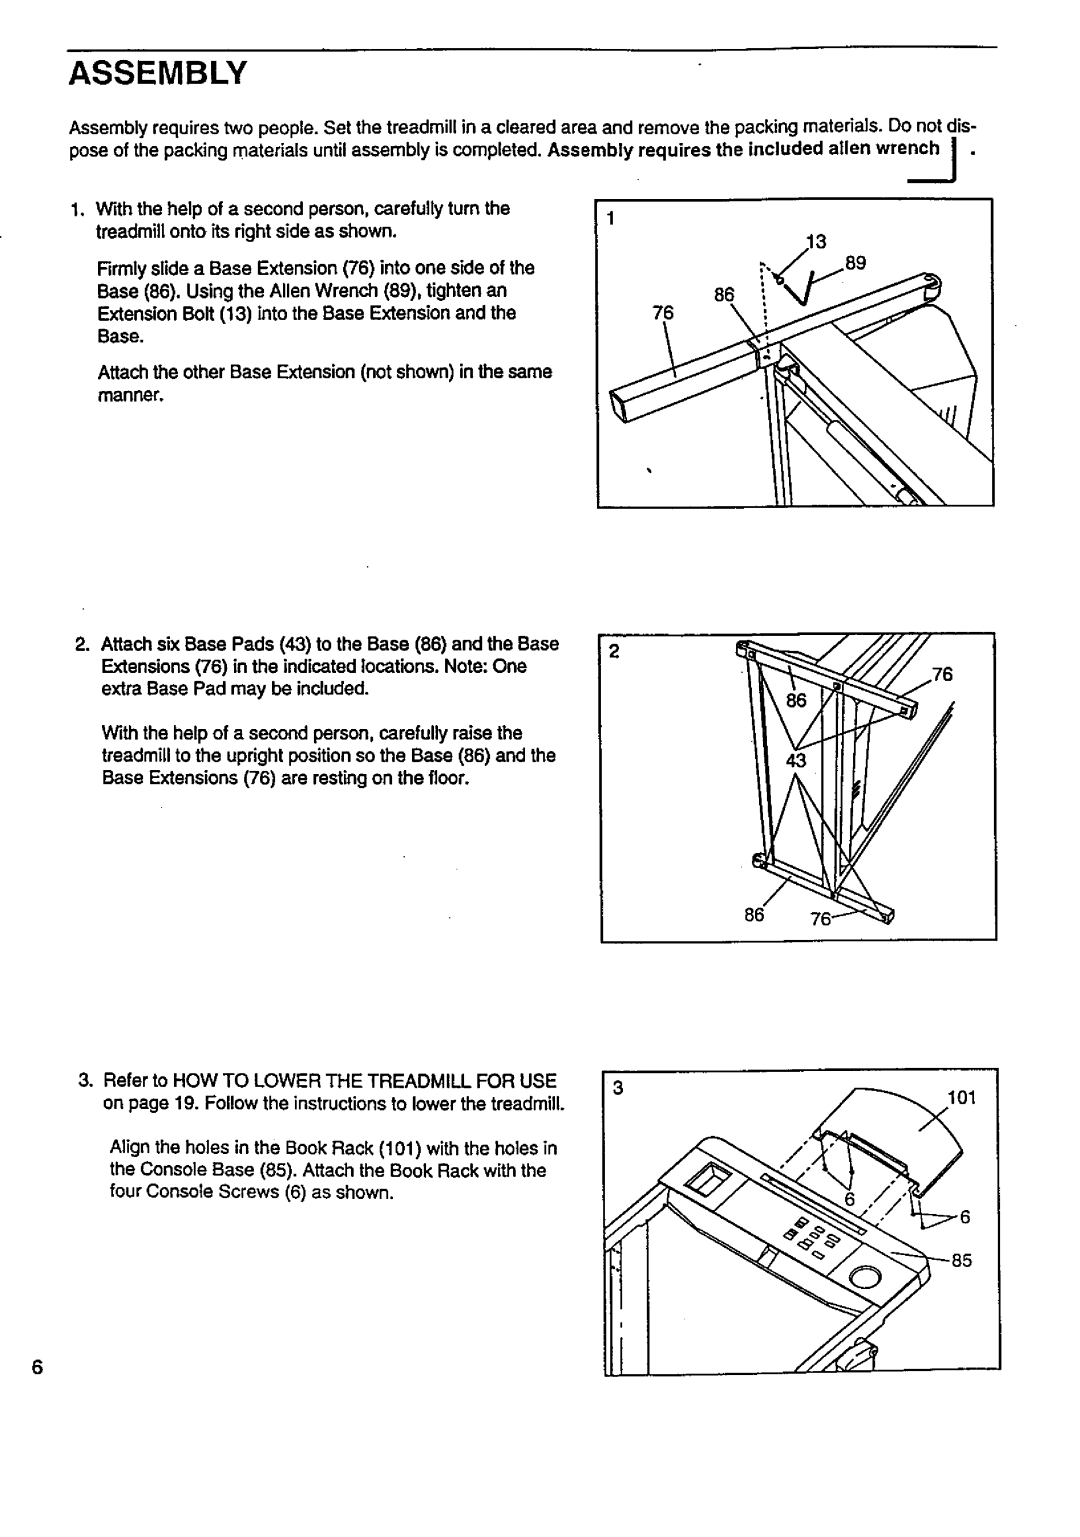
°With the help of a second person, carefully turn the treadmill onto its right side as shown.
Firmly slide a Base Extension (76) into one side of the Base (86). Using the Allen Wrench (89), tighten an Extension Bolt (13) into the Base Extension and the
Base.
Attach the other Base Extension (not shown) in the same manner.
2.Attach six Base Pads (43) to the Base (86) and the Base Extensions (76) in the indicated locations. Note: One extra Base Pad may be included.
With the help of a second person, carefully raise the treadmill to the upright position so the Base (86) and the Base Extensions (76) are resting on the floor.
remove the packing materials. Do not dis- requires the included allen wrench _ .
._J
86
76
86
3° Refer to HOW TO LOWER THE TREADMILL FOR USE | 3 | 1oi | |
on page 19. Follow the instructions to lower the treadmill. | |||
| |||
|
| ||
Align the holes in the Book Rack (101) with the holes in |
|
| |
the Console Base (85). Attach the Book Rack with the |
|
| |
four Console Screws (6) as shown. |
|
|
6