
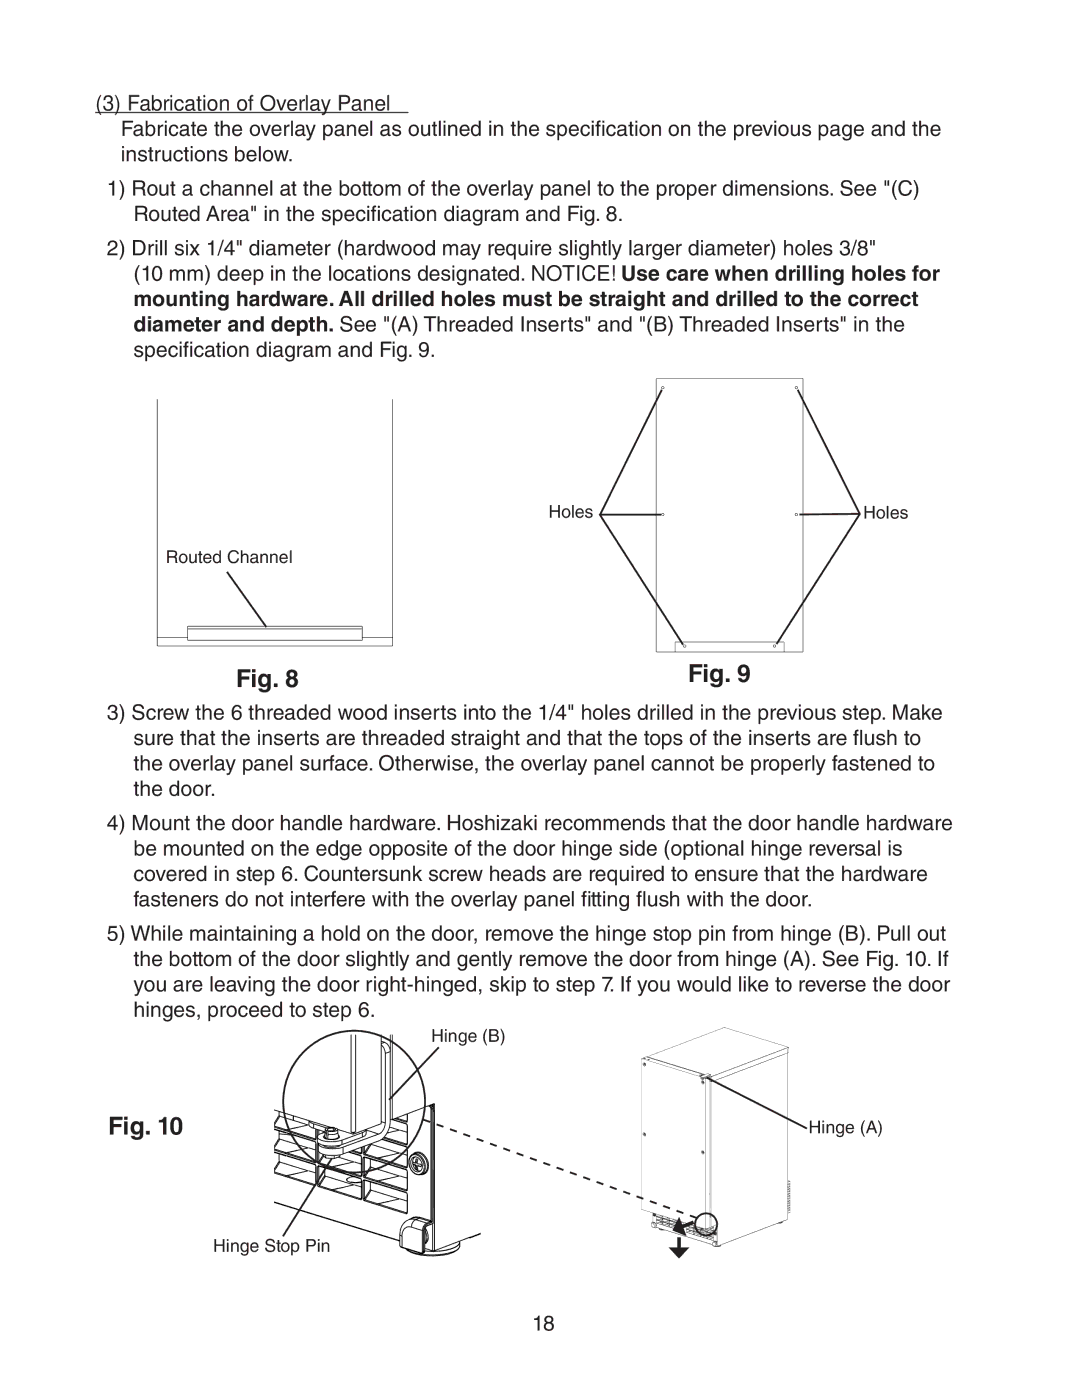
C-101BAH, C-101BAH-AD, C-101BAH-DS, C-101BAH-ADDS specifications
Hoshizaki is renowned for its high-quality ice-making machines, and the C-101BAH series is no exception. This series includes models such as the C-101BAH-AD, C-101BAH-DS, C-101BAH-ADDS, and C-101BAH, each designed to meet the varying needs of commercial kitchens, bars, and establishments requiring reliable ice production. The primary focus of these units is to provide efficient, sanitary, and quality ice.One of the standout features of the Hoshizaki C-101BAH series is its innovative cube ice production technology. These machines are designed to produce crescent-shaped ice cubes, known for their durability and slow melting characteristics. This is highly beneficial for businesses that want to maintain the temperature of beverages, enhancing the customer experience. The ice produced is crystal-clear and free of impurities, thanks to the advanced purification systems employed in the machinery.
A hallmark of the C-101BAH series is its energy efficiency, making it an environmentally friendly choice for ice production. Hoshizaki integrates state-of-the-art technology that minimizes energy consumption while maximizing ice output. This is crucial for restaurants and bars looking to reduce overhead costs without compromising on service quality.
Additionally, the C-101BAH models boast robust construction and durability. Made from high-quality stainless steel, they resist corrosion and are easy to clean, ensuring longevity and hygiene in any working environment. The compact design of these machines allows for flexible installation in various spaces, making them suitable for countertops or under-counter applications.
Moreover, Hoshizaki machines are designed with user-friendly controls featuring intuitive digital displays that make operation and troubleshooting straightforward. Maintenance is also simplified due to accessible components, enabling quicker servicing and reduced downtime.
In summary, the Hoshizaki C-101BAH series, including the C-101BAH-AD, C-101BAH-DS, C-101BAH-ADDS, and C-101BAH, exemplifies the brand's commitment to innovation and quality. These ice machines stand out for their efficient ice production, energy-saving technologies, durable construction, and ease of use and maintenance, making them a top choice for commercial establishments demanding reliability and high performance in ice-making solutions.