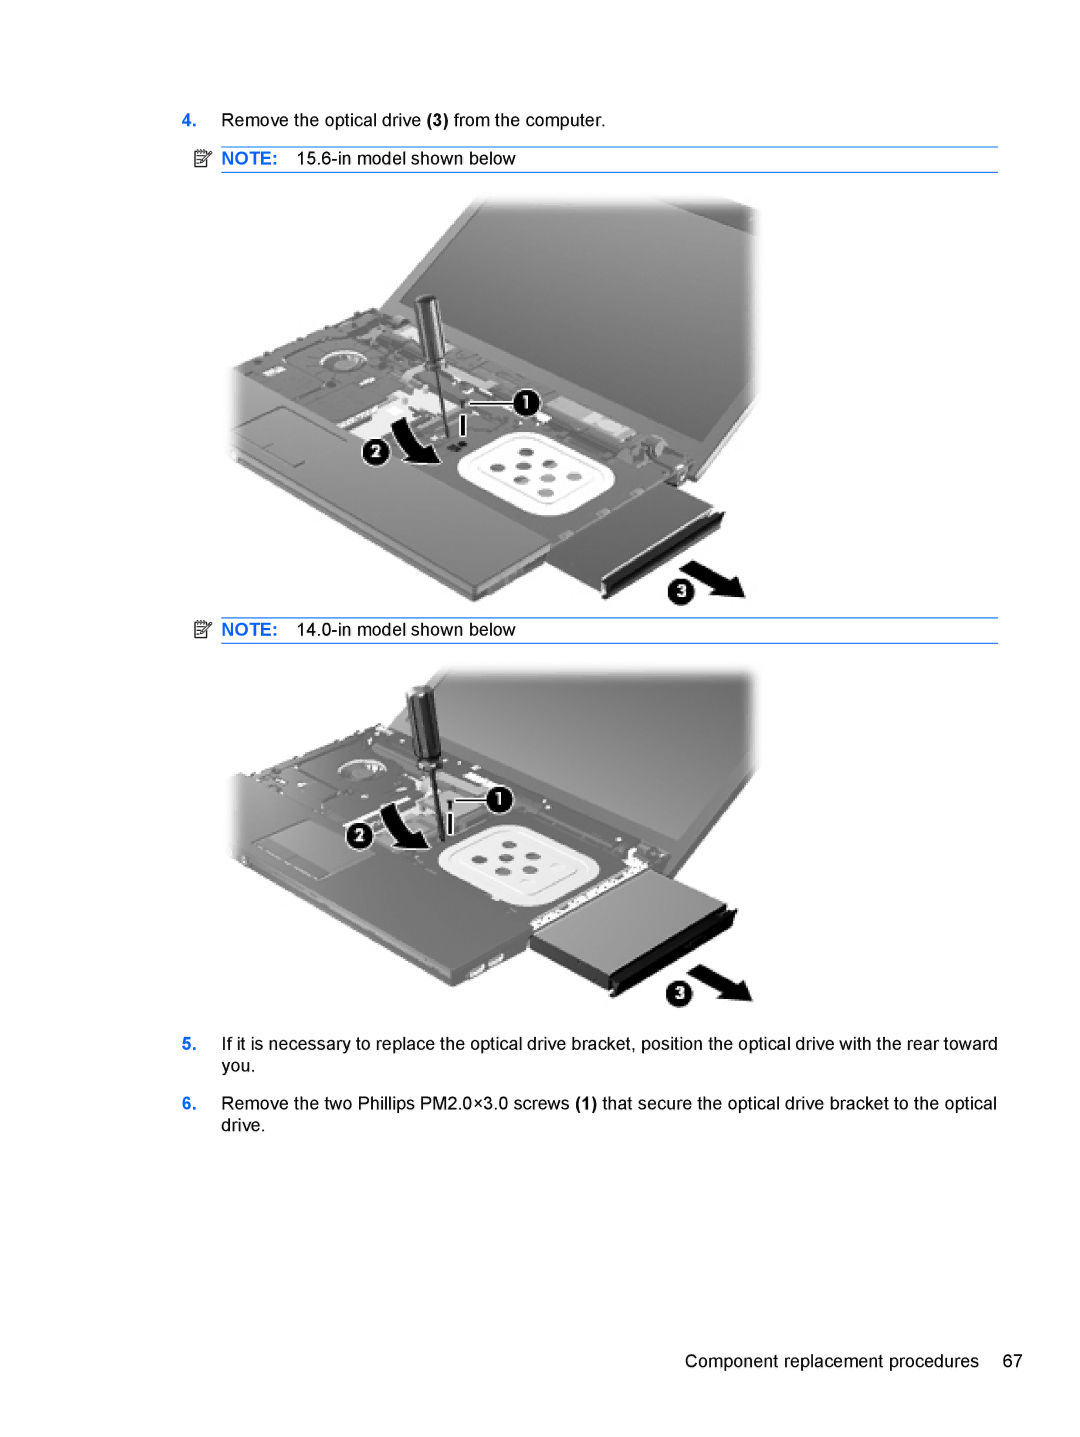
4.Remove the optical drive (3) from the computer.
![]() NOTE:
NOTE:
![]() NOTE:
NOTE:
5.If it is necessary to replace the optical drive bracket, position the optical drive with the rear toward you.
6.Remove the two Phillips PM2.0×3.0 screws (1) that secure the optical drive bracket to the optical drive.
Component replacement procedures 67
