SECTION 3
OPERATING THE ASTROJET 2600P/2800P
To use the Overlay feature, first create a layout in an application such as Microsoft Word. Place all of the fixed information and graphics on this layout. Open the layout and go to Print in the File menu. Click on Features and then click on Overlay. Select “Contains overlay” from the box, and then click on Apply and OK.
Next, click OK on the “Print” window. The overlay will download.
Now open the job that contains the variable data and using File then Print from the drop down menu open the “Print” window for the application. Click on Properties then on the Features tab. Then click on the drop down menu under Overlay and click on Previous job contains overlay. Click Apply, then OK. When the Print window reappears, click OK to send the job to the printer. To start printing press the ENTER key on the printer.
If you wish to print a second job using the same overlay, simply open that job and send it to the printer. If the next job does not contain an overlay, then click on Properties in the “Print” window, select Overlay, then No overlay. Click Apply, then OK.
To print the next job with a different overlay, repeat the process for the first overlay.
NOTE: Turning the printer OFF, then ON will clear the overlay and the job.
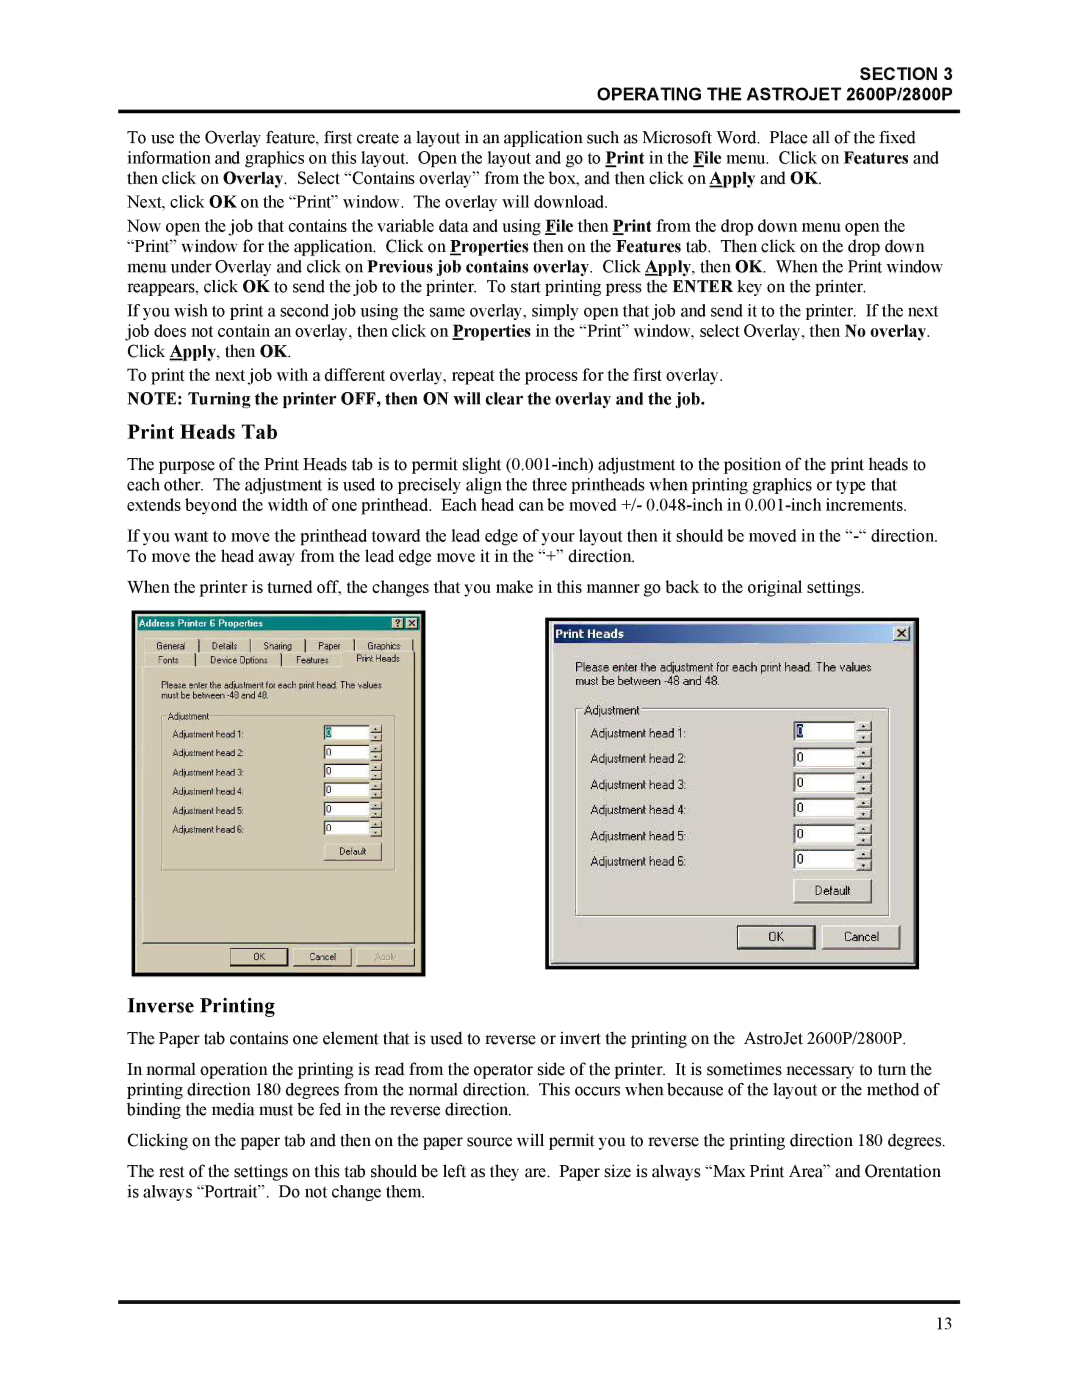
Print Heads Tab
The purpose of the Print Heads tab is to permit slight
If you want to move the printhead toward the lead edge of your layout then it should be moved in the
When the printer is turned off, the changes that you make in this manner go back to the original settings.
Inverse Printing
The Paper tab contains one element that is used to reverse or invert the printing on the AstroJet 2600P/2800P.
In normal operation the printing is read from the operator side of the printer. It is sometimes necessary to turn the printing direction 180 degrees from the normal direction. This occurs when because of the layout or the method of binding the media must be fed in the reverse direction.
Clicking on the paper tab and then on the paper source will permit you to reverse the printing direction 180 degrees.
The rest of the settings on this tab should be left as they are. Paper size is always “Max Print Area” and Orentation is always “Portrait”. Do not change them.
13