SECTION 4
MAINTENANCE
2600P/2800P/2800P Printer. It can be accessed from the LCD panel on the Printer from the MENU key. If this does not solve the problem then proceed as follows:
1.Wipe the printhead with a wet cloth as described in "Cleaning the Printhead" above.
2.Perform the Purge routine from the Printer by pressing the MENU key momentarily and then the + key. Load media and press the ENTER key to purge. Repeat if necessary.
3.Wipe the printhead again with a moist cloth.
NOTE: For more information refer to the Troubleshooting Print Heads in Section 5 – Trouble Shooting Guide.
Jams in the ASTROJET 2600P/2800P Printer
If a jam occurs, STOP the Printer. Up to 10 missed addresses can be recovered at the printer control panel. (See Section 3 – Operating the ASTROJET 2600P/2800P “Print Recovery After Jam.
Some possible reasons for jamming are:
1.Feeding more than one piece of media.
2.Damaged media, such a
3.Media that is not stiff enough may not be usable. Media that meets Postal stiffness requirements for automated feeding is acceptable in the ASTROJET 2600P/2800P.
4.Envelopes that are caught under the flap of another envelope or stuck to one another may cause jamming.
Removing Jammed Media
1.It may be necessary to move one or more of the printheads to gain access to the jammed media. Take care in removing jammed media to prevent damage to the print heads. All pieces of the jammed media must be removed from the feed path.
2.Follow the instructions in Section 3 – Operating the ASTROJET 2600P/2800P “Print Recovery After Jam”.
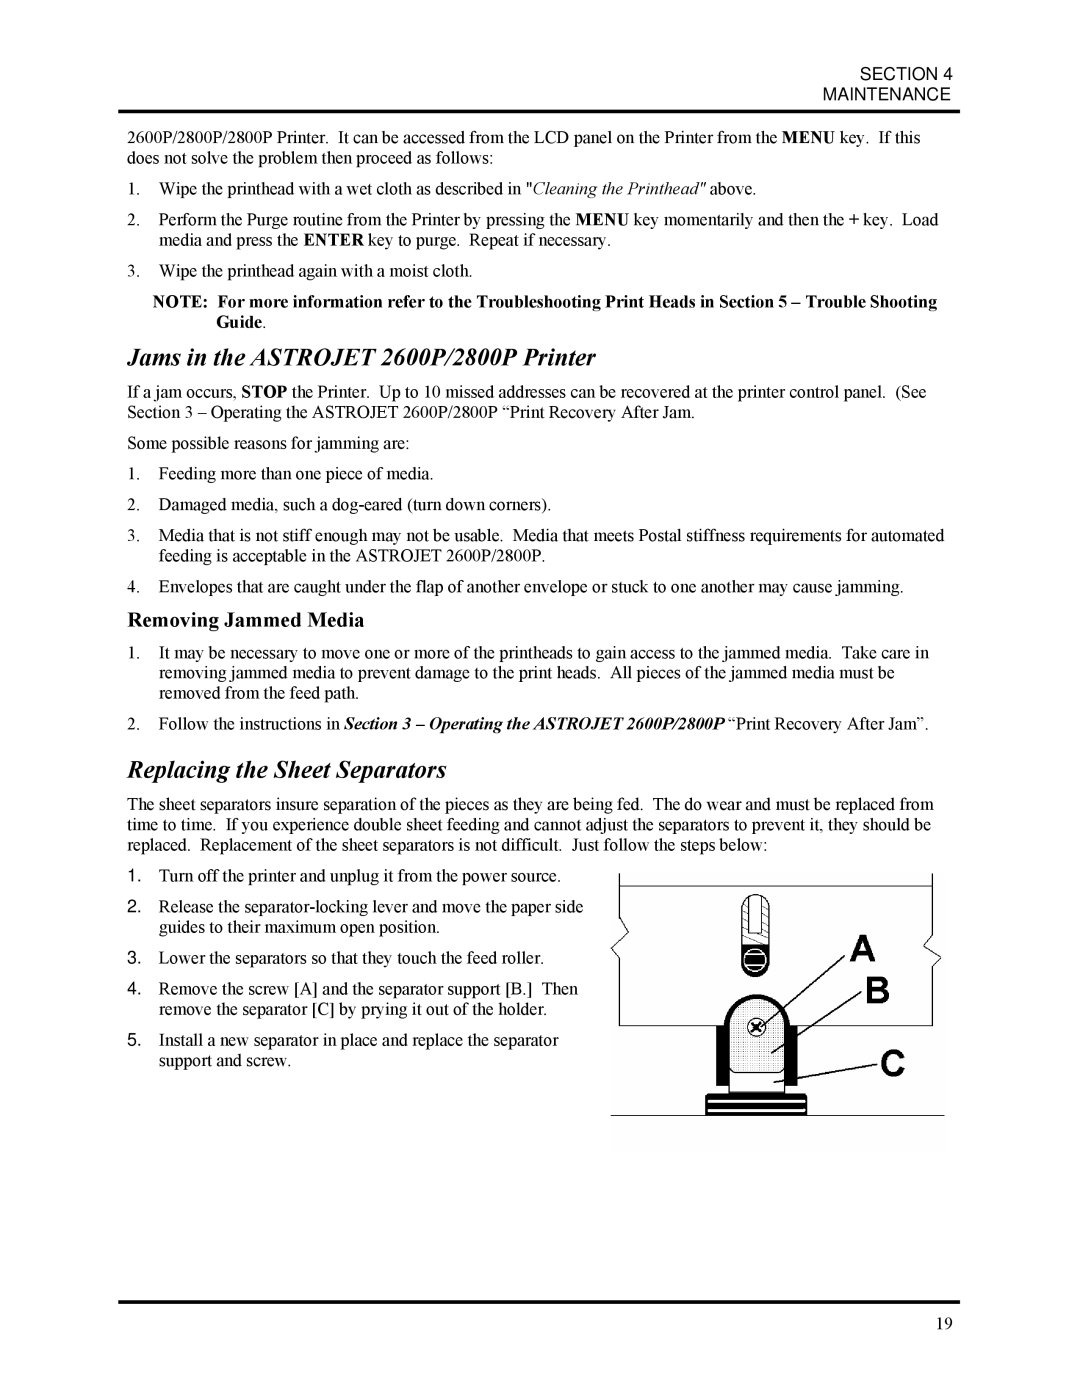
Replacing the Sheet Separators
The sheet separators insure separation of the pieces as they are being fed. The do wear and must be replaced from time to time. If you experience double sheet feeding and cannot adjust the separators to prevent it, they should be replaced. Replacement of the sheet separators is not difficult. Just follow the steps below:
1.Turn off the printer and unplug it from the power source.
2.Release the
3.Lower the separators so that they touch the feed roller.
4.Remove the screw [A] and the separator support [B.] Then remove the separator [C] by prying it out of the holder.
5.Install a new separator in place and replace the separator support and screw.
19