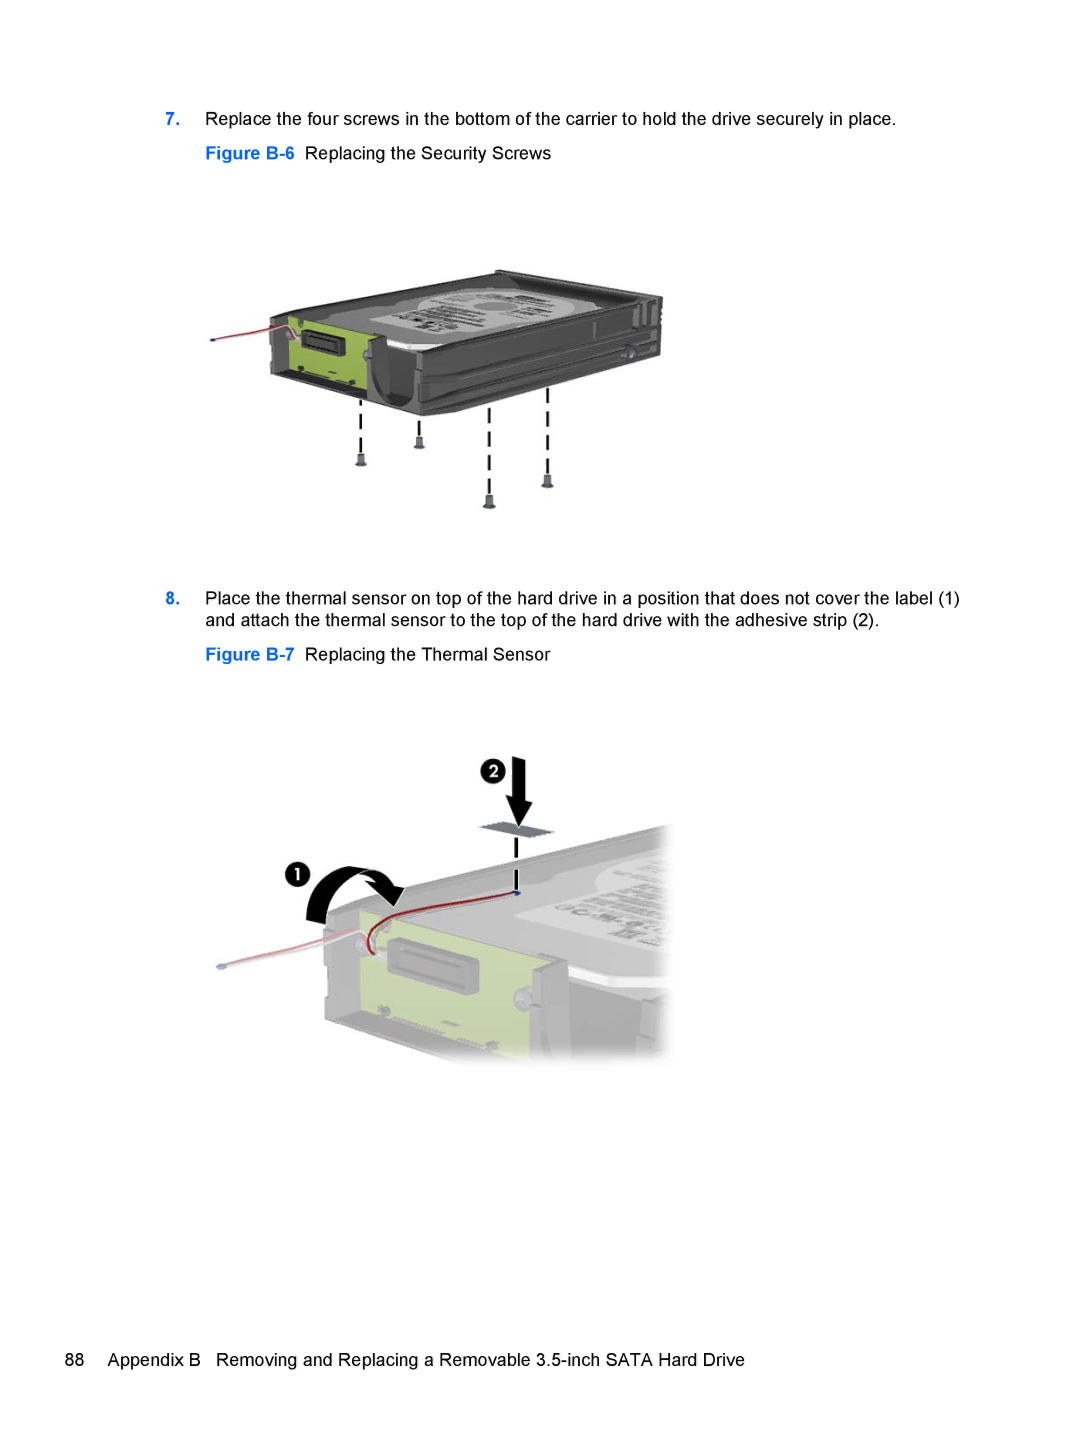
7.Replace the four screws in the bottom of the carrier to hold the drive securely in place. Figure
8.Place the thermal sensor on top of the hard drive in a position that does not cover the label (1) and attach the thermal sensor to the top of the hard drive with the adhesive strip (2).
