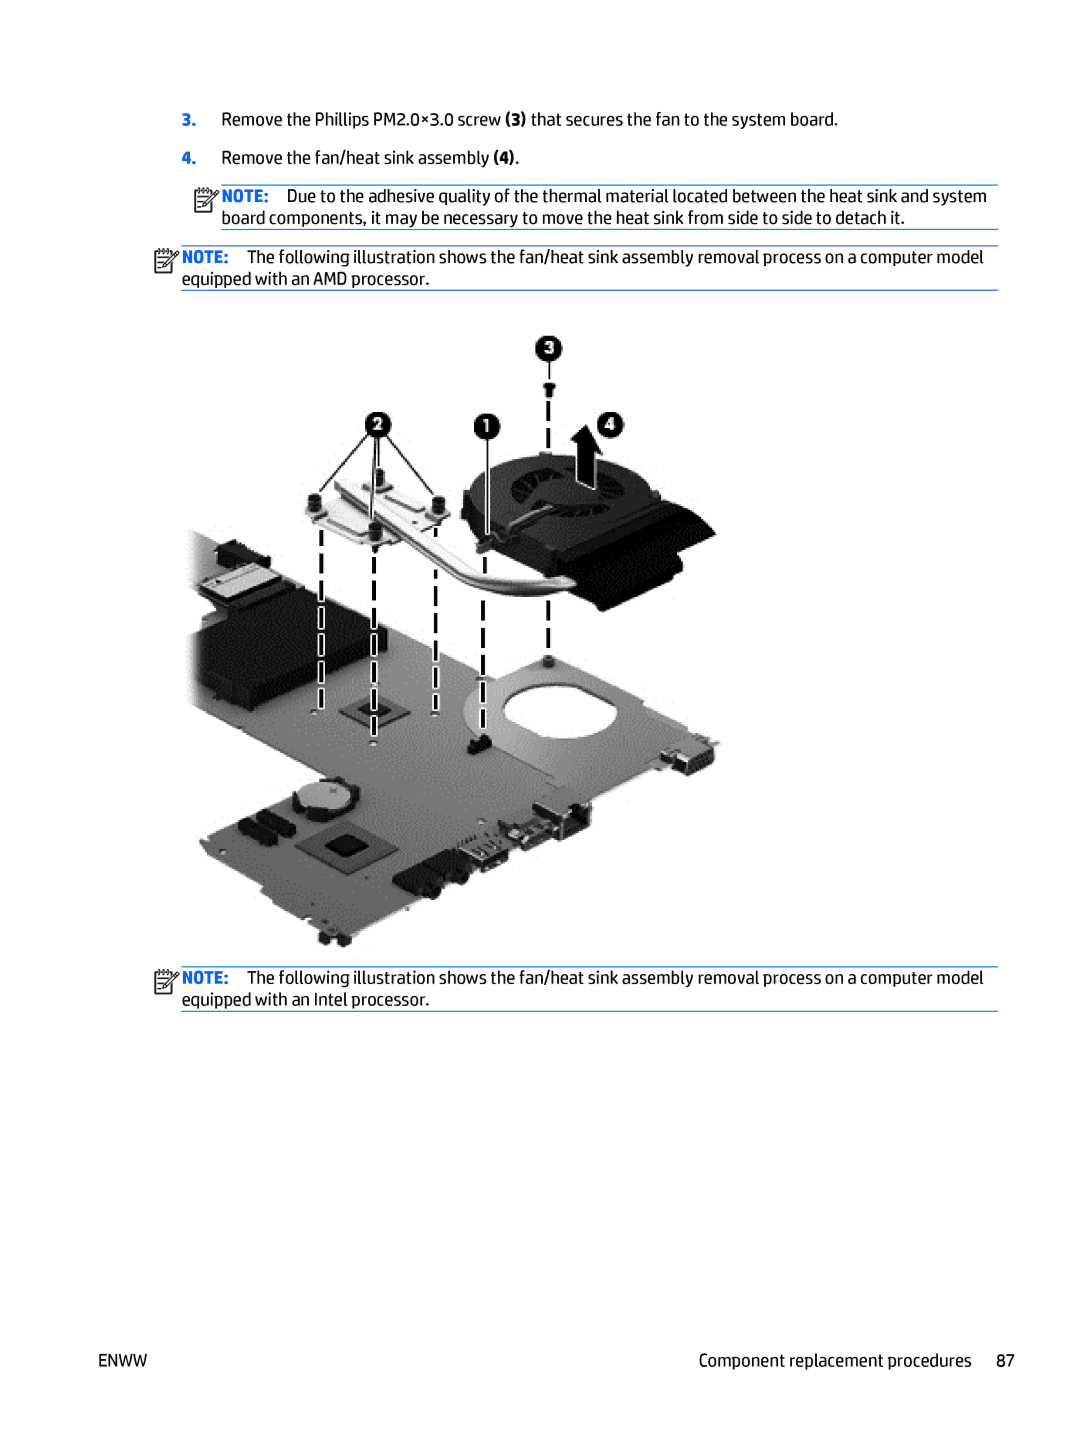
3.Remove the Phillips PM2.0×3.0 screw (3) that secures the fan to the system board.
4.Remove the fan/heat sink assembly (4).
![]()
![]()
![]()
![]() NOTE: Due to the adhesive quality of the thermal material located between the heat sink and system board components, it may be necessary to move the heat sink from side to side to detach it.
NOTE: Due to the adhesive quality of the thermal material located between the heat sink and system board components, it may be necessary to move the heat sink from side to side to detach it.
![]()
![]()
![]()
![]() NOTE: The following illustration shows the fan/heat sink assembly removal process on a computer model equipped with an AMD processor.
NOTE: The following illustration shows the fan/heat sink assembly removal process on a computer model equipped with an AMD processor.
![]()
![]()
![]()
![]() NOTE: The following illustration shows the fan/heat sink assembly removal process on a computer model equipped with an Intel processor.
NOTE: The following illustration shows the fan/heat sink assembly removal process on a computer model equipped with an Intel processor.
ENWW | Component replacement procedures 87 |
