Safety equipment
6.2 Assembling the chain brake
1
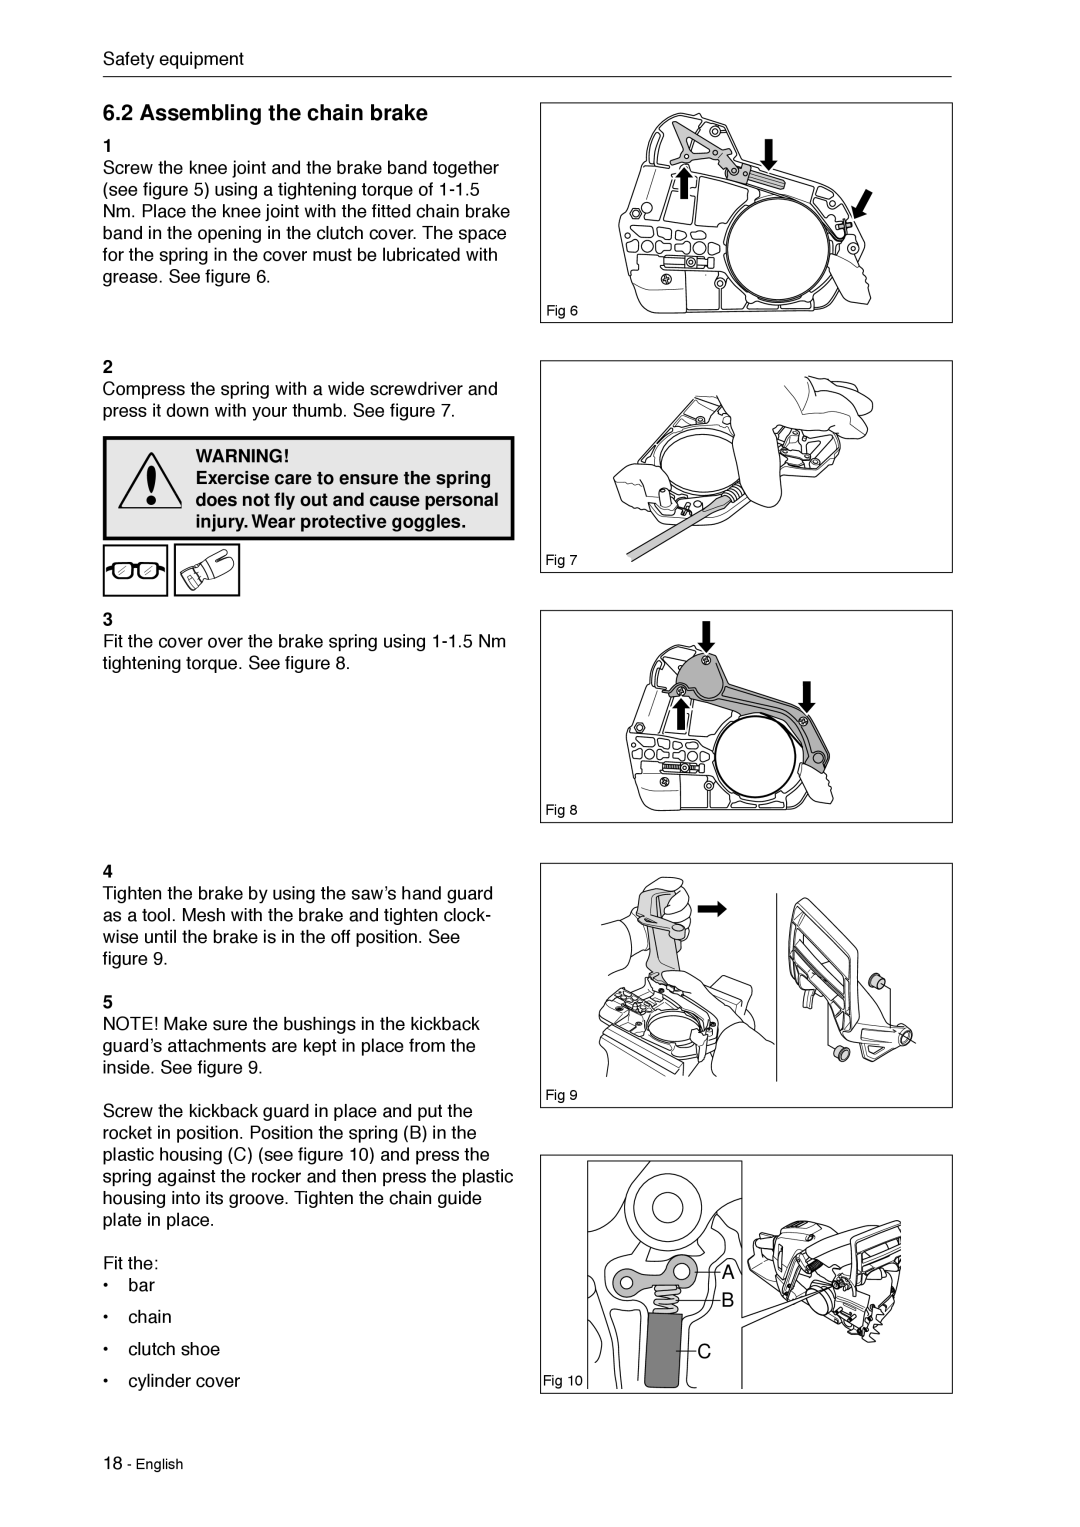
Screw the knee joint and the brake band together (see figure 5) using a tightening torque of
2
Compress the spring with a wide screwdriver and press it down with your thumb. See figure 7.
WARNING!
Exercise care to ensure the spring does not fly out and cause personal injury. Wear protective goggles.
3
Fit the cover over the brake spring using
Fig 6
Fig 7
Fig 8
4
Tighten the brake by using the saw’s hand guard as a tool. Mesh with the brake and tighten clock- wise until the brake is in the off position. See figure 9.
5
NOTE! Make sure the bushings in the kickback guard’s attachments are kept in place from the inside. See figure 9.
Screw the kickback guard in place and put the rocket in position. Position the spring (B) in the plastic housing (C) (see figure 10) and press the spring against the rocker and then press the plastic housing into its groove. Tighten the chain guide plate in place.
Fit the:
• bar
• chain
• clutch shoe
• cylinder cover
Fig 9
A |
B |
C |
Fig 10 |
18 - English
