Getting Started
Setup
This monitor works with platforms running at horizontal frequencies between 30 and 85 kHz.
Step 1: Connect the monitor to the
computer
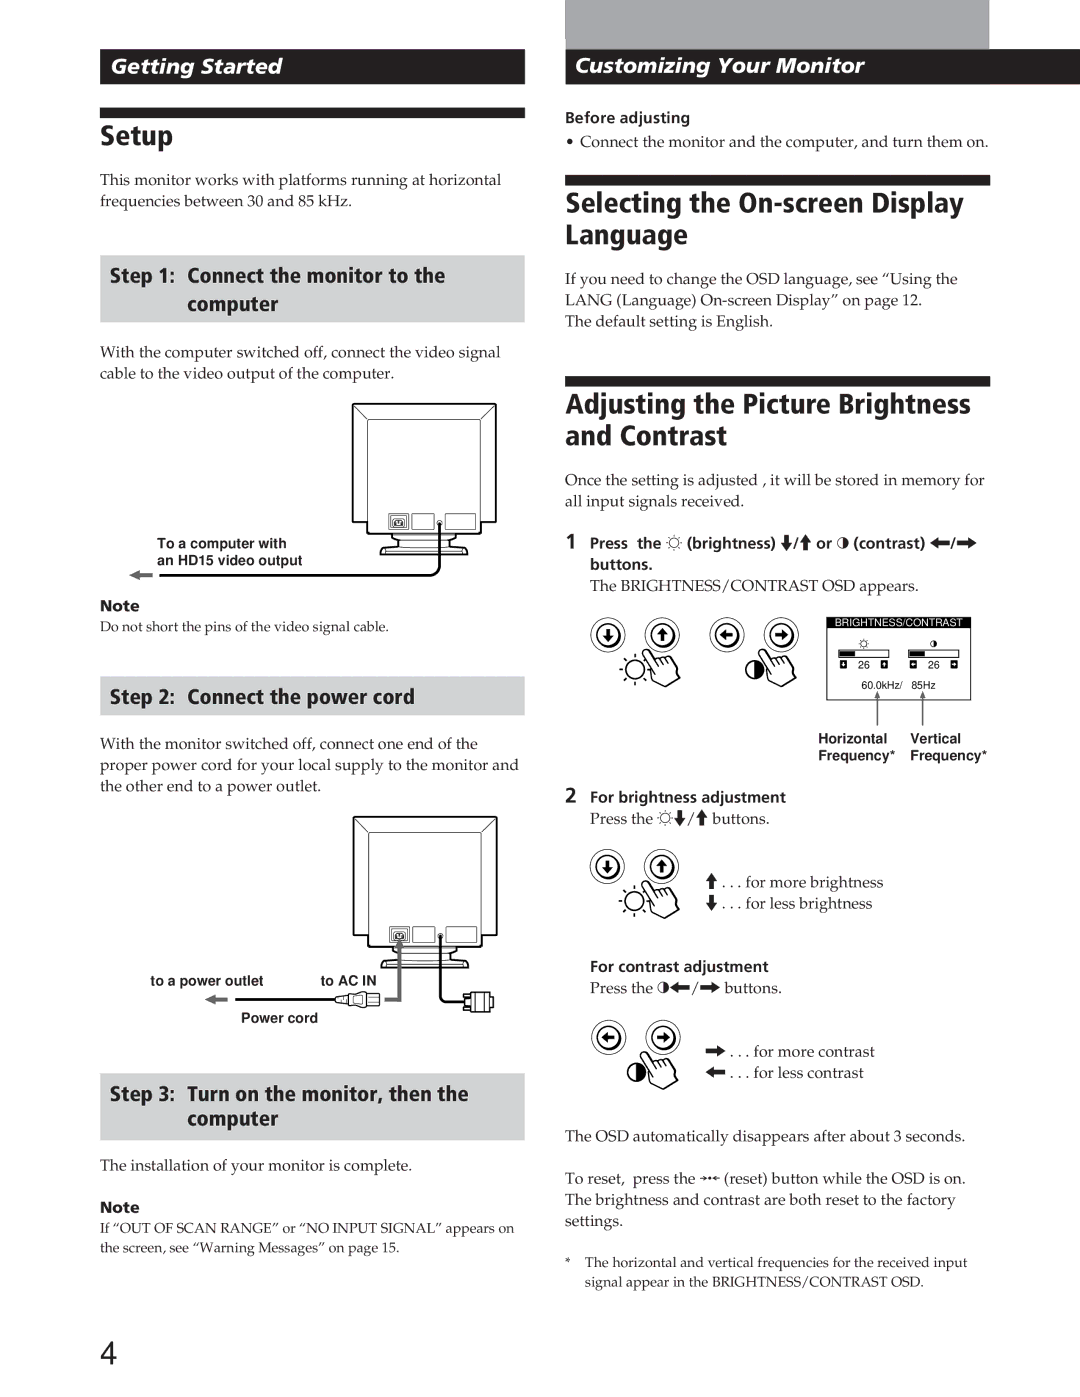
With the computer switched off, connect the video signal cable to the video output of the computer.
To a computer with an HD15 video output
Note
Do not short the pins of the video signal cable.
Step 2: Connect the power cord
With the monitor switched off, connect one end of the proper power cord for your local supply to the monitor and the other end to a power outlet.
to a power outlet | to AC IN | |||
|
|
|
|
|
Power cord
Step 3: Turn on the monitor, then the
computer
The installation of your monitor is complete.
Note
If “OUT OF SCAN RANGE” or “NO INPUT SIGNAL” appears on the screen, see “Warning Messages” on page 15.
4
Customizing Your Monitor
Before adjusting
• Connect the monitor and the computer, and turn them on.
Selecting the On-screen Display Language
If you need to change the OSD language, see “Using the LANG (Language)
The default setting is English.
Adjusting the Picture Brightness and Contrast
Once the setting is adjusted , it will be stored in memory for all input signals received.
1Press the ¬ (brightness) ./>or > (contrast) ?// buttons.
The BRIGHTNESS/CONTRAST OSD appears.
BRIGHTNESS/CONTRAST
26 ![]()
![]() 26 60.0kHz/ 85Hz
26 60.0kHz/ 85Hz
Horizontal Vertical
Frequency* Frequency*
2For brightness adjustment
Press the ¬./>buttons.
>. . . for more brightness
.. . . for less brightness
For contrast adjustment
Press the >?//buttons.
/. . . for more contrast ?. . . for less contrast
The OSD automatically disappears after about 3 seconds.
To reset, press the ? (reset) button while the OSD is on. The brightness and contrast are both reset to the factory settings.
*The horizontal and vertical frequencies for the received input signal appear in the BRIGHTNESS/CONTRAST OSD.