Customizing Your Monitor
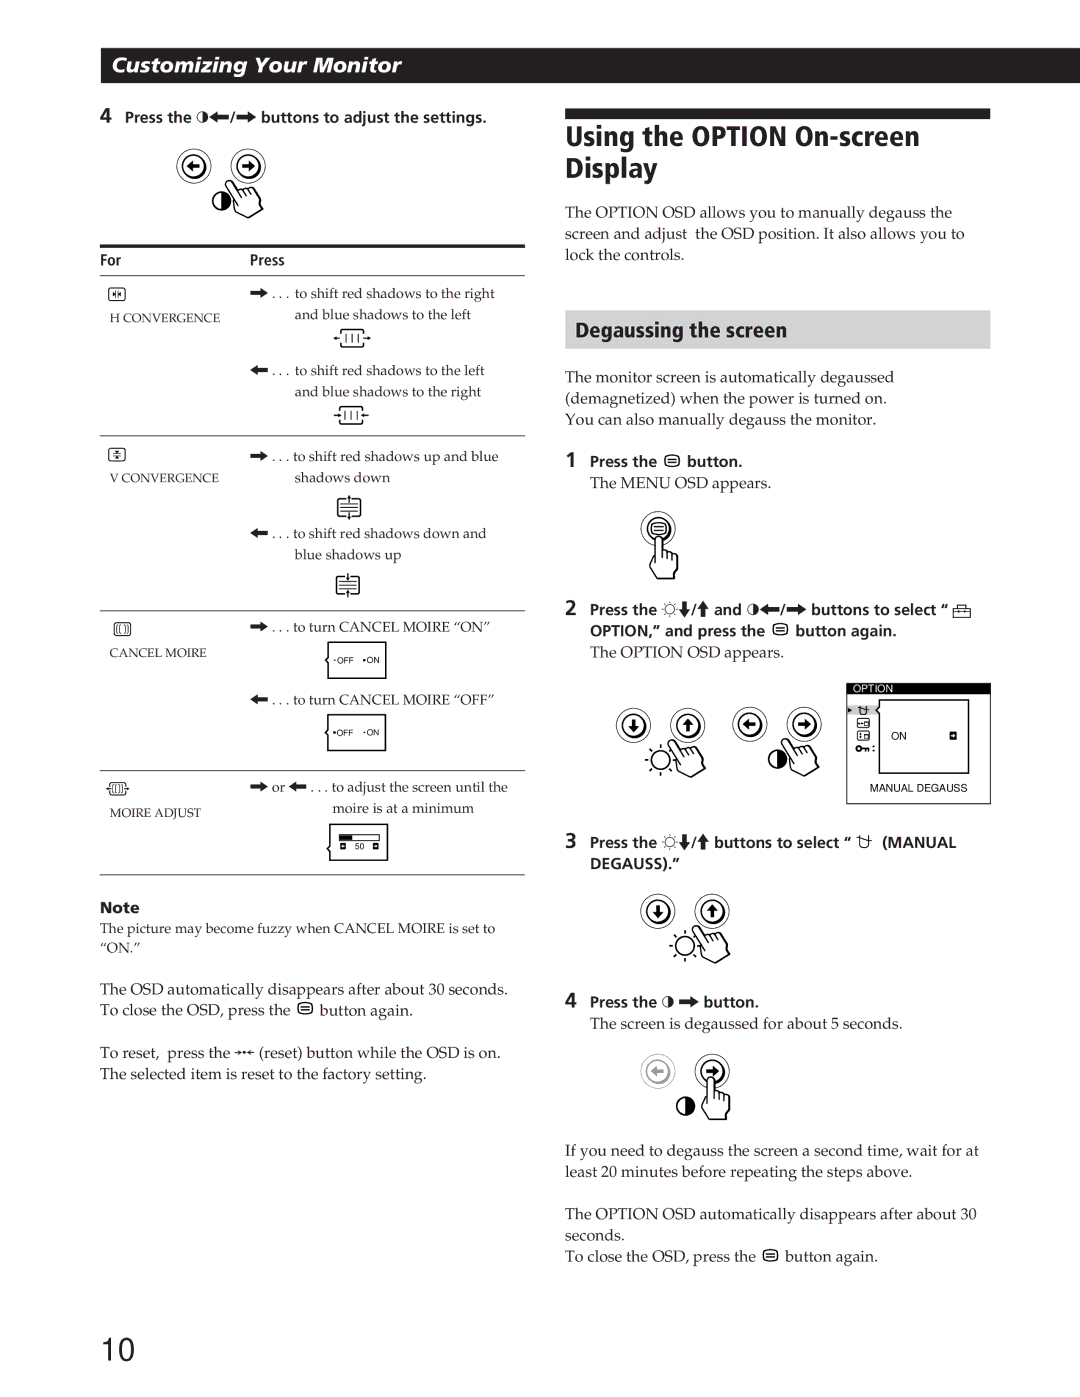
4Press the >?//buttons to adjust the settings.
For | Press | ||||||
|
|
| |||||
|
| /. . . to shift red shadows to the right | |||||
|
| ||||||
H CONVERGENCE | and blue shadows to the left | ||||||
|
|
|
|
|
|
|
|
|
|
|
|
|
|
|
|
?. . . to shift red shadows to the left and blue shadows to the right
| /. . . to shift red shadows up and blue |
V CONVERGENCE | shadows down |
?. . . to shift red shadows down and blue shadows up
/. . . to turn CANCEL MOIRE “ON”
CANCEL MOIRE
OFF ![]() ON
ON
?. . . to turn CANCEL MOIRE “OFF”
![]() OFF ON
OFF ON
| /or ?. . . to adjust the screen until the | ||||
MOIRE ADJUST | moire is at a minimum | ||||
|
|
|
|
|
|
| 50 |
|
| ||
|
|
|
|
|
|
Note
The picture may become fuzzy when CANCEL MOIRE is set to “ON.”
The OSD automatically disappears after about 30 seconds. To close the OSD, press the ![]() button again.
button again.
To reset, press the ? (reset) button while the OSD is on. The selected item is reset to the factory setting.
Using the OPTION On-screen Display
The OPTION OSD allows you to manually degauss the screen and adjust the OSD position. It also allows you to lock the controls.
Degaussing the screen
The monitor screen is automatically degaussed (demagnetized) when the power is turned on. You can also manually degauss the monitor.
1 Press the | button. |
The MENU OSD appears.
2Press the ¬./>and >?//buttons to select “ ![]()
![]()
![]()
OPTION,” and press the ![]() button again.
button again.
The OPTION OSD appears.
OPTION
ON
MANUAL DEGAUSS
3Press the ¬./>buttons to select “  (MANUAL
DEGAUSS).”
4Press the > /button.
The screen is degaussed for about 5 seconds.
If you need to degauss the screen a second time, wait for at least 20 minutes before repeating the steps above.
The OPTION OSD automatically disappears after about 30 seconds.
To close the OSD, press the ![]() button again.
button again.
10
