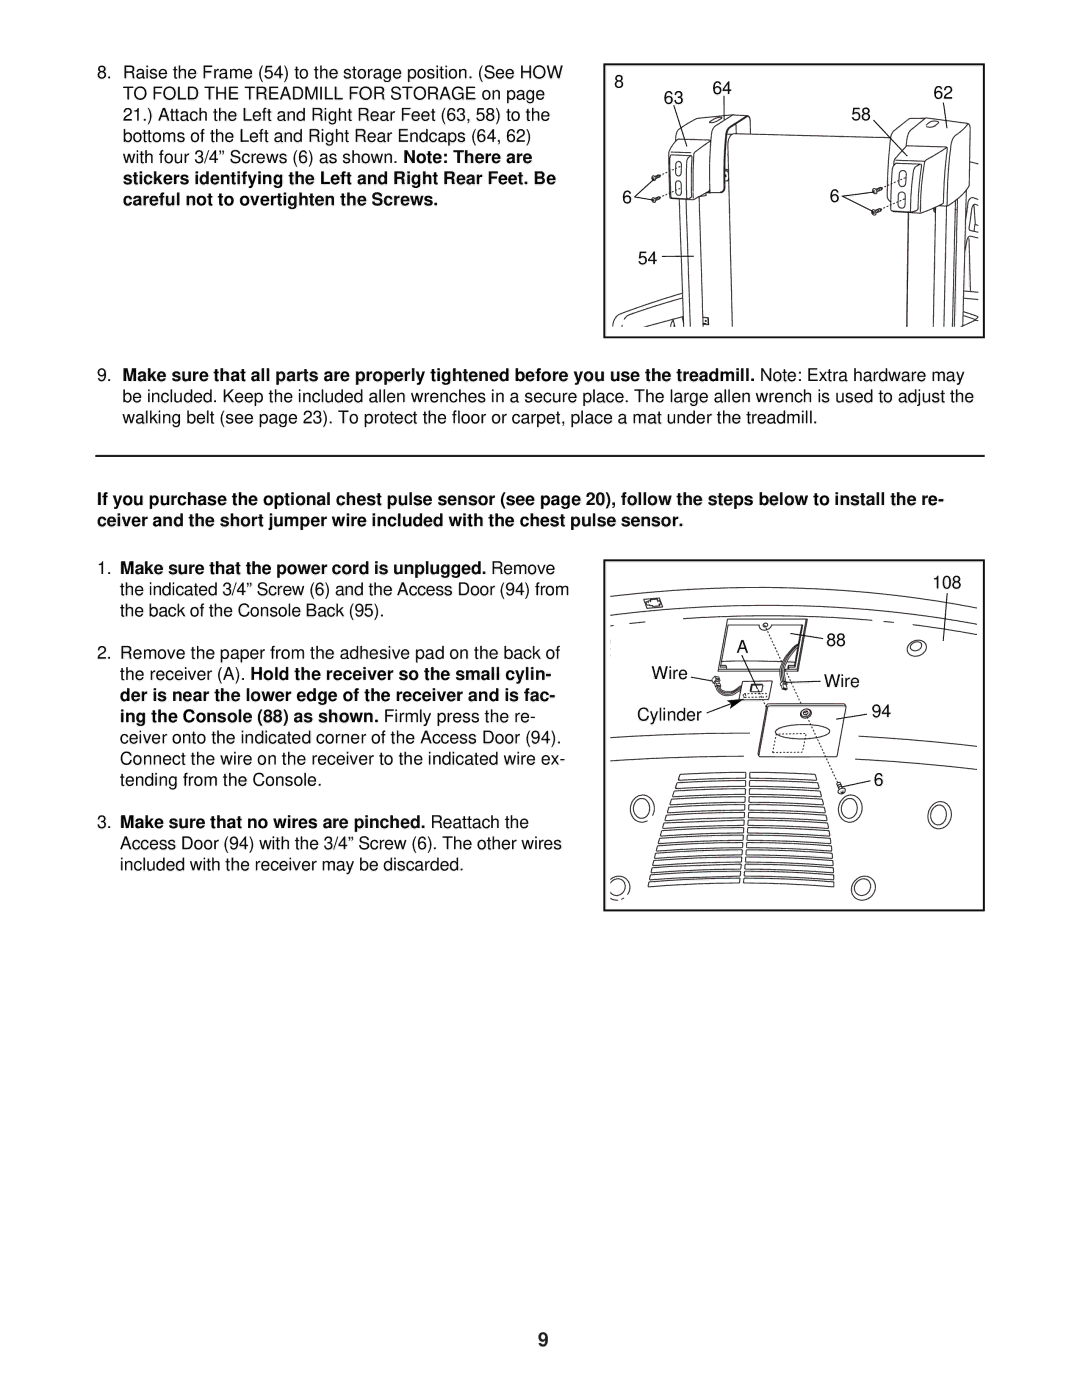
8.Raise the Frame (54) to the storage position. (See HOW TO FOLD THE TREADMILL FOR STORAGE on page
21.) Attach the Left and Right Rear Feet (63, 58) to the bottoms of the Left and Right Rear Endcaps (64, 62)
with four 3/4” Screws (6) as shown. Note: There are
stickers identifying the Left and Right Rear Feet. Be careful not to overtighten the Screws.
8 | 64 | 62 |
63 | ||
|
| 58 |
6 |
| 6 |
54 |
|
|
9. Make sure that all parts are properly tightened before you use the treadmill. | Note: Extra hardware may |
be included. Keep the included allen wrenches in a secure place. The large allen wrench is used to adjust the |
|
walking belt (see page 23). To protect the floor or carpet, place a mat under the treadmill. |
|
|
|
If you purchase the optional chest pulse sensor (see page 20), follow the steps below to install the re- ceiver and the short jumper wire included with the chest pulse sensor.
1. | Make sure that the power cord is unplugged. | Remove |
|
| 108 | |
| the indicated 3/4” Screw (6) and the Access Door (94) from |
|
| |||
|
|
|
| |||
| the back of the Console Back (95). |
|
|
|
| |
2. Remove the paper from the adhesive pad on the back of |
| A | 88 | |||
|
| |||||
|
|
| ||||
| the receiver (A). | Hold the receiver so the small cylin- | Wire |
| Wire | |
| der is near the lower edge of the receiver and is fac- |
|
| |||
| Cylinder |
| 94 | |||
| ing the Console (88) as shown. | Firmly press the re- |
| |||
| ceiver onto the indicated corner of the Access Door (94). |
|
|
| ||
| Connect the wire on the receiver to the indicated wire ex- |
|
|
| ||
| tending from the Console. |
|
|
| 6 | |
3. | Make sure that no wires are pinched. | Reattach the |
|
|
| |
| Access Door (94) with the 3/4” Screw (6). The other wires |
|
|
| ||
| included with the receiver may be discarded. |
|
|
|
| |
9
