8.Place the heatsink and fan assembly onto the socket. Align the four fasteners toward the four mounting holes on the motherboard.
9.Press each of the four fasteners down into the mounting holes. Rotate the fastener clock-wise to lock the heatsink and fan assembly into position.
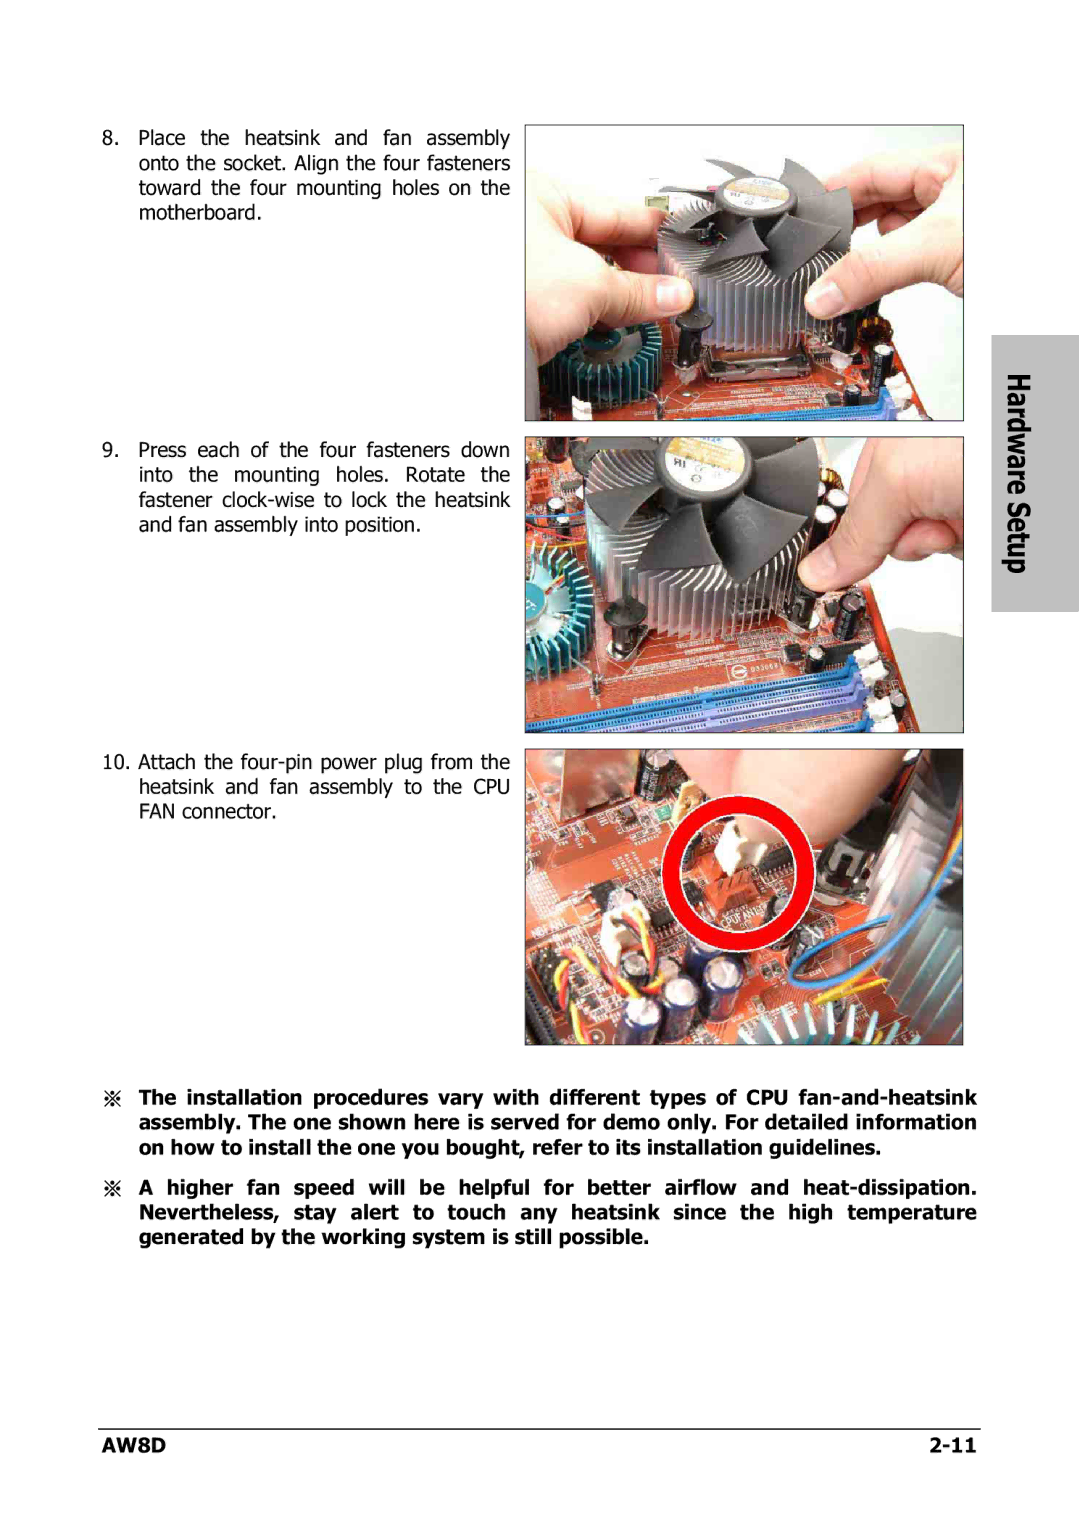
10.Attach the four-pin power plug from the heatsink and fan assembly to the CPU FAN connector.
※The installation procedures vary with different types of CPU fan-and-heatsink assembly. The one shown here is served for demo only. For detailed information on how to install the one you bought, refer to its installation guidelines.
※A higher fan speed will be helpful for better airflow and heat-dissipation. Nevertheless, stay alert to touch any heatsink since the high temperature generated by the working system is still possible.