SECTION
SECTION 9—UPHOLSTERY/SEAT POSITIONING STRAP
WARNING
After ANY adjustments, repair or service and BEFORE use, make sure all attaching hardware is tightened securely - otherwise injury or damage may result.
Replacing Seat Upholstery
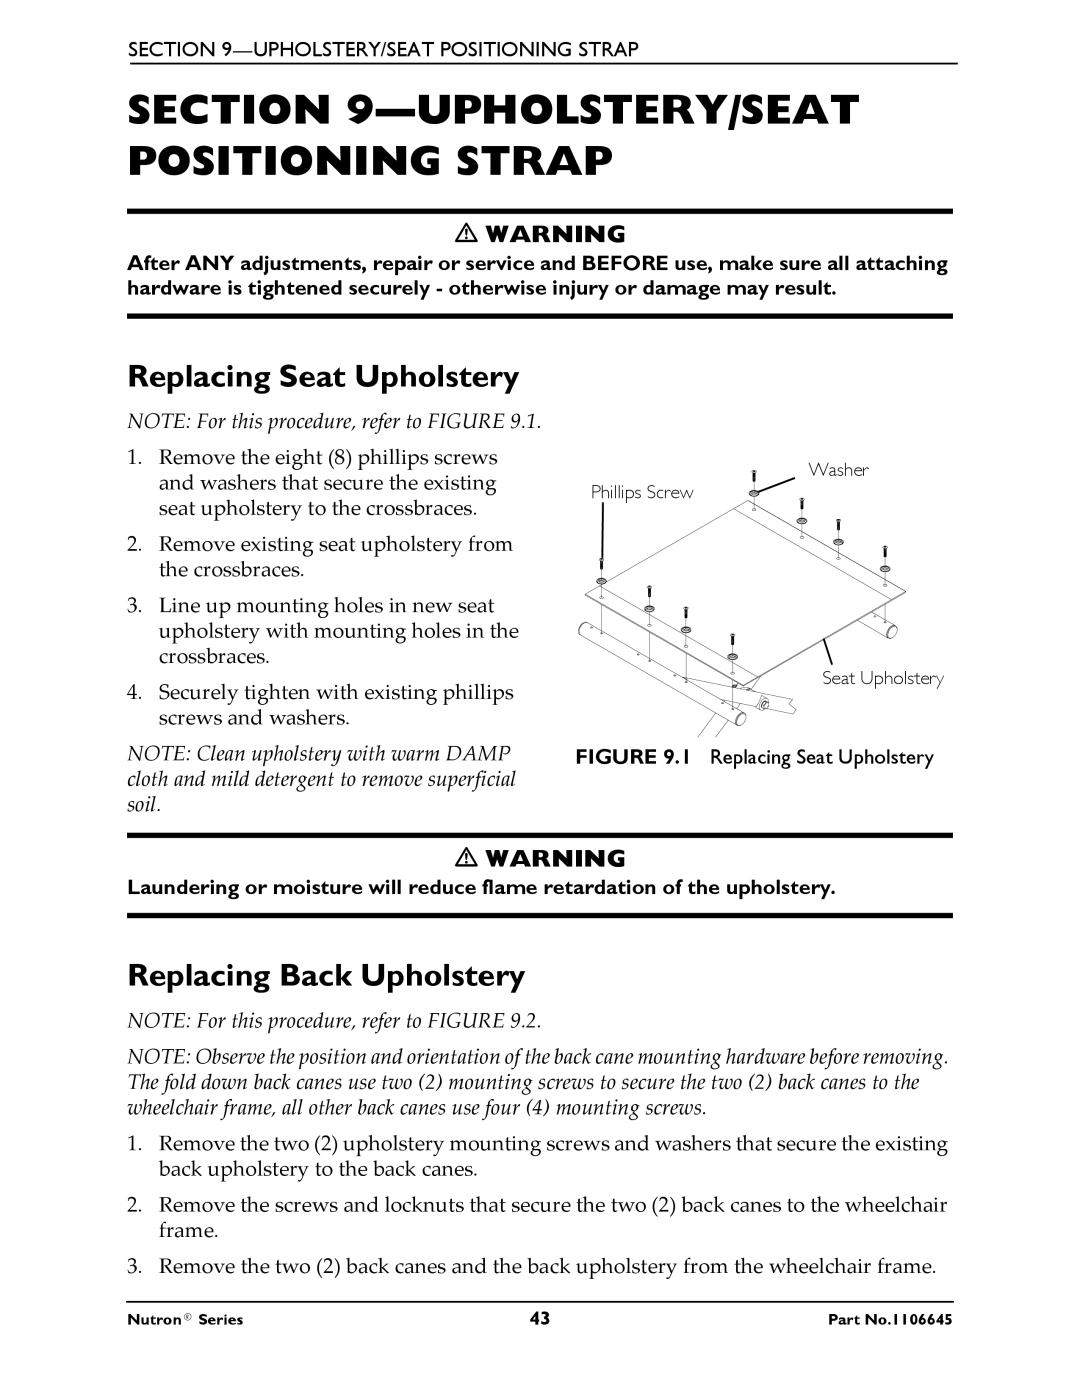
NOTE: For this procedure, refer to FIGURE 9.1.
1.Remove the eight (8) phillips screws and washers that secure the existing seat upholstery to the crossbraces.
2.Remove existing seat upholstery from the crossbraces.
3.Line up mounting holes in new seat upholstery with mounting holes in the crossbraces.
4.Securely tighten with existing phillips screws and washers.
NOTE: Clean upholstery with warm DAMP cloth and mild detergent to remove superficial soil.
WARNING
Laundering or moisture will reduce flame retardation of the upholstery.
Replacing Back Upholstery
NOTE: For this procedure, refer to FIGURE 9.2.
NOTE: Observe the position and orientation of the back cane mounting hardware before removing. The fold down back canes use two (2) mounting screws to secure the two (2) back canes to the wheelchair frame, all other back canes use four (4) mounting screws.
1.Remove the two (2) upholstery mounting screws and washers that secure the existing back upholstery to the back canes.
2.Remove the screws and locknuts that secure the two (2) back canes to the wheelchair frame.
3.Remove the two (2) back canes and the back upholstery from the wheelchair frame.
Nutron® Series | 43 | Part No.1106645 |
