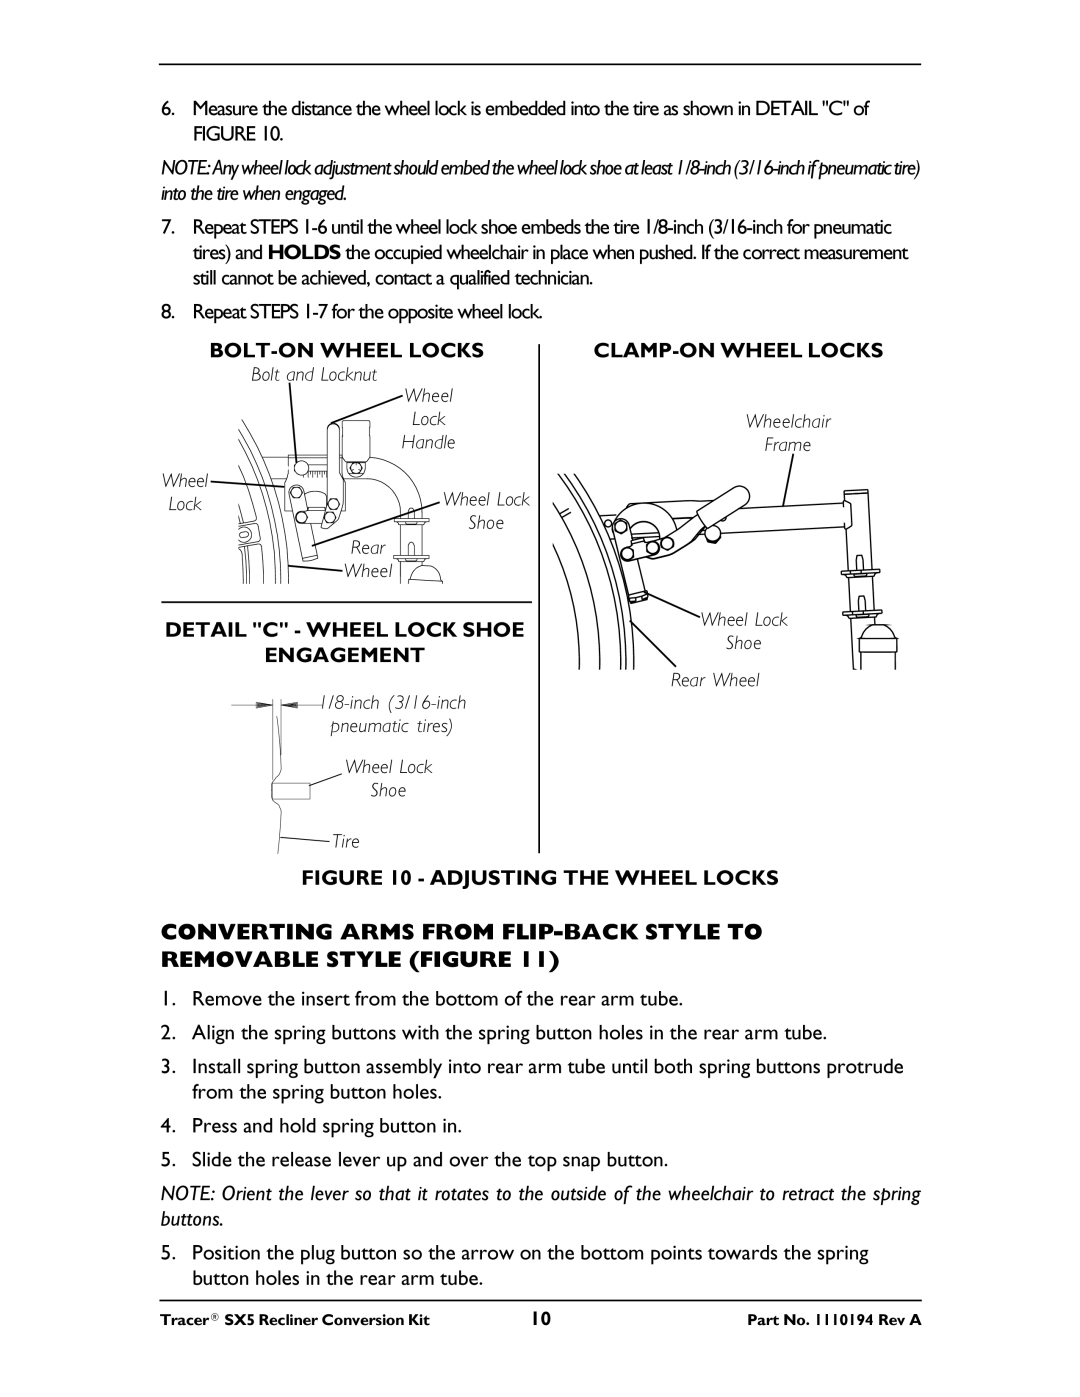
6.Measure the distance the wheel lock is embedded into the tire as shown in DETAIL "C" of FIGURE 10.
NOTE: Any wheel lock adjustment should embed the wheel lock shoe at least
7.Repeat STEPS
8.Repeat STEPS
Bolt and Locknut
Wheel
Lock
Handle
Wheel | Wheel Lock |
Lock | |
| Shoe |
Rear
![]() Wheel
Wheel
DETAIL "C" - WHEEL LOCK SHOE
ENGAGEMENT
pneumatic tires)
Wheel Lock
Shoe
Tire
Wheelchair
Frame
Wheel Lock
Shoe
Rear Wheel
FIGURE 10 - ADJUSTING THE WHEEL LOCKS
CONVERTING ARMS FROM
1.Remove the insert from the bottom of the rear arm tube.
2.Align the spring buttons with the spring button holes in the rear arm tube.
3.Install spring button assembly into rear arm tube until both spring buttons protrude from the spring button holes.
4.Press and hold spring button in.
5.Slide the release lever up and over the top snap button.
NOTE: Orient the lever so that it rotates to the outside of the wheelchair to retract the spring buttons.
5.Position the plug button so the arrow on the bottom points towards the spring button holes in the rear arm tube.
Tracer® SX5 Recliner Conversion Kit | 10 | Part No. 1110194 Rev A |