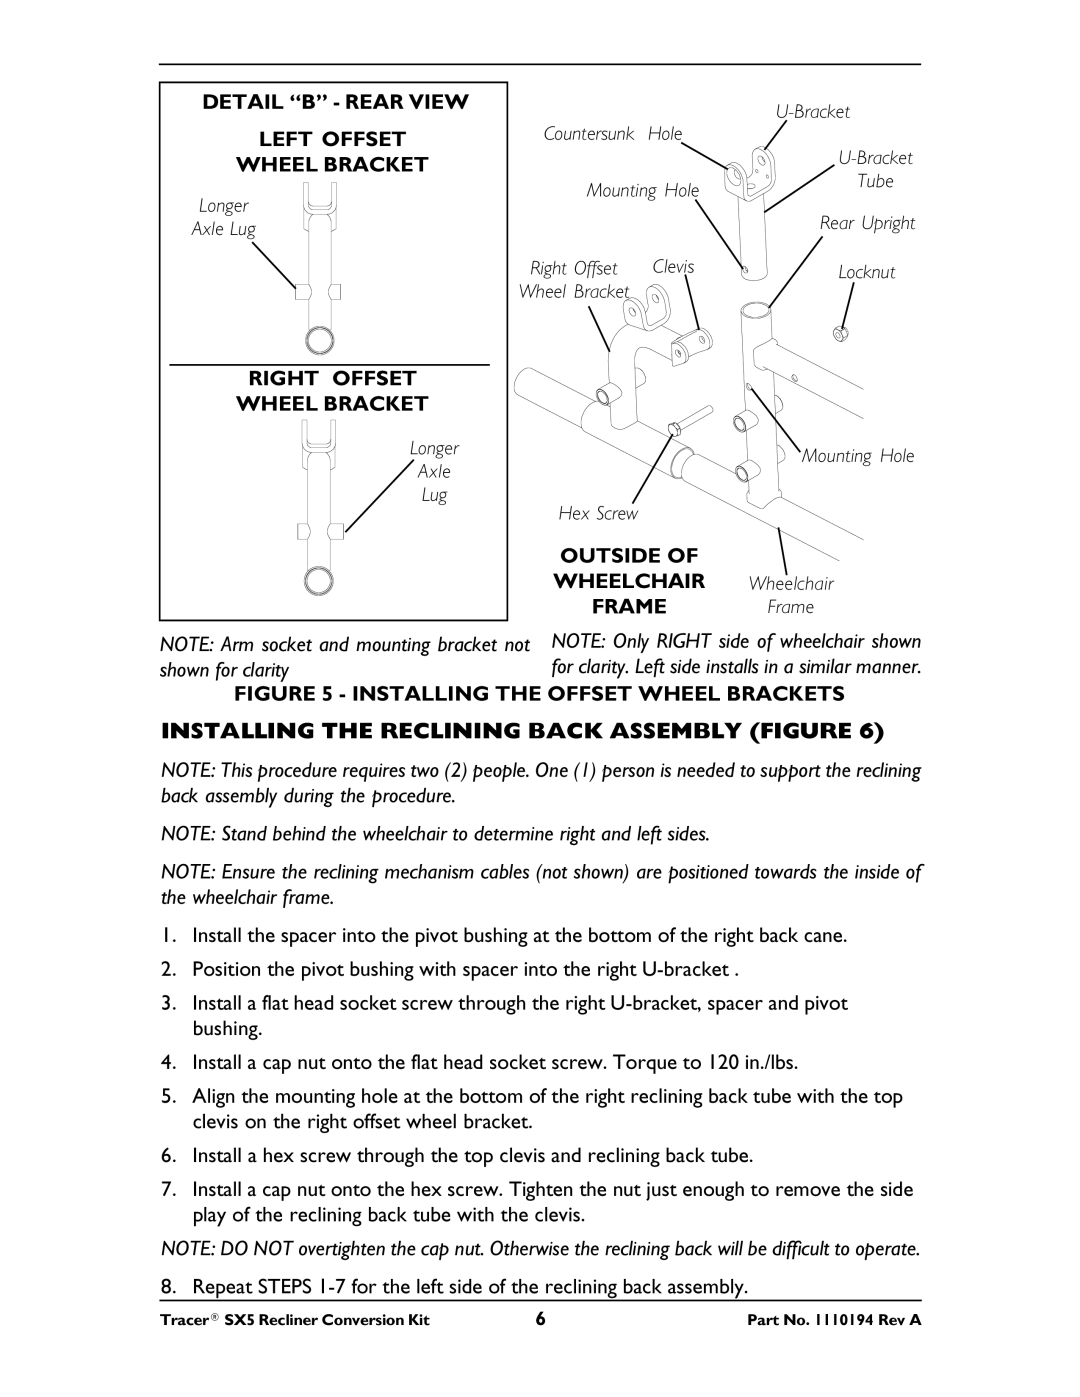
DETAIL “B” - REAR VIEW
LEFT OFFSET
WHEEL BRACKET
Longer
Axle Lug
RIGHT OFFSET
WHEEL BRACKET
Longer
Axle
Lug
Countersunk | Hole | |
| ||
|
| |
Mounting Hole | Tube | |
| ||
|
| Rear Upright |
Right Offset | Clevis | Locknut |
Wheel Bracket
Mounting Hole
Hex Screw
OUTSIDE OF
WHEELCHAIR Wheelchair
FRAME Frame
NOTE: Arm socket and mounting bracket not shown for clarity
FIGURE 5 - INSTALLING THE OFFSET WHEEL BRACKETS
INSTALLING THE RECLINING BACK ASSEMBLY (FIGURE 6)
NOTE: This procedure requires two (2) people. One (1) person is needed to support the reclining back assembly during the procedure.
NOTE: Stand behind the wheelchair to determine right and left sides.
NOTE: Ensure the reclining mechanism cables (not shown) are positioned towards the inside of the wheelchair frame.
1.Install the spacer into the pivot bushing at the bottom of the right back cane.
2.Position the pivot bushing with spacer into the right
3.Install a flat head socket screw through the right
4.Install a cap nut onto the flat head socket screw. Torque to 120 in./lbs.
5.Align the mounting hole at the bottom of the right reclining back tube with the top clevis on the right offset wheel bracket.
6.Install a hex screw through the top clevis and reclining back tube.
7.Install a cap nut onto the hex screw. Tighten the nut just enough to remove the side play of the reclining back tube with the clevis.
NOTE: DO NOT overtighten the cap nut. Otherwise the reclining back will be difficult to operate. 8. Repeat STEPS
Tracer® SX5 Recliner Conversion Kit | 6 | Part No. 1110194 Rev A |