Wireless iPod Dock External Connections
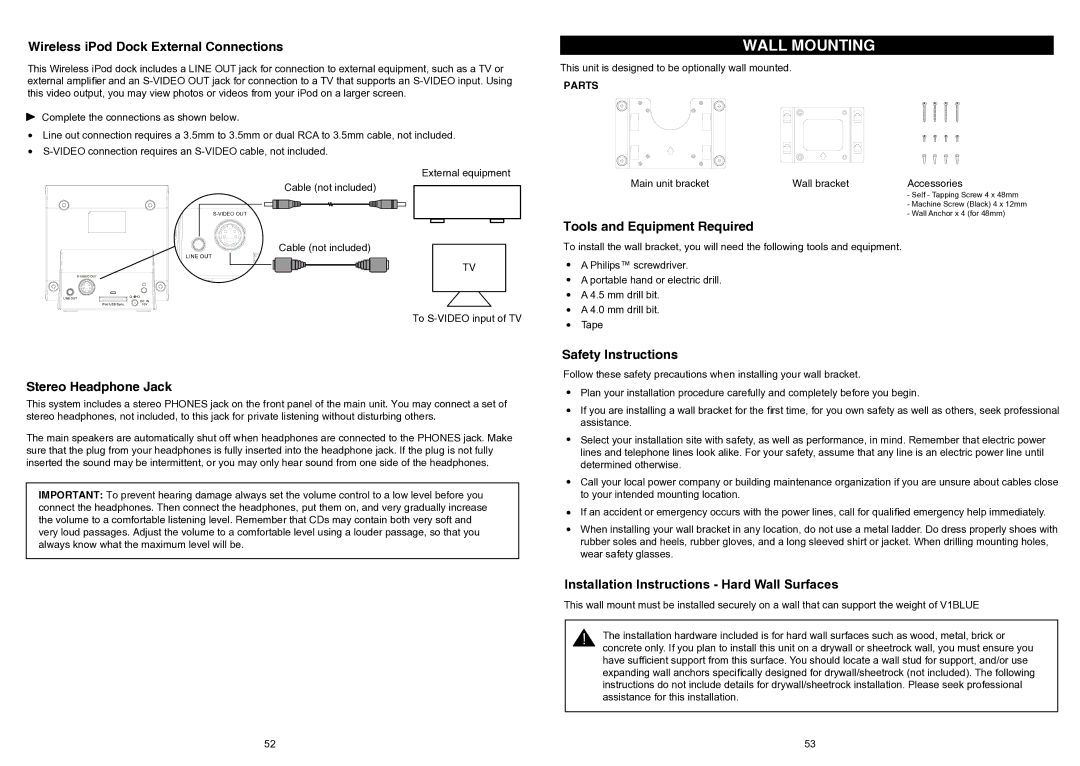
This Wireless iPod dock includes a LINE OUT jack for connection to external equipment, such as a TV or external amplifier and an
Complete the connections as shown below.
Line out connection requires a 3.5mm to 3.5mm or dual RCA to 3.5mm cable, not included.
External equipment
Cable (not included)
Cable (not included)
TV
To
Stereo Headphone Jack
This system includes a stereo PHONES jack on the front panel of the main unit. You may connect a set of stereo headphones, not included, to this jack for private listening without disturbing others.
The main speakers are automatically shut off when headphones are connected to the PHONES jack. Make sure that the plug from your headphones is fully inserted into the headphone jack. If the plug is not fully inserted the sound may be intermittent, or you may only hear sound from one side of the headphones.
IMPORTANT: To prevent hearing damage always set the volume control to a low level before you connect the headphones. Then connect the headphones, put them on, and very gradually increase the volume to a comfortable listening level. Remember that CDs may contain both very soft and very loud passages. Adjust the volume to a comfortable level using a louder passage, so that you always know what the maximum level will be.
WALL MOUNTING
This unit is designed to be optionally wall mounted.
PARTS
Main unit bracket | Wall bracket | Accessories |
|
| - Self - Tapping Screw 4 x 48mm |
|
| - Machine Screw (Black) 4 x 12mm |
|
| - Wall Anchor x 4 (for 48mm) |
Tools and Equipment Required
To install the wall bracket, you will need the following tools and equipment.
A Philips™ screwdriver.
A portable hand or electric drill.
A 4.5 mm drill bit.
A 4.0 mm drill bit.
Tape
Safety Instructions
Follow these safety precautions when installing your wall bracket.
Plan your installation procedure carefully and completely before you begin.
If you are installing a wall bracket for the first time, for you own safety as well as others, seek professional assistance.
Select your installation site with safety, as well as performance, in mind. Remember that electric power lines and telephone lines look alike. For your safety, assume that any line is an electric power line until determined otherwise.
Call your local power company or building maintenance organization if you are unsure about cables close to your intended mounting location.
If an accident or emergency occurs with the power lines, call for qualified emergency help immediately.
When installing your wall bracket in any location, do not use a metal ladder. Do dress properly shoes with rubber soles and heels, rubber gloves, and a long sleeved shirt or jacket. When drilling mounting holes, wear safety glasses.
Installation Instructions - Hard Wall Surfaces
This wall mount must be installed securely on a wall that can support the weight of V1BLUE
!The installation hardware included is for hard wall surfaces such as wood, metal, brick or concrete only. If you plan to install this unit on a drywall or sheetrock wall, you must ensure you have sufficient support from this surface. You should locate a wall stud for support, and/or use expanding wall anchors specifically designed for drywall/sheetrock (not included). The following instructions do not include details for drywall/sheetrock installation. Please seek professional assistance for this installation.
52 | 53 |
