
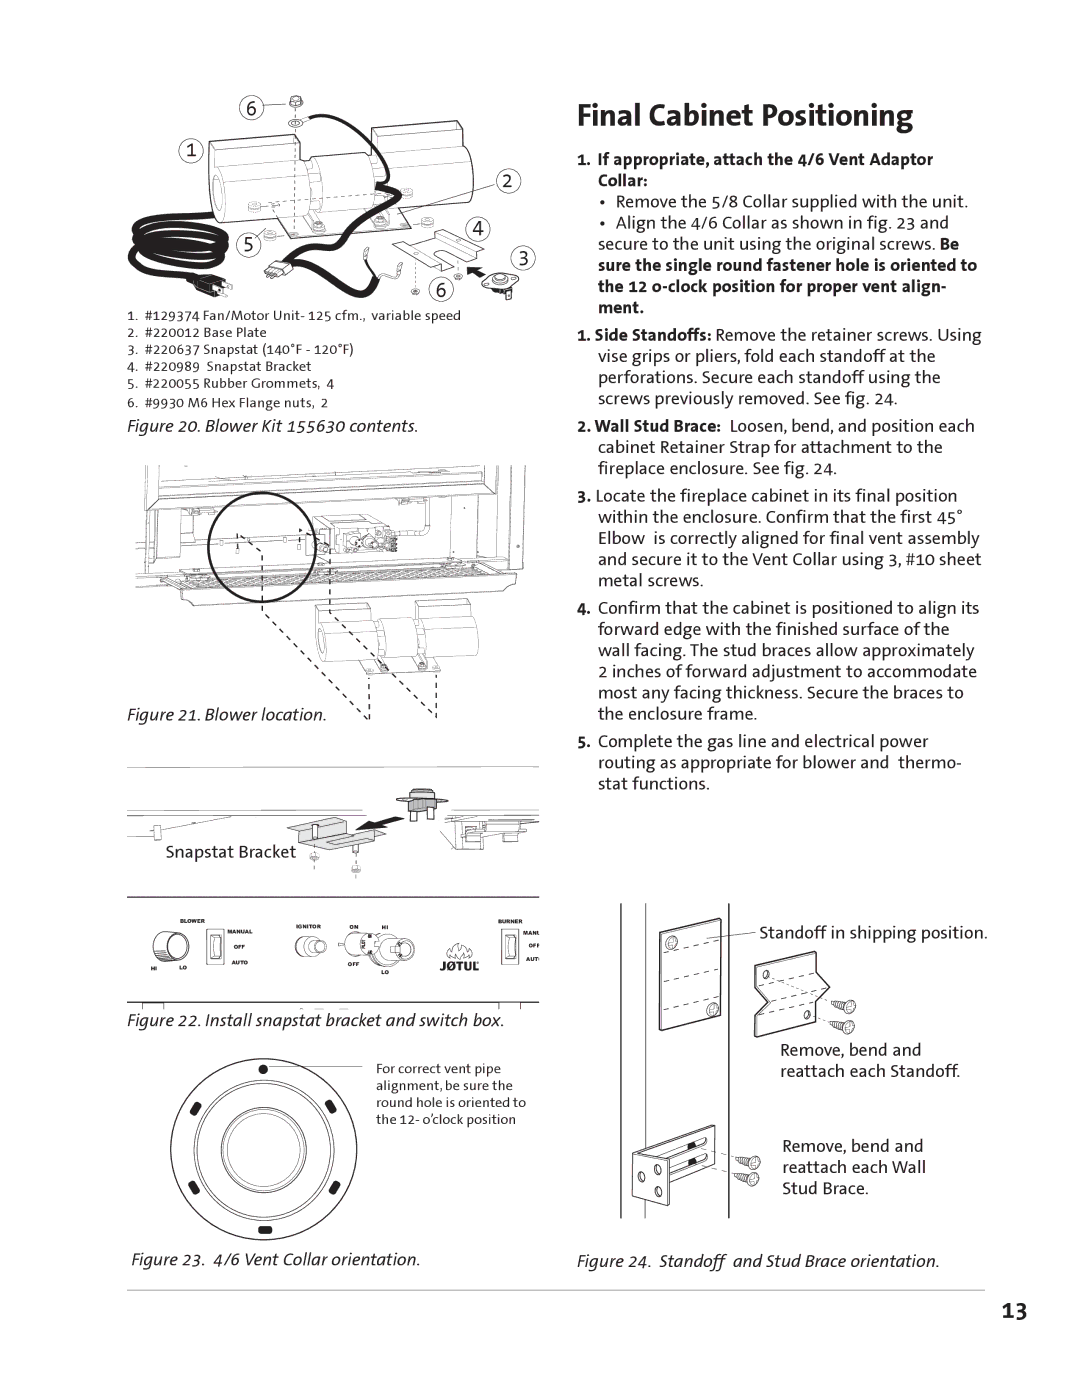
GZ 550 DV II specifications
The Jotul GZ 550 DV II is a remarkable gas fireplace that combines elegance with efficiency, making it a perfect addition to any modern home. Known for its impressive design and advanced technology, this model captures the essence of warmth and sophistication that homeowners seek in their heating solutions.One of the main features of the Jotul GZ 550 DV II is its contemporary and sleek aesthetic. Available in various finishes, including a rich black or a striking steel, it complements diverse interior styles, from minimalist to rustic. The full-view glass door enhances the visual appeal, allowing the mesmerizing flames to be a focal point of any room.
The fireplace operates on direct vent gas technology, a standout feature that enables it to draw air from the outside instead of depleting indoor air. This not only enhances safety but also improves energy efficiency, making it a more environmentally friendly choice. Homeowners can enjoy consistent heating without worrying about negatively impacting their indoor air quality.
Equipped with variable flame control, the Jotul GZ 550 DV II allows users to adjust the intensity of the flames according to their preferences. Whether it’s a cozy gathering with friends or a quiet evening alone, the adjustable flames provide a tailored ambiance. Additionally, the remote control feature offers convenience, allowing users to ignite or adjust the fireplace from the comfort of their seat.
Another notable characteristic of this gas fireplace is its efficient heat exchanger system. It maximizes heat output while minimizing gas consumption, ensuring homeowners can enjoy warmth without excessive utility bills. The fireplace has an impressive heating capacity, capable of warming medium to large spaces effectively.
Safety features are paramount in the Jotul GZ 550 DV II. It includes a safety screen to prevent any accidental contact with the hot glass, as well as an automatic shut-off mechanism in case of any irregularities, providing peace of mind for families.
In summary, the Jotul GZ 550 DV II is not just a fireplace; it is a blend of modern design, technology, and efficiency. With its elegant aesthetics, direct vent technology, user-friendly controls, and robust safety features, it stands out as a premier option for those looking to enhance their living space with the warmth and beauty of a gas fireplace. It reflects Jotul's commitment to quality and innovation, making it a worthy investment for any home.