
DT-V17G1 specifications
The JVC DT-V17G1 is a high-performance 17-inch LCD monitor specifically designed for broadcast and production environments. With its advanced features and cutting-edge technologies, it offers an exceptional viewing experience, making it an excellent choice for professionals in the filmmaking and broadcasting industry.One of the standout features of the DT-V17G1 is its Full HD resolution of 1920 x 1080 pixels, ensuring that images are rendered with stunning clarity and detail. This level of resolution makes it ideal for critical monitoring tasks, allowing professionals to see every nuance in their footage. The monitor also boasts a high brightness level of 300 cd/m², which combined with a contrast ratio of 1000:1, provides excellent visibility even in brightly lit environments.
The DT-V17G1 employs advanced color processing technologies, including 10-bit color depth, which results in a wider color gamut and smoother gradations. This is particularly important for color-critical applications where accurate color representation is essential. The monitor supports various color spaces, including BT.709, making it versatile for different production standards.
In terms of connectivity, the JVC DT-V17G1 is equipped with multiple input options, including HDMI, SDI, and Composite inputs. This versatility ensures it can easily integrate into a wide range of production setups, whether for live broadcasts, video editing, or post-production environments. The monitor also features loop-through capabilities for SDI, allowing for easy signal distribution to other devices.
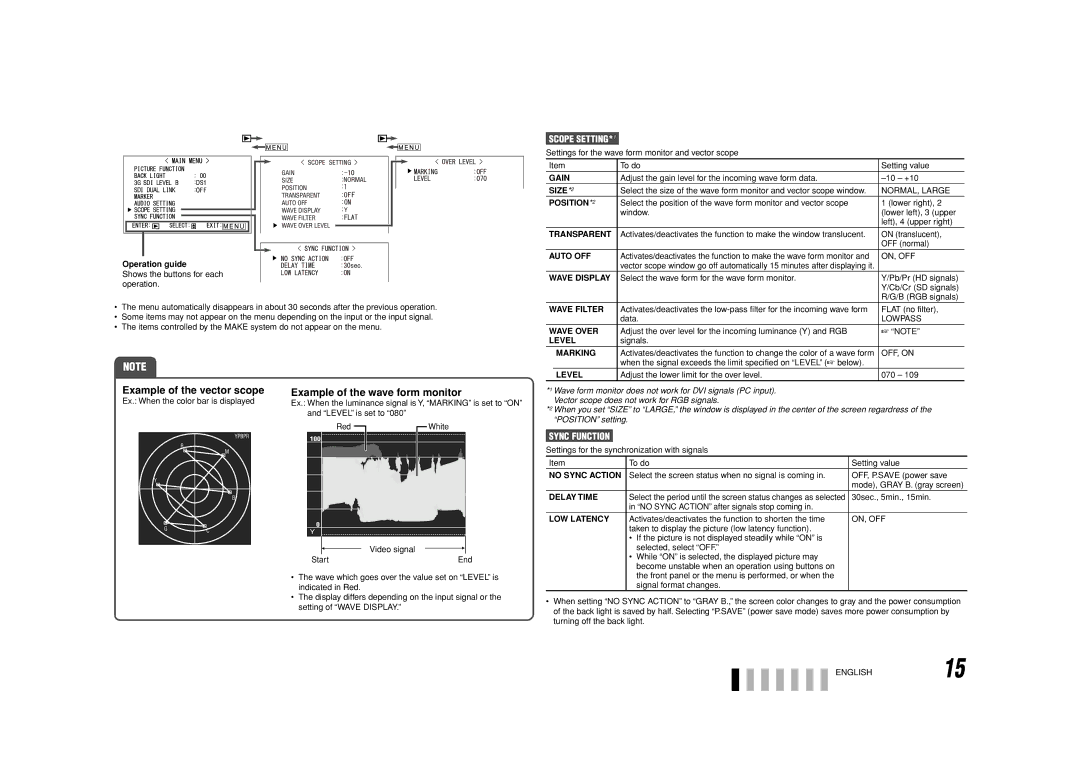
Another remarkable characteristic of the DT-V17G1 is its comprehensive set of built-in tools designed to assist in video production. These include waveform and vector scope displays, which provide valuable information about the signal's quality and help maintain broadcast standards. Furthermore, the monitor comes with peaking, false color, and zebra patterns, which enhance focus and exposure control.
The JVC DT-V17G1 is housed in a robust and lightweight chassis, making it suitable for both studio and field use. Its ergonomic design includes VESA mount compatibility, offering flexible mounting options to suit different production environments. This combination of advanced features, professional-grade technology, and user-friendly design makes the JVC DT-V17G1 a reliable and indispensable tool for any broadcast or production professional. With its high-quality display and range of monitoring capabilities, it is poised to meet the demands of today’s media industry.