Menu Operations
1 Display the menu.
To display the main menu
\Press MENU button.
To display the
\Press  button while pressing
  button.
When the main menu is displayed
Selected item
Operation guide
When the
Selected item ![]()
Operation guide ![]()
2 Press 
 buttons to select an item, then press
  button.
Ex.: When “AREA MARKER” is selected
3 Press ![]()
![]() buttons to select an item,
buttons to select an item,
then press buttons to make adjustments.
4 Press MENU button to return to the previous menu.
•Pressing the button again finishes the menu operation.
NOTE
For some items, adjustments will be made by pressing in step 2 .
Audio Channel Selection
Select audio channels of EMBEDDED AUDIO signals to output from the speakers (L/R) and MONITOR OUT (L/R) terminals.
1 Press or button to display the screen for audio channel selection.
You cannot display this screen when displaying a menu screen.
Selected item ![]()
2 Press ![]()
![]() buttons to select the left
buttons to select the left
(L) or right (R).
3 Press ![]() buttons to select an audio channel.
buttons to select an audio channel.
NOTE
•You can select channels from 12 audio channels.
•You have to choose a group of selectable audio channels before the channel selection (☞ “E.AUDIO GROUP” on page 11).
4 Press MENU button to finish the audio channel selection.
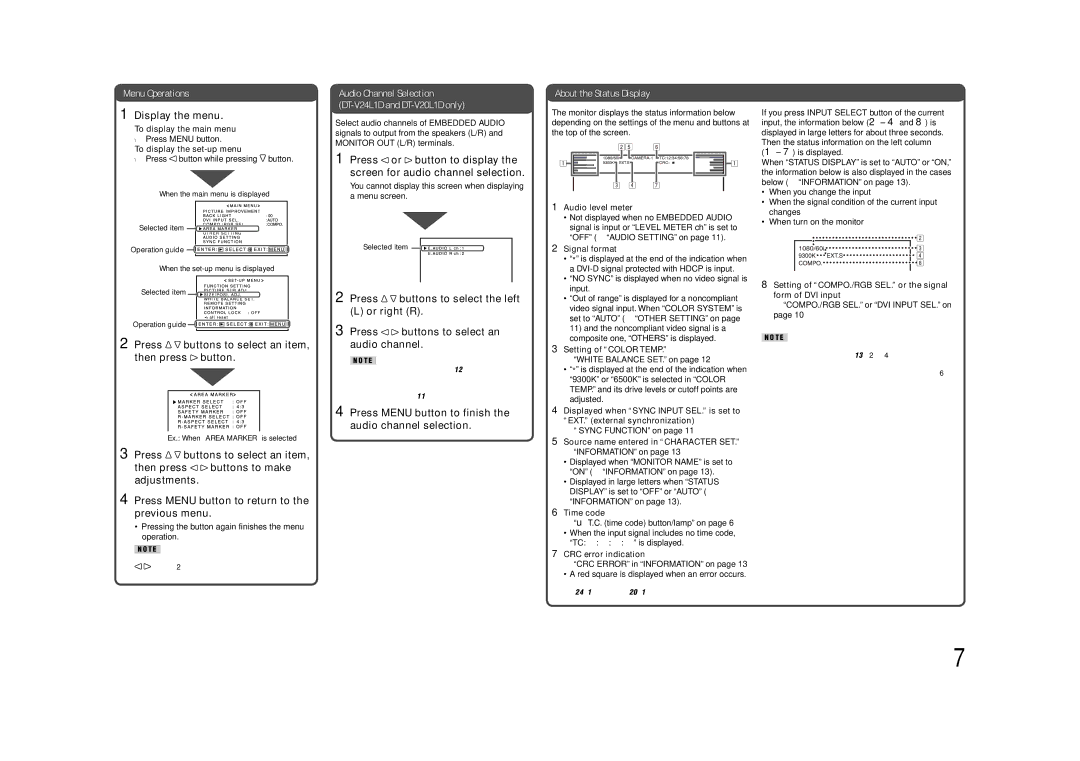
About the Status Display
The monitor displays the status information below depending on the settings of the menu and buttons at the top of the screen.
1Audio level meter*
•Not displayed when no EMBEDDED AUDIO signal is input or “LEVEL METER ch” is set to “OFF” (☞ “AUDIO SETTING” on page 11).
2Signal format
•“*” is displayed at the end of the indication when a
•“NO SYNC” is displayed when no video signal is input.
•“Out of range” is displayed for a noncompliant video signal input. When “COLOR SYSTEM” is set to “AUTO” (☞ “OTHER SETTING” on page 11) and the noncompliant video signal is a composite one, “OTHERS” is displayed.
3Setting of “COLOR TEMP.”
☞ “WHITE BALANCE SET.” on page 12
•“*” is displayed at the end of the indication when “9300K” or “6500K” is selected in “COLOR TEMP.” and its drive levels or cutoff points are adjusted.
4Displayed when “SYNC INPUT SEL.” is set to “EXT.” (external synchronization)
☞ “ SYNC FUNCTION” on page 11
5Source name entered in “CHARACTER SET.”
☞ “INFORMATION” on page 13
•Displayed when “MONITOR NAME” is set to “ON” (☞ “INFORMATION” on page 13).
•Displayed in large letters when “STATUS DISPLAY” is set to “OFF” or “AUTO” (☞ “INFORMATION” on page 13).
6Time code*
☞ “u T.C. (time code) button/lamp” on page 6
• When the input signal includes no time code, “TC:–
7CRC error indication*
☞ “CRC ERROR” in “INFORMATION” on page 13
• A red square is displayed when an error occurs.
*
If you press INPUT SELECT button of the current input, the information below (2 – 4 and 8) is displayed in large letters for about three seconds. Then the status information on the left column (1 – 7) is displayed.
When “STATUS DISPLAY” is set to “AUTO” or “ON,” the information below is also displayed in the cases below (☞ “INFORMATION” on page 13).
•When you change the input
•When the signal condition of the current input changes
•When turn on the monitor
8Setting of “COMPO./RGB SEL.” or the signal form of DVI input
☞ “COMPO./RGB SEL.” or “DVI INPUT SEL.” on page 10
NOTE
•When “STATUS DISPLAY” is set to “OFF” or “AUTO” (☞ “INFORMATION” on page 13), 2 – 4 are not displayed at the top of the screen.
•While displaying any of the status indications except 6 at the top of the screen, the picture is displayed below the status display area. (The status display may overlap with the picture when a computer signal is input.)
7