![]()
![]()
![]()
![]()
![]()
![]()
![]()
![]()
![]() EN
EN![]() 59
59![]()
Inputting the Date
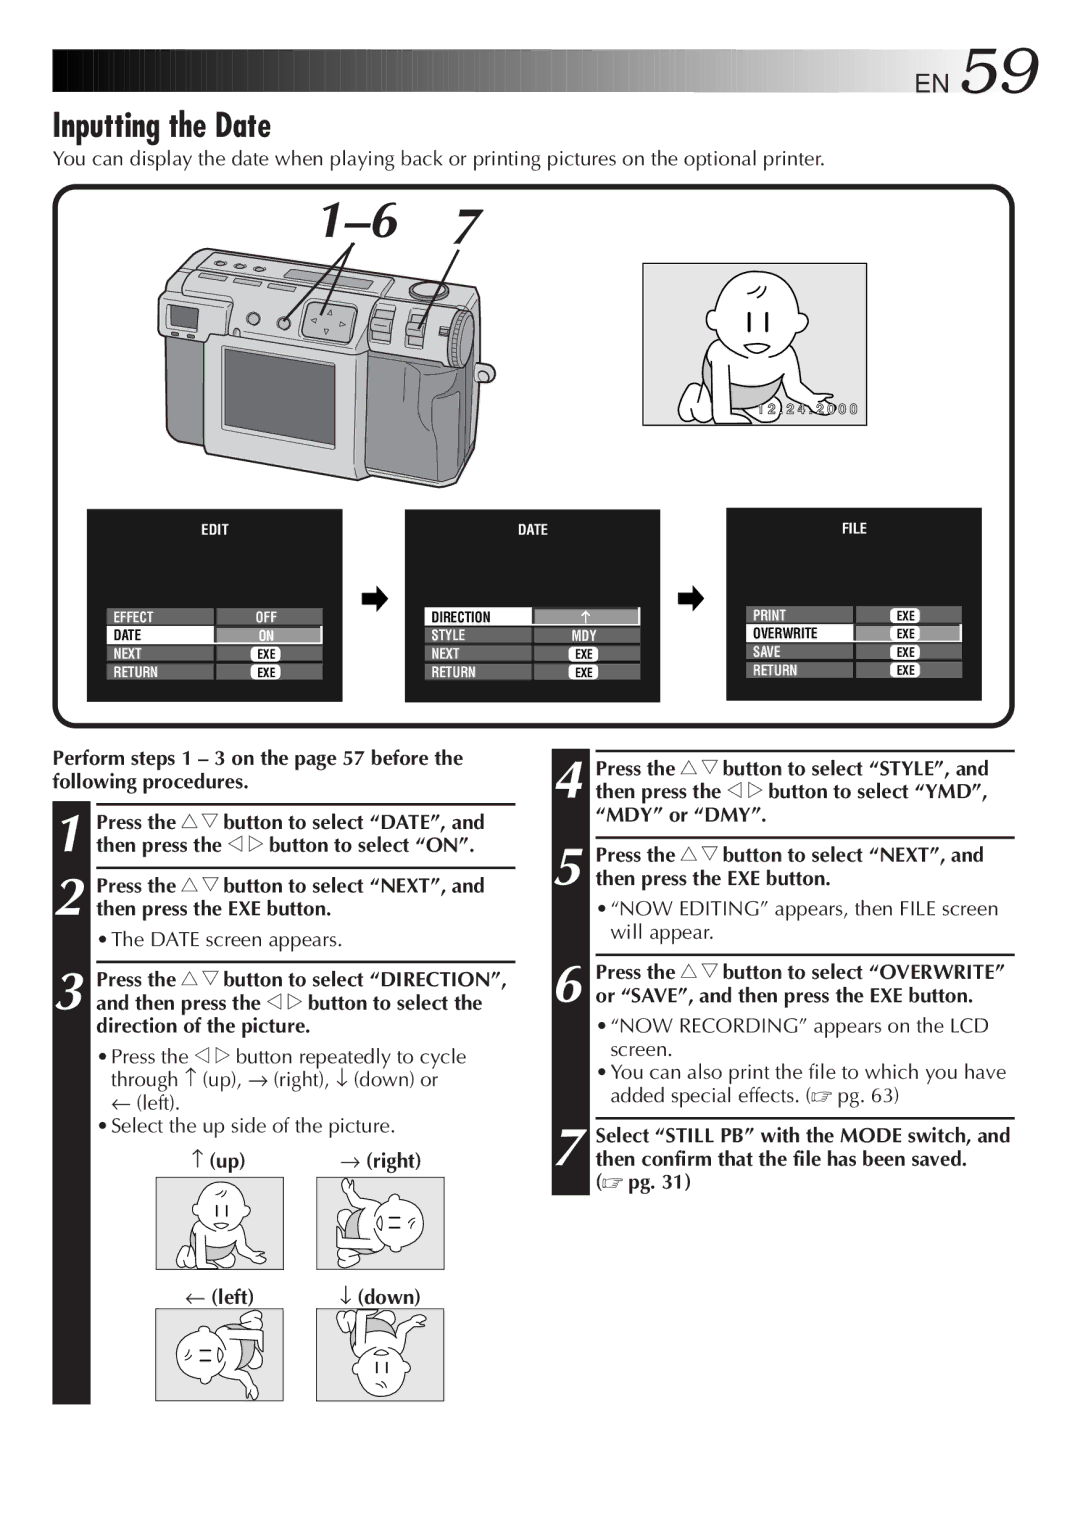
You can display the date when playing back or printing pictures on the optional printer.
1 2 . 2 4 . 2 0 0 0
|
| EDIT | ||
|
|
|
|
|
| EFFECT |
| OFF | |
| DATE |
| ON |
|
| NEXT |
| EXE |
|
| RETURN |
| EXE |
|
|
|
|
|
|
|
| DATE | ||
|
|
|
|
|
| DIRECTION |
|
|
|
| STYLE |
| MDY |
|
| NEXT |
| EXE |
|
| RETURN |
| EXE |
|
|
|
|
|
|
| FILE |
| |
| EXE |
| |
|
| ||
OVERWRITE |
| EXE |
|
SAVE |
| EXE |
|
RETURN |
| EXE |
|
|
|
|
|
Perform steps 1 – 3 on the page 57 before the following procedures.
1 Press the r t button to select “DATE”, and then press the w e button to select “ON”.
2 Press the r t button to select “NEXT”, and then press the EXE button.
•The DATE screen appears.
3 Press the r t button to select “DIRECTION”, and then press the w e button to select the direction of the picture.
•Press the w e button repeatedly to cycle through − (up), → (right), ↓ (down) or
←(left).
•Select the up side of the picture.
− (up) | → (right) | ||||
|
|
|
|
|
|
|
|
|
|
|
|
|
|
|
|
|
|
|
|
|
|
|
|
|
|
|
|
|
|
← (left) | ↓ (down) | ||||
|
|
|
|
|
|
|
|
|
|
|
|
|
|
|
|
|
|
|
|
|
|
|
|
