Other Convenient Functions
|
| MENU INPUT | POWER | |
2 / 3 | 5 / 5 | MENU |
| |
| DISPLAY | ASPECT | POWER |
|
| VIDEO A | VIDEO B | COMPO. RGB |
|
| MUTING |
| VOLUME |
|
VOLUME – |
|
|
|
|
| MULTIPLE | MONITOR ADJUSTMENT |
| |
| MODE | ID SET | ID |
|
|
|
|
| 2 / 3 |
| MENU/EXIT |
|
| 5 / 5 |
MENU/EXIT |
|
|
| |
|
|
|
| |
|
| |||
24 |
|
|
|
|
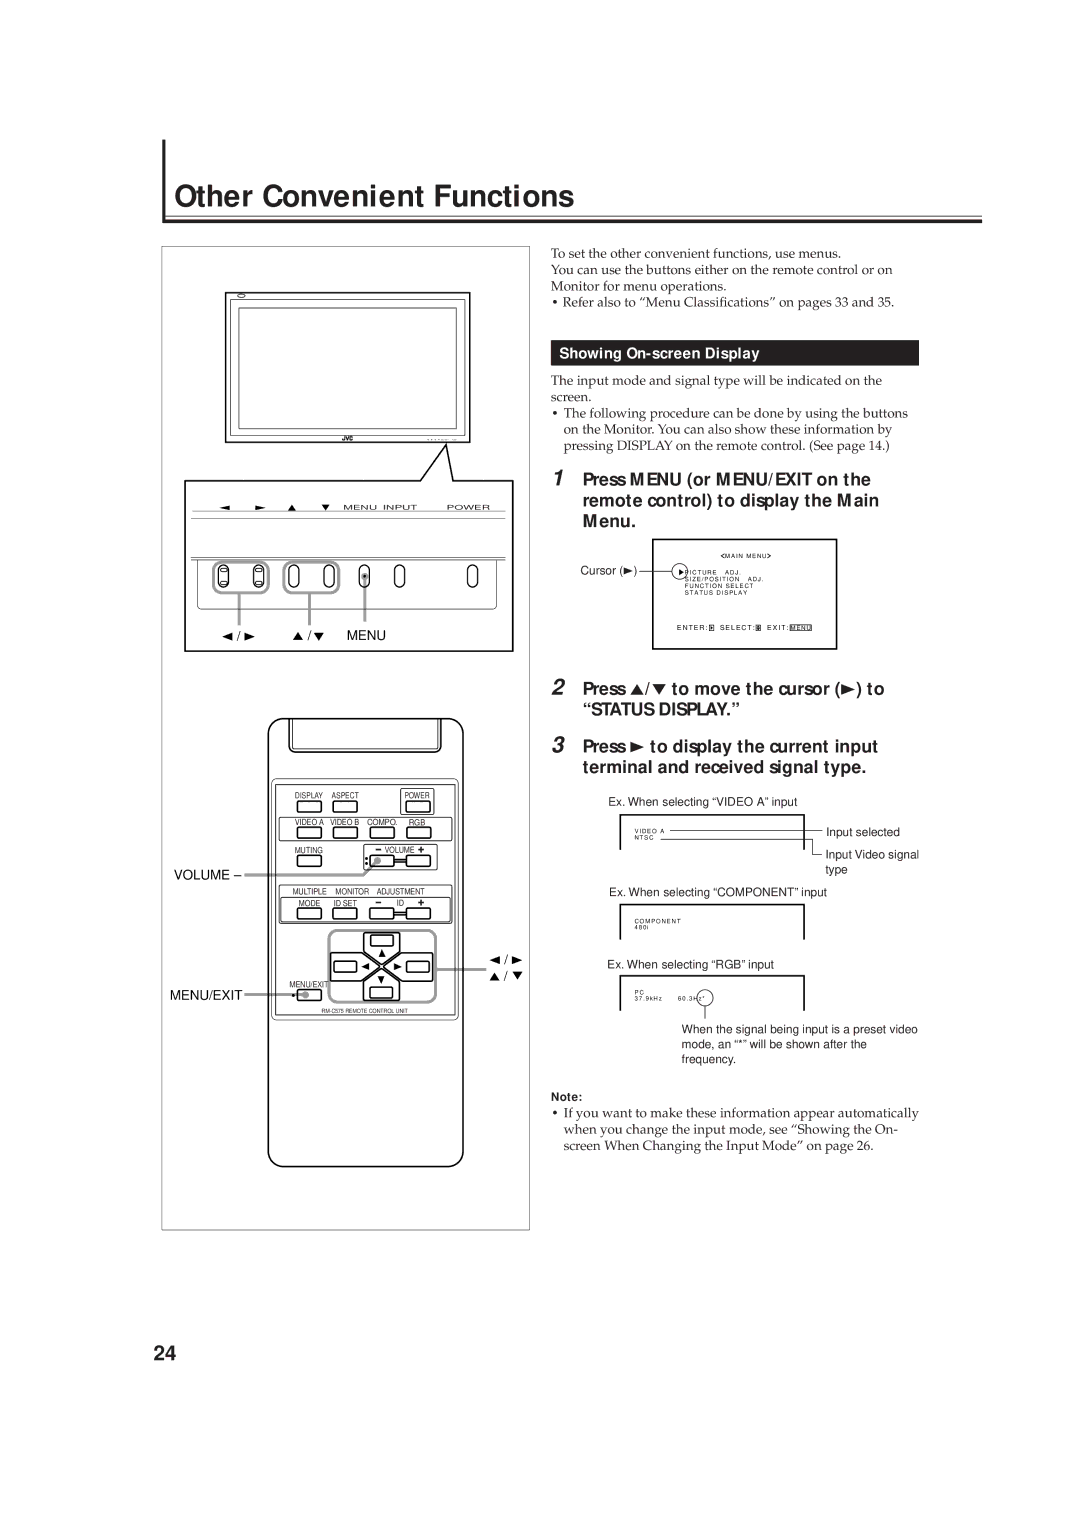
To set the other convenient functions, use menus.
You can use the buttons either on the remote control or on Monitor for menu operations.
• Refer also to “Menu Classifications” on pages 33 and 35.
Showing On-screen Display
The input mode and signal type will be indicated on the screen.
•The following procedure can be done by using the buttons on the Monitor. You can also show these information by pressing DISPLAY on the remote control. (See page 14.)
1 Press MENU (or MENU/EXIT on the remote control) to display the Main Menu.
|
|
|
| M A I N M E N U | ||||
Cursor (3) | P I C T U R E | A D J . | ||||||
| S I Z E / P O S I T I O N A D J . | |||||||
| F U N C T I O N S E L E C T | |||||||
| S T A T U S D I S P L A Y | |||||||
| E N T E R : |
|
| S E L E C T : |
| E X I T : |
|
|
|
|
|
| M E N U |
| |||
|
|
|
|
|
|
|
|
|
2 Press 5/∞ to move the cursor (3) to
“STATUS DISPLAY.”
3 Press 3 to display the current input terminal and received signal type.
Ex. When selecting “VIDEO A” input
| V I D E O A |
|
|
| Input selected | |
|
|
|
|
| ||
| N T S C |
|
|
|
| Input Video signal |
|
|
|
|
|
| |
|
|
|
| |||
|
|
|
|
|
| |
|
|
|
|
|
| type |
Ex. When selecting “COMPONENT” input | ||||||
C O M P O N E N T 4 8 0 i
Ex. When selecting “RGB” input
P C |
|
3 7 . 9 k H z | 6 0 . 3 H z * |
When the signal being input is a preset video mode, an “*” will be shown after the frequency.
Note:
•If you want to make these information appear automatically when you change the input mode, see “Showing the On- screen When Changing the Input Mode” on page 26.
